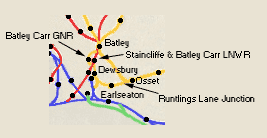
 Railway Ramblers gazetteer Railway Ramblers gazetteer
See also the Railway Ramblers gazetteer - Kirklees
: GNR Ossett (Runtlings lane jn ) - Batley |
 Dewsbury
& Batley Map c1900 : Ralph Rawlinson Dewsbury
& Batley Map c1900 : Ralph Rawlinson |
 Wakefield
Adwalton Junction OS Map (1947) : Ralph Rawlinson Wakefield
Adwalton Junction OS Map (1947) : Ralph Rawlinson |
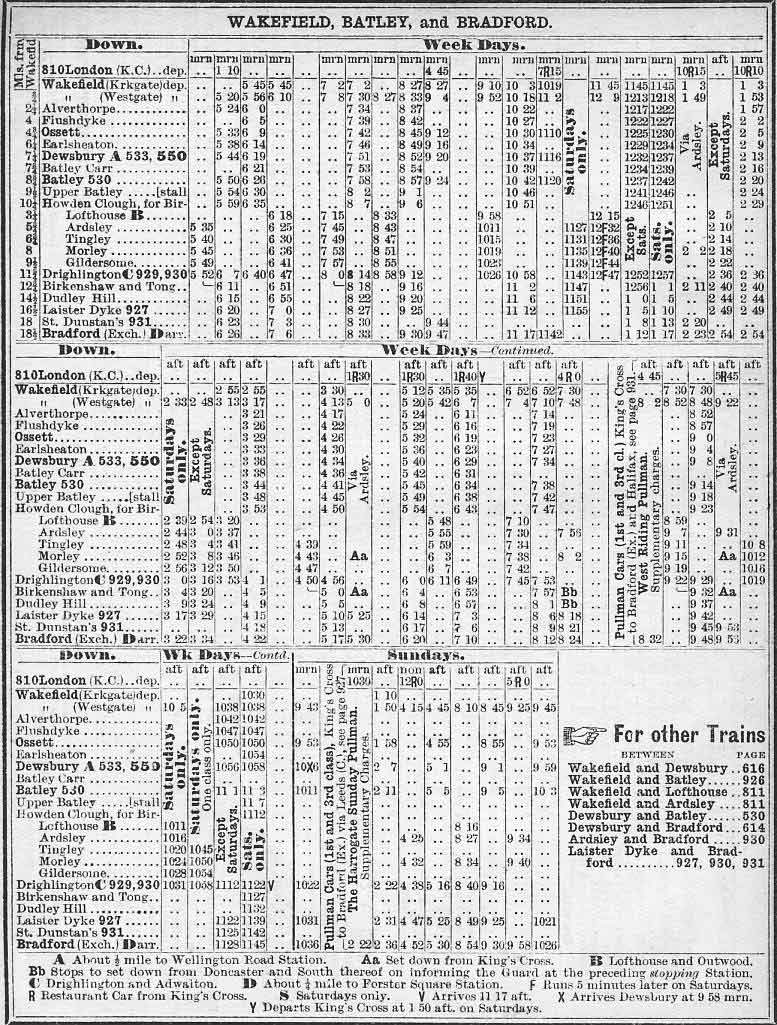
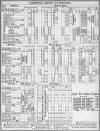 Timetable
Wakefield Bradford & Batley (1930) : Ralph Rawlinson Timetable
Wakefield Bradford & Batley (1930) : Ralph Rawlinson |
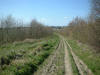
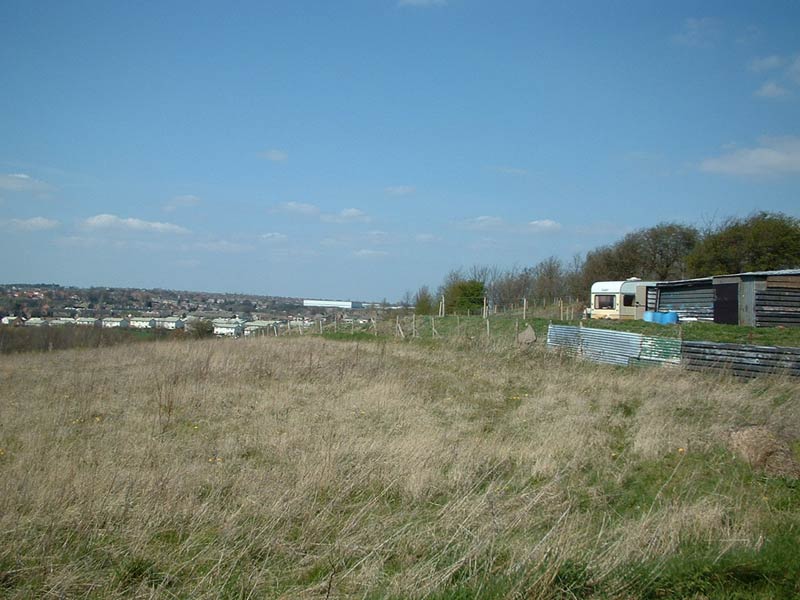
 Earlsheaton-1 (07-04-07)
: Andrew Stopford Earlsheaton-1 (07-04-07)
: Andrew Stopford
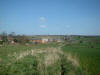
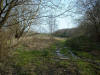
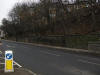
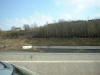
Looking towards Runtlings Junction on the Dewsbury
- Ossett line. South of Pildacre Lane, about 500yds from Runtlings
Junction.
There has been a lot of landscape alteration but this is
clearly the line of the branch.
Was there a bridge beneath where I am standing? |
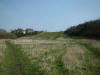
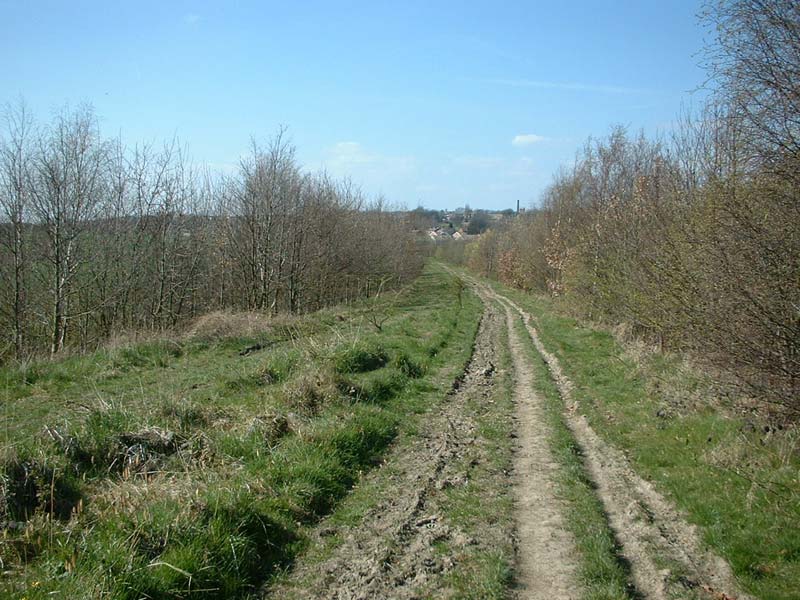
 Earlsheaton-2 (07-04-07)
: Andrew Stopford Earlsheaton-2 (07-04-07)
: Andrew Stopford
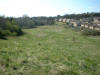
More or less the same spot looking north - the
caravan is on the trackbed. |
 Earlsheaton-3 (07-04-07)
: Andrew Stopford Earlsheaton-3 (07-04-07)
: Andrew Stopford
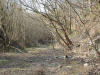
Further north west, looking towards Earlsheaton. |
 Earlsheaton-4 (07-04-07)
: Andrew Stopford Earlsheaton-4 (07-04-07)
: Andrew Stopford
Further north west again. |
 Earlsheaton-6 (07-04-07)
: Andrew Stopford Earlsheaton-6 (07-04-07)
: Andrew Stopford
And again - infrastructure survivor! |
 Earlsheaton-8 (07-04-07)
: Andrew Stopford Earlsheaton-8 (07-04-07)
: Andrew Stopford
Looking back south west from the track bed - it
curves to the right and along the line of the trees in the centre of the
shot and climbs gently to where the white dots are - that's the caravan
etc in Eheaton 2! |
 Earlsheaton-10 (07-04-07)
: Andrew Stopford Earlsheaton-10 (07-04-07)
: Andrew Stopford
Similar shot to 8 above, but you can see the line of the
Chickenley Heath Branch beneath the church spire on the horizon - it's
the straight horizontal line where the fields change colour. Earlsheaton
branch again in the foreground. |
Earlsheaton Station
2/11A_0011_small.jpg) Opened 01-1875. Closed 06-06-1953. Opened 01-1875. Closed 06-06-1953.
Earlsheaton station map (1890) :
Malcolm Mallison |
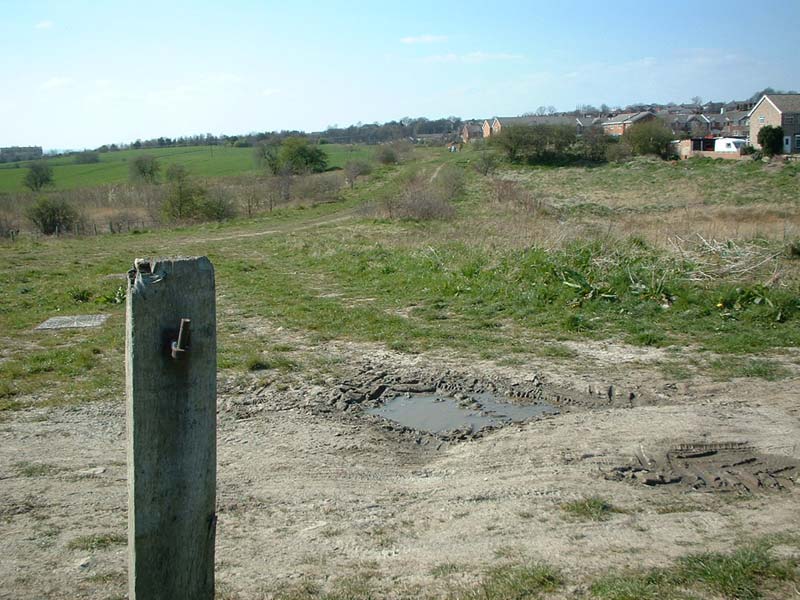
 Earlsheaton
Station (07-04-07)
: Andrew Stopford Earlsheaton
Station (07-04-07)
: Andrew Stopford
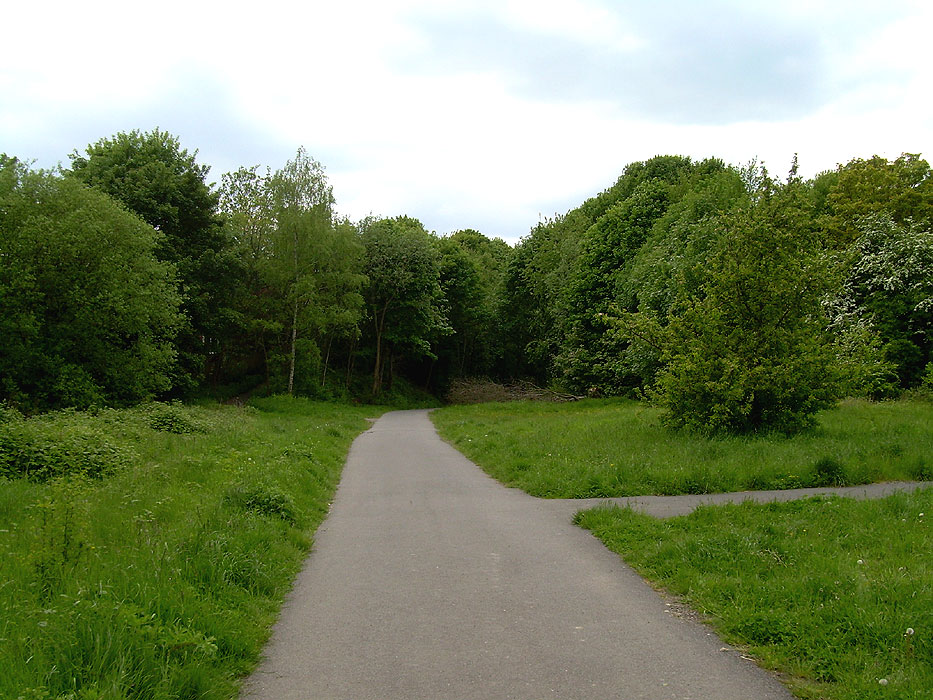
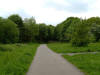
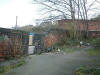
Looking down on the site of Earlsheaton Station -
the amount of landfill is apparent!
Earlsheaton Tunnel is at the end of
a short cutting in the trees at the far side of the open space. |
 Earlsheaton
station (27-05-13) : David Webdale Earlsheaton
station (27-05-13) : David Webdale
The site of the Earlseaton station, facing back towards the tunnel &
Dewsbury.
All cycle path now, well used. |
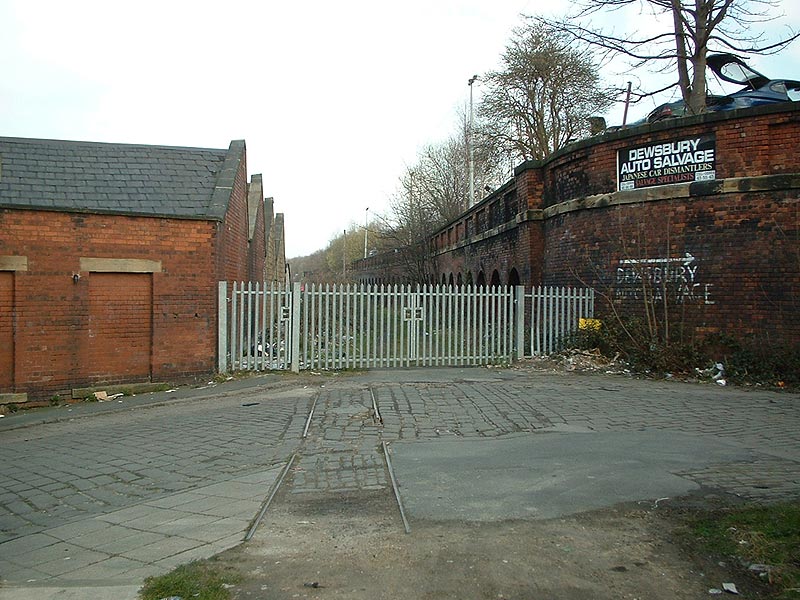
 Earlsheaton
Station & Tunnel entrance (02-04-07)
: Andrew Stopford Earlsheaton
Station & Tunnel entrance (02-04-07)
: Andrew Stopford
Earlsheaton Station lineside infrastructure survivor!
(extreme right behind wire fence)
Eastern facing tunnel mouth just
visible behind metal pole fencing. |
 Earlsheaton
Station (02-04-07)
: Andrew Stopford Earlsheaton
Station (02-04-07)
: Andrew Stopford
Facing the other way - view of the station site on emerging from the
short cutting after exiting the tunnel.
Some landfill has taken place -
track went through the gap between the trees on the right and the houses
to the left. |
 Earlsheaton
Station (02-04-07)
: Andrew Stopford Earlsheaton
Station (02-04-07)
: Andrew Stopford
Closer look at previous view - the houses on the left are in Station
Road, (the road runs between the houses and is now a dead end into
someone's yard) so the station buildings must have been about there. The
extent of the landfill is apparent.
Old maps show that where I am
standing there was a sizeable yard with buildings. |
 Dewsbury
hybrid map : David Webdale Dewsbury
hybrid map : David Webdale
Dewsbury map - rails 1910, roads 2013. See
also Dewsbury section |
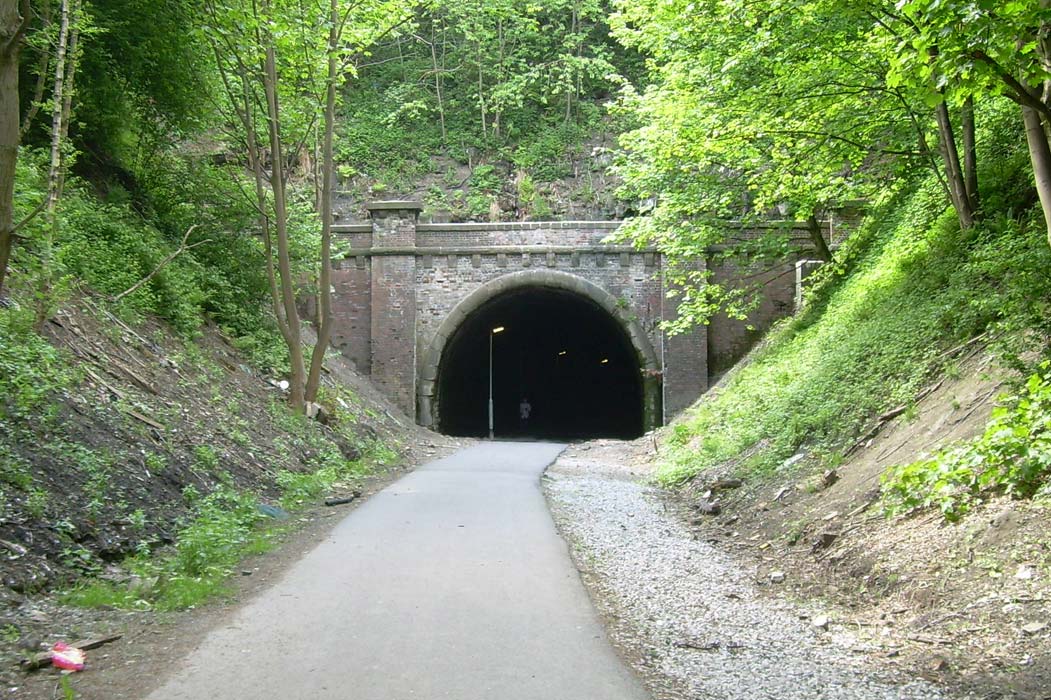
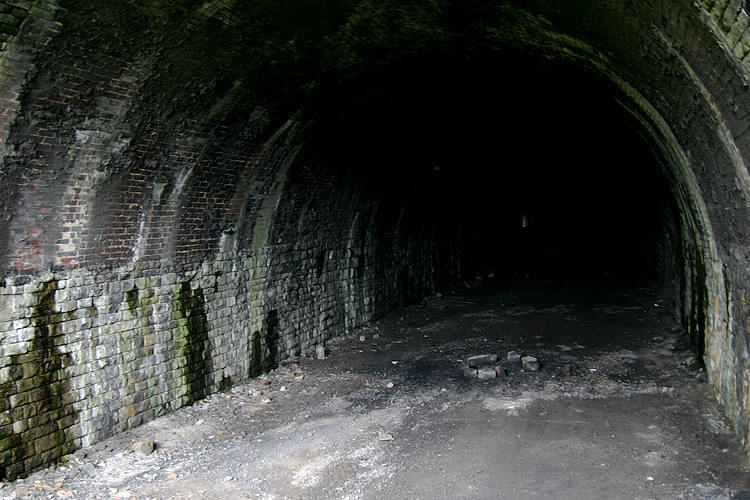
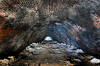
Earlsheaton tunnel
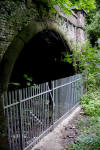 Earlsheaton
tunnel (13-06-06) :
Graeme Bickerdike website - http://www.forgottenrelics.co.uk/ Earlsheaton
tunnel (13-06-06) :
Graeme Bickerdike website - http://www.forgottenrelics.co.uk/
Shows the eastern portal of Earlsheaton tunnel. It is indeed sealed (but
not impenetrable) and,
contrary to the ‘route today’ section,
there’s no earth infill. However
the approach is muddy and lots of household clutter (lawnmowers, fridges
etc) have been thrown into the cutting. |
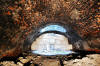
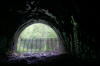 Earlsheaton
tunnel (13-06-06) :
Graeme Bickerdike Earlsheaton
tunnel (13-06-06) :
Graeme Bickerdike
The view from just inside the eastern end.
The interior is in good
condition – mostly dry throughout and the lining (stone sides, brick
roof) has survived well. |
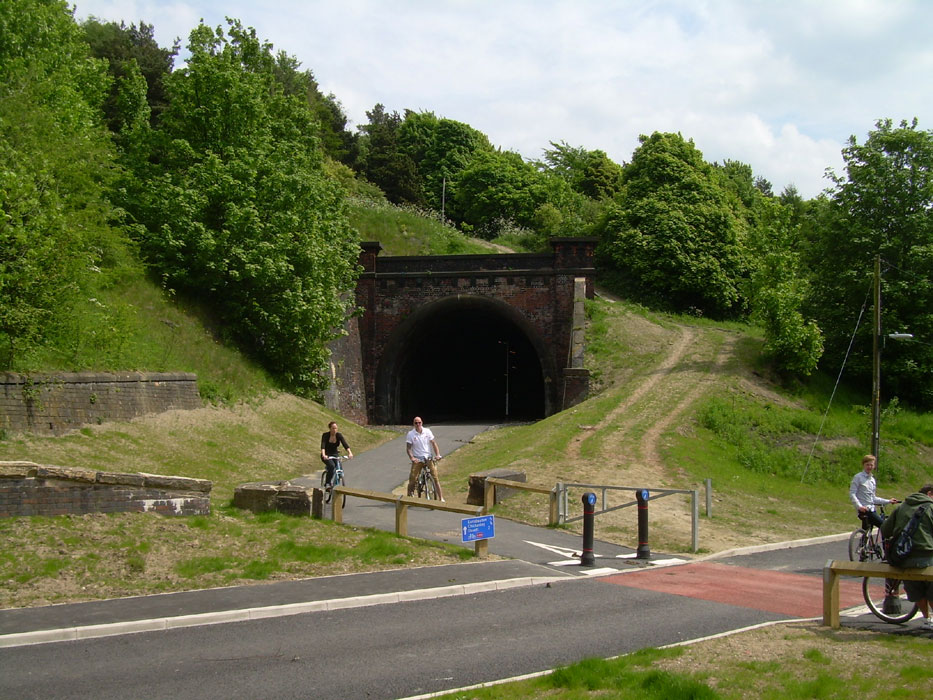
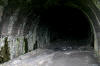
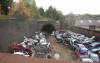
 Earlsheaton
tunnel (27-05-13) : David Webdale Earlsheaton
tunnel (27-05-13) : David Webdale
The eastern portal. Cycle path now, all tidied up & well used when I was
there. |
 Earlsheaton
tunnel (27-05-13) : David Webdale Earlsheaton
tunnel (27-05-13) : David Webdale
The eastern portal, wider view. |
 Earlsheaton
tunnel (13-06-06) :
Graeme Bickerdike Earlsheaton
tunnel (13-06-06) :
Graeme Bickerdike
The western portal. |
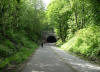
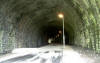
 Earlsheaton
tunnel (27-05-13) : David Webdale Earlsheaton
tunnel (27-05-13) : David Webdale
The western portal. All cycle path now, quite well used. |
 Earlsheaton
tunnel (13-06-06) :
Graeme Bickerdike Earlsheaton
tunnel (13-06-06) :
Graeme Bickerdike
looks over the barricade at the western portal. Although the tunnel is
short, you can’t quite see the other end because of the curvature.
You
might just be able to detect a distant glow. |
 Earlsheaton
tunnel (27-05-13) : David Webdale Earlsheaton
tunnel (27-05-13) : David Webdale
Viewed from the western portal. Nice dry cycle path & LED street
lighting. |
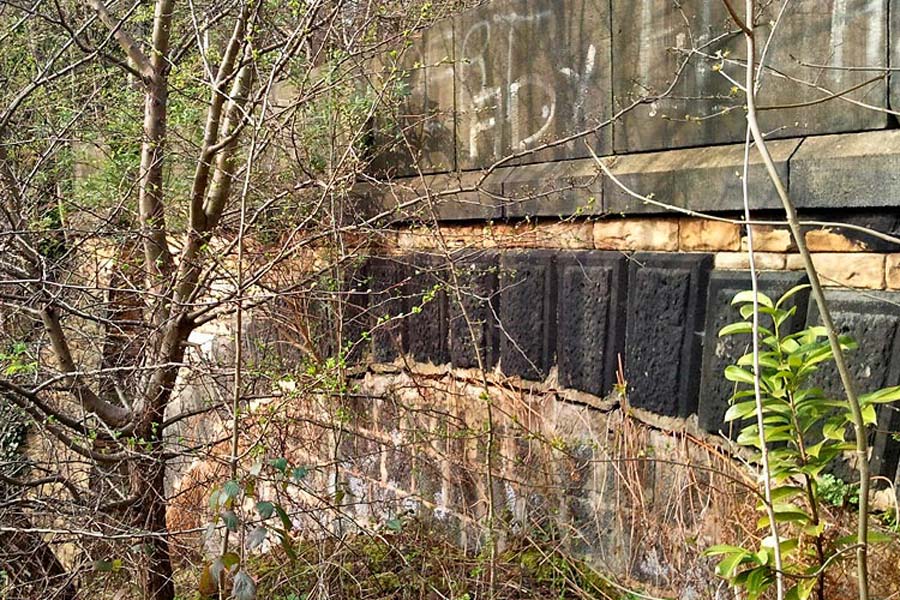
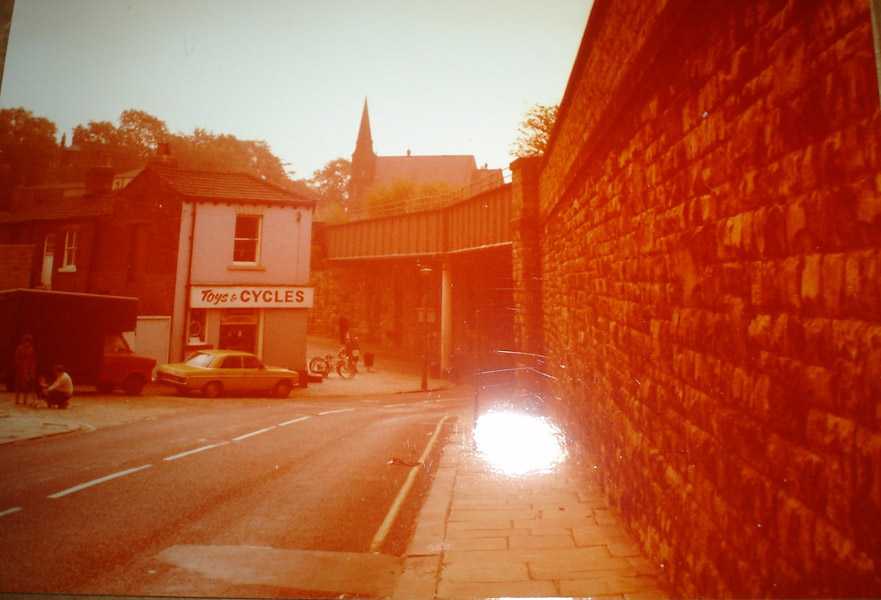
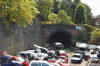
Leeds road (Dewsbury) tunnel (213 yards) GNR
Leeds road tunnel (20-01-10) :
Carbootnut
See Carbootnut photo's on Flickr
 Great
Northern (LNER) tunnel portal at the junction of Leeds road with
Dewsbury ring road. This portal was hemmed in similar to Old Lane tunnel
at Halifax. Hard to imagine now, but a separate (metal?) bridge was here
right were the pavement is, to carry Leeds road over the railway. When
this footpath was being made after the bridge had been removed, the top
of the tunnel mouth is just inches below and you could actually look
inside, it was all landfilled, so you couldn't actually fall in, as
such, but there was some gaps between the infill and the roof of the
tunnel. Only one buttress remains,- the short length of wall by the
pipe, the other buttress was removed recently. Great
Northern (LNER) tunnel portal at the junction of Leeds road with
Dewsbury ring road. This portal was hemmed in similar to Old Lane tunnel
at Halifax. Hard to imagine now, but a separate (metal?) bridge was here
right were the pavement is, to carry Leeds road over the railway. When
this footpath was being made after the bridge had been removed, the top
of the tunnel mouth is just inches below and you could actually look
inside, it was all landfilled, so you couldn't actually fall in, as
such, but there was some gaps between the infill and the roof of the
tunnel. Only one buttress remains,- the short length of wall by the
pipe, the other buttress was removed recently.
Note : Hugh Mcsherry
About 23 years ago, I drove a bull douser and back filled a tunnel on
Leeds road Dewsbury. This is the photo of where the tunnel was. |
Leeds road tunnel (20-01-10) :
Carbootnut
 A
buttress has been removed recently, it stood at the point where the wall
has been repaired. This view is looking down Leeds road towards the
junction with Dewsbury ring road. The tunnel finished here and a
seperate bridge took Leeds road over the railway, so this pavement, at
one time, was on the bridge. The tunnel is filled in and sealed up. The
wall is starting to lean and may well collapse onto the road at some
point, which may reveal the top of the tunnel mouth once again. A
buttress has been removed recently, it stood at the point where the wall
has been repaired. This view is looking down Leeds road towards the
junction with Dewsbury ring road. The tunnel finished here and a
seperate bridge took Leeds road over the railway, so this pavement, at
one time, was on the bridge. The tunnel is filled in and sealed up. The
wall is starting to lean and may well collapse onto the road at some
point, which may reveal the top of the tunnel mouth once again. |
 Leeds
road tunnel (20-01-10) :
Carbootnut Leeds
road tunnel (20-01-10) :
Carbootnut
Just a general view of where the tunnel was, a seperate bridge took
Leeds road over the railway at this location.
According to 'Lost relics of an enterprising age', this is Leeds Road
tunnel, 213 yards. |
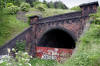
 Leeds
road tunnel (23-03-12) : Graeme Bickerdike Leeds
road tunnel (23-03-12) : Graeme Bickerdike
I was out walking this afternoon and stumbled across the eastern portal
of Leeds Road/Dewsbury Tunnel, which everyone seemed to have assumed was
completely buried. Landfill has claimed half of it, but the top and
western part remains. I need to go back to get some better pictures but
attached is one I took on my camera phone. |
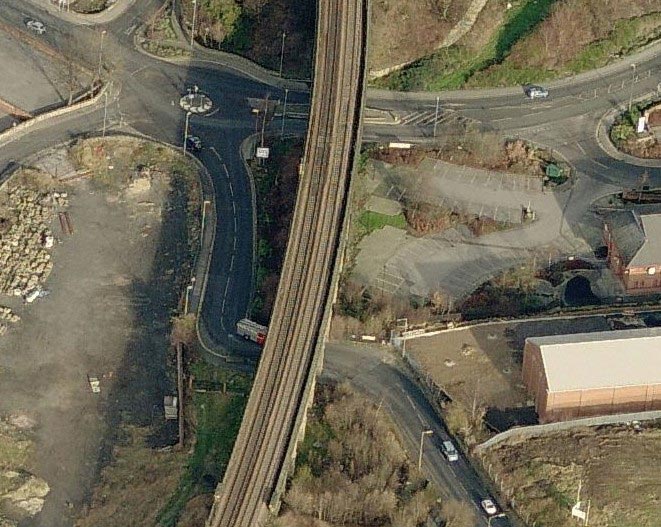
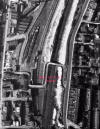
Leeds
road tunnel (1890 /2013) : Graeme Bickerdike
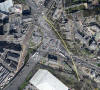 The
attached aerial shows today’s Dewsbury with the 1890 Town Plan overlayed.
This suggests that any parapet/retaining wall associated with the tunnel
probably disappeared with the realignment of the local roads. The
north-west portal was beneath what is now the ring road. The plan does
however indicate that the tunnel had two ventilation shafts, which I
didn’t previously know. Although partly buried, the south-east portal
can still be found in the undergrowth. It’s pretty clear though that the
central and northern sections of the tunnel were opened out and removed
when the ring road was constructed. The
attached aerial shows today’s Dewsbury with the 1890 Town Plan overlayed.
This suggests that any parapet/retaining wall associated with the tunnel
probably disappeared with the realignment of the local roads. The
north-west portal was beneath what is now the ring road. The plan does
however indicate that the tunnel had two ventilation shafts, which I
didn’t previously know. Although partly buried, the south-east portal
can still be found in the undergrowth. It’s pretty clear though that the
central and northern sections of the tunnel were opened out and removed
when the ring road was constructed. |
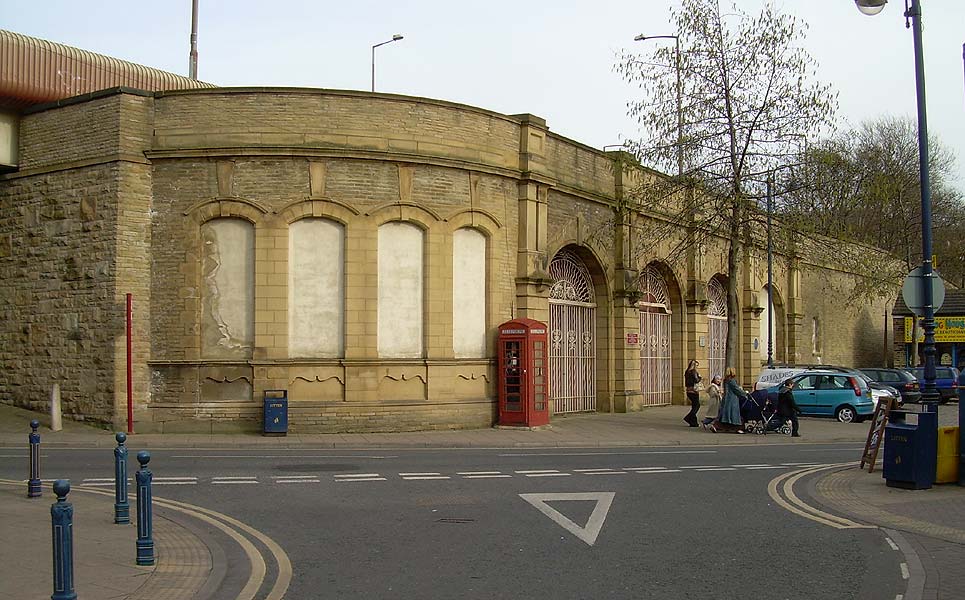
Dewsbury
Central station
 Opened
1874. Closed 07-09-1964. Opened
1874. Closed 07-09-1964.
GNR Dewsbury Central Station (12-03-07) :
David Webdale
The entrances to the station from road level. Taken from
Whitehall Way. |
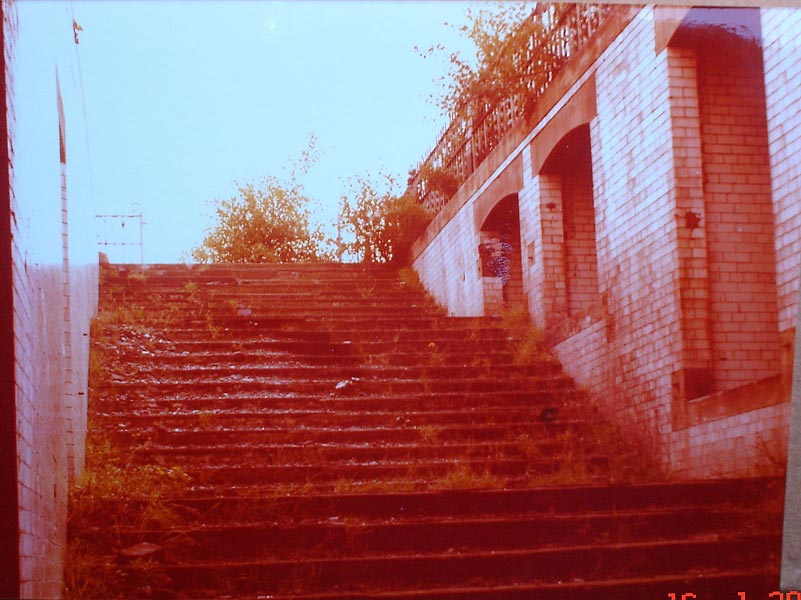
 GNR
Dewsbury Central Station (1978) : Tony Geering GNR
Dewsbury Central Station (1978) : Tony Geering
Dewsbury Central station - the steps which led up to the
platform. |
 GNR
Dewsbury Central Station (1978) : Tony Geering GNR
Dewsbury Central Station (1978) : Tony Geering
Taken on the platform in 1978 looking north. |
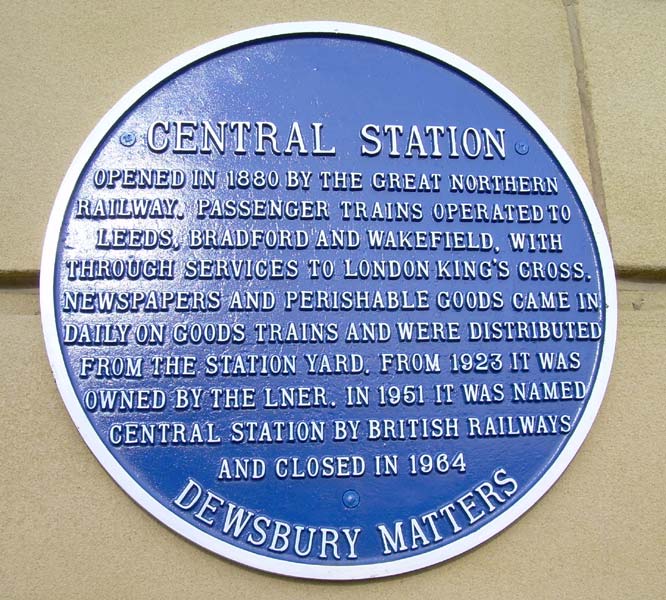
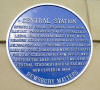 Plaque
(12-03-07) : David Webdale Plaque
(12-03-07) : David Webdale
Spotted this blue plaque on the side of the
building, good idea we thought. |
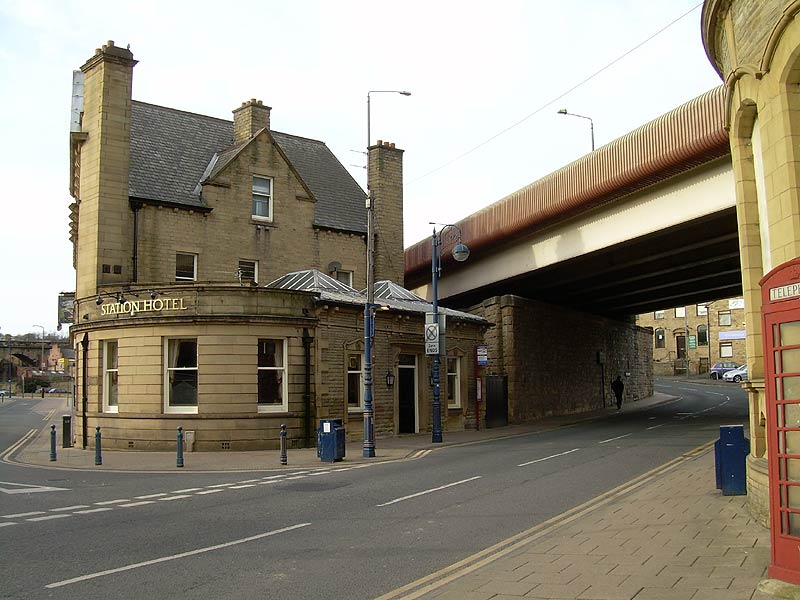
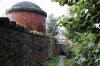
 Station
Hotel (12-03-07) : David Webdale Station
Hotel (12-03-07) : David Webdale
Looking across Corporation Street, tasty hotel
building.
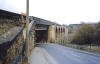
Dewsbury ring road flies over where the tracks once were, original bridge
stonework survives beneath.
Viaduct carrying existing Dewsbury Wellington Street to Batley line
visible in the background on extreme left. |
 GNR
Crackenedge Lane bridge (1978) : Tony Geering GNR
Crackenedge Lane bridge (1978) : Tony Geering
The bridge which carried the station over Crackenedge Lane. The photo is
taken from Crackenedge Lane and shows the junction with Battye Street.
This was an unusual shaped bridge with a single central pillar on this
side of the bridge rising from the pavement corner.
The bridge was
re-built to carry the ring road. |
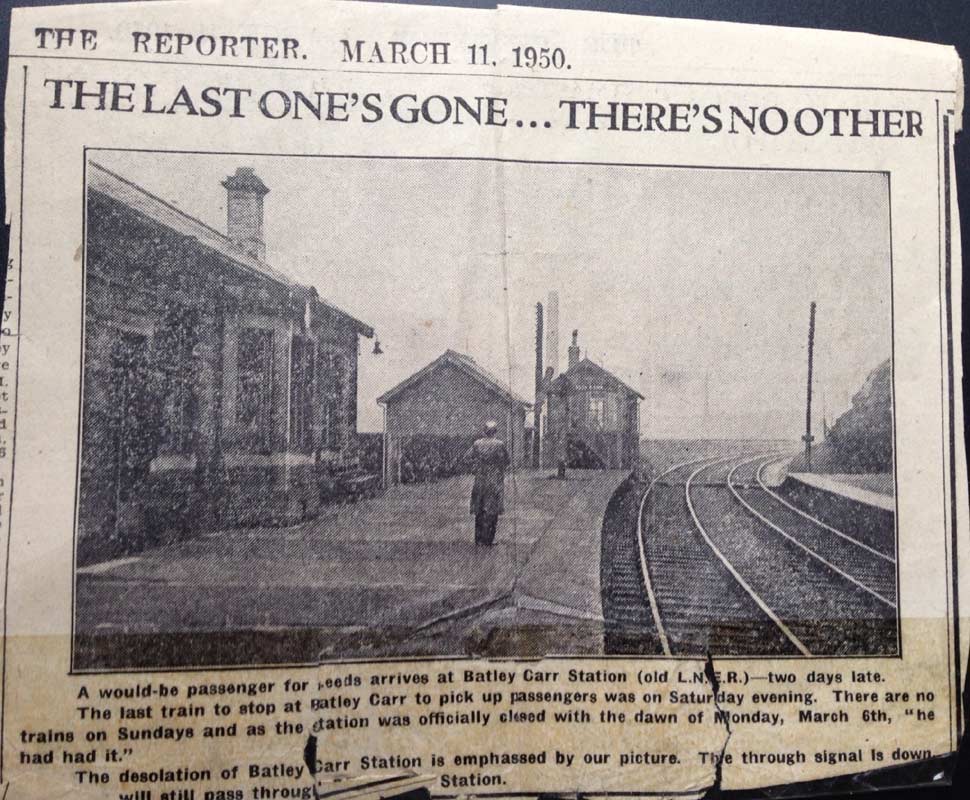
Batley
Carr Station
 Opened
12-04-1880. Closed 1950. Opened
12-04-1880. Closed 1950.
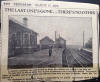
Batley Carr station : c/o Keith Looker
Newspaper scan from 1950. |
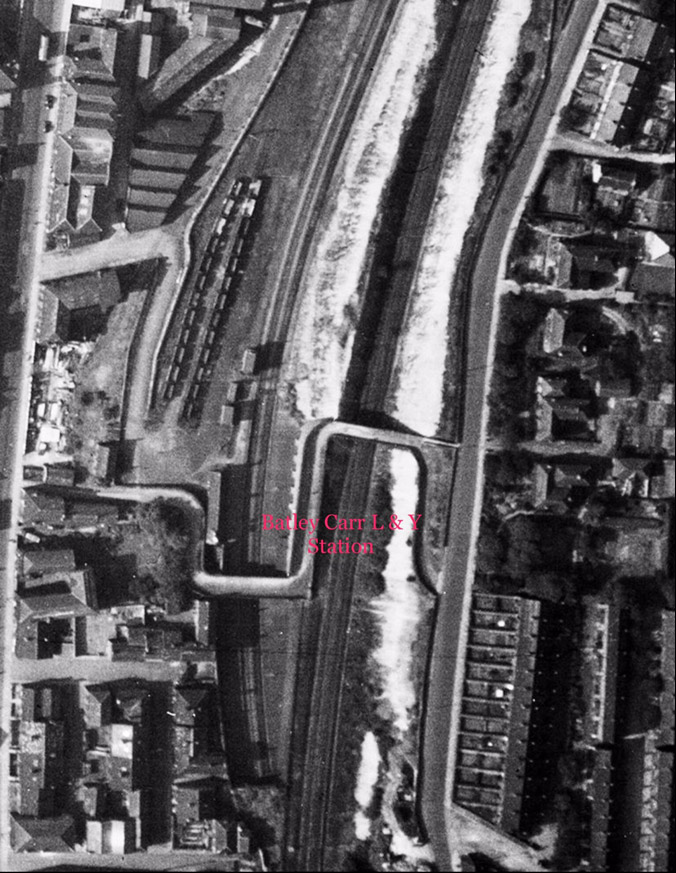
 Batley Carr station : c/o Keith Looker Batley Carr station : c/o Keith Looker
This is the site aerial view of Batley Carr L & Y
station the current line can be seen to the right, access was via
Bradford road and Wood Lane which is the small dogged leg lane. The
trucks to the left were likely supplying coal to Batley gas works down
what was called the coal rally.
The other Batley Carr station was at Jack Lane and was titled Batley
Carr and Staincliffe |
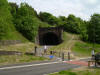
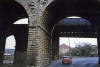
 Batley
Carr station & Crackenedge tunnel : Humphrey Burton Batley
Carr station & Crackenedge tunnel : Humphrey Burton
Station site & north portal of Batley Carr (Crackenedge)
tunnel. |
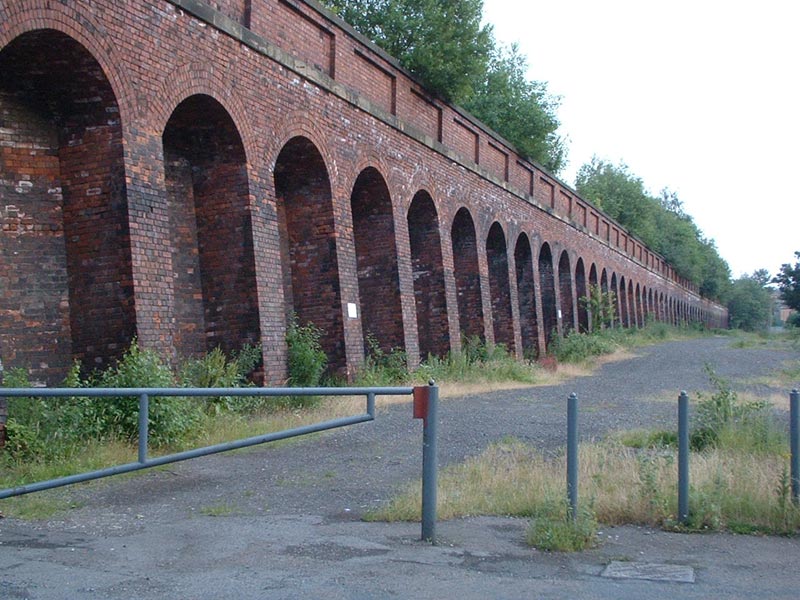
 Batley
Carr station & Crackenedge tunnel : Phill Davison
See Full set on Flickr / Phill Davison Batley
Carr station & Crackenedge tunnel : Phill Davison
See Full set on Flickr / Phill Davison
Station site & north portal of Batley Carr (Crackenedge)
tunnel. Batley Carr tunnel is 179 yds long with one air shaft.
The South portal has been landfilled, with no trace of it to be seen
these days.
The line was buit by the G.N.R and opened in 1880, The line closed to
traffic in 1965. |
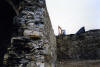
Crackenedge tunnel
 Crackenedge
tunnel interior : Phill Davison Crackenedge
tunnel interior : Phill Davison
Compacted landfill to a height of 7-8' runs the
remaining tunnel length towards the retaining wall.
This must have been added to strengthen the tunnel. The L.N.W
Leeds-Manchester line runs directly above this tunnel. |
 Crackenedge
tunnel interior : Phill Davison Crackenedge
tunnel interior : Phill Davison
The view of the Gabion cage retaining wall 112 yds
into the tunnel. The Gabion cage is a galvanised steel wire cage filled
with large stones to retain the landfill on the other side. I've never
seen this type of retaining wall within a tunnel before.
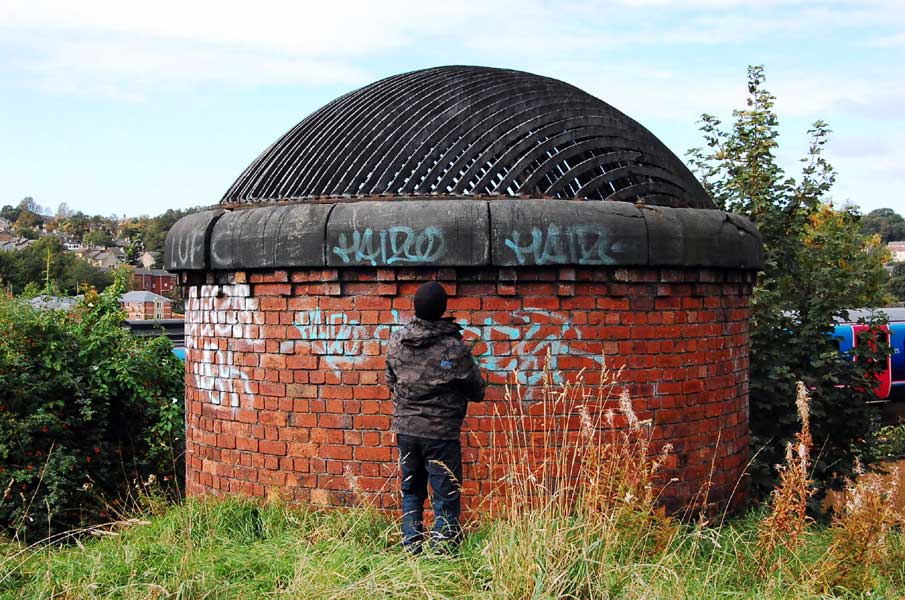
The blue glow of daylight radiates down Star Trek style from the open
air shaft above. See next photo. |
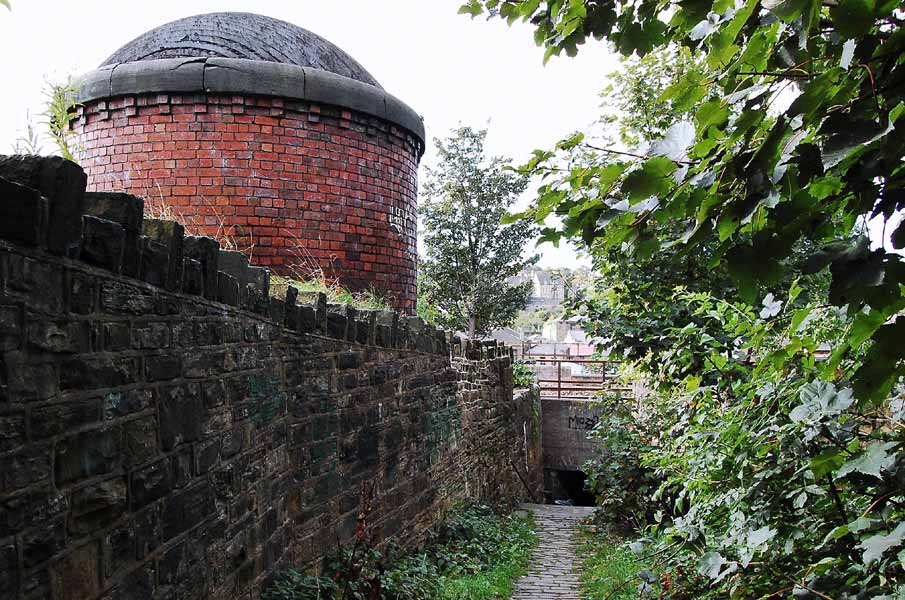
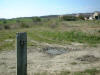
Batley
Carr tunnel vent : Phill Davison
The view looking down Upper Peel street. |
 Batley
Carr tunnel vent : Phill Davison Batley
Carr tunnel vent : Phill Davison |
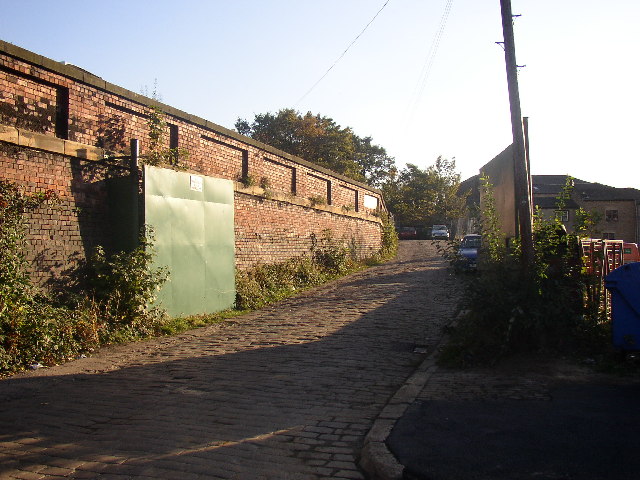
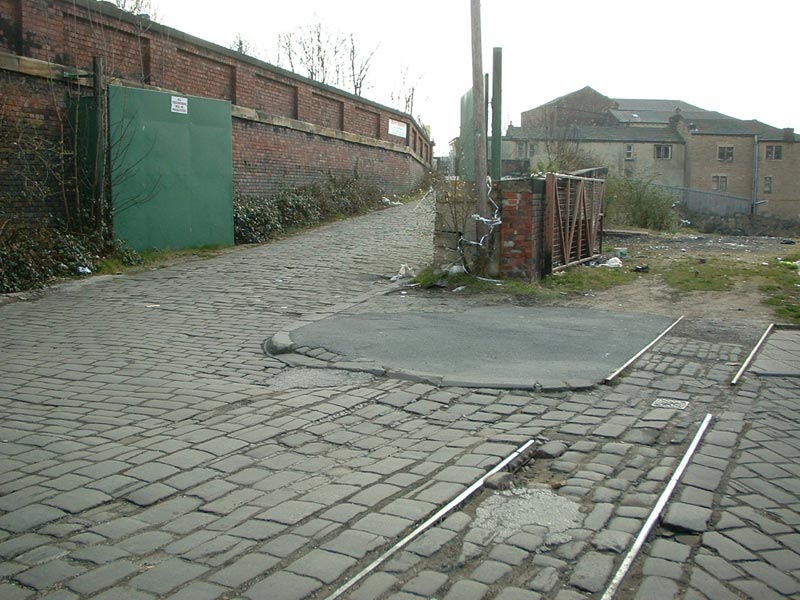
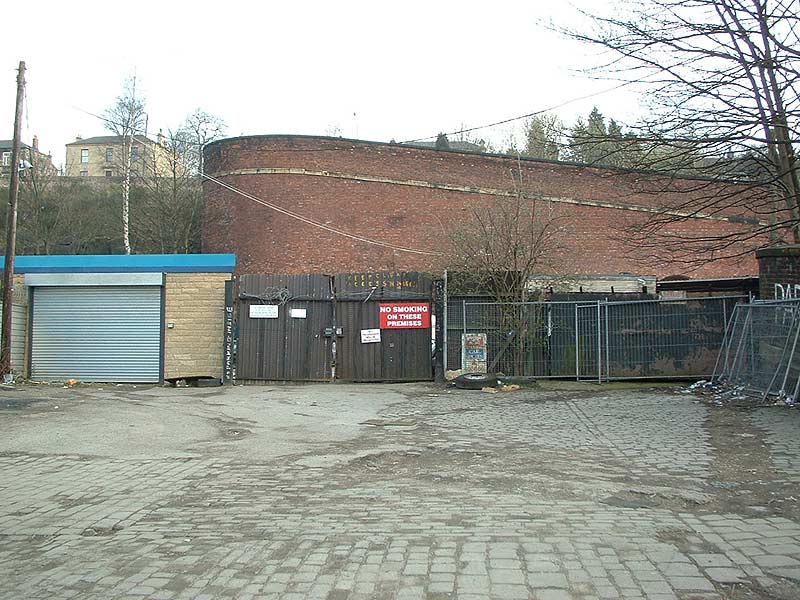
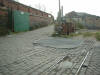
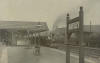
 Batley Carr : Humphrey Burton Batley Carr : Humphrey Burton
Cobbled approach road. |
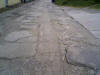
 Batley
Carr GNR station (26-03-07) : Andrew Stopford Batley
Carr GNR station (26-03-07) : Andrew Stopford
The track is at a lower level to the GNR line and
I'm not actually sure it's standard gauge |
 Batley
Carr GNR station (26-03-07) : Andrew Stopford Batley
Carr GNR station (26-03-07) : Andrew Stopford
Remnants of track at the bottom of the entrance drive to Batley Carr GNR
station. |
Batley
Carr GNR station (22-05-11) : Tony Geering
 Found
signs of the old "tramway" which ran from Batley Carr Station (see above
photo's) It ran parallel to GNR, then turned right passing under the
Batley LNWR viaduct and GNR bridge, crossed Mill Lane and went East up
the valley towards Shaw Cross.
An old map shows the line serving the old Gas Works near the viaduct,
and a colliery up the valley. I took the photo on the mills access road,
which runs parallel to and south of Grange Road Batley, behind the
mills.I have attached a photo looking east.
It looks like the rails have been lifted and filled in with concrete. Found
signs of the old "tramway" which ran from Batley Carr Station (see above
photo's) It ran parallel to GNR, then turned right passing under the
Batley LNWR viaduct and GNR bridge, crossed Mill Lane and went East up
the valley towards Shaw Cross.
An old map shows the line serving the old Gas Works near the viaduct,
and a colliery up the valley. I took the photo on the mills access road,
which runs parallel to and south of Grange Road Batley, behind the
mills.I have attached a photo looking east.
It looks like the rails have been lifted and filled in with concrete. |
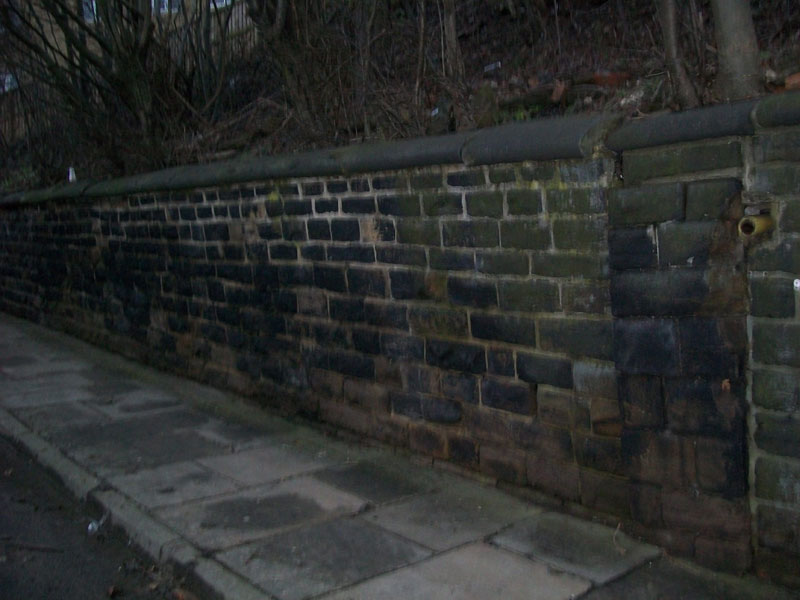
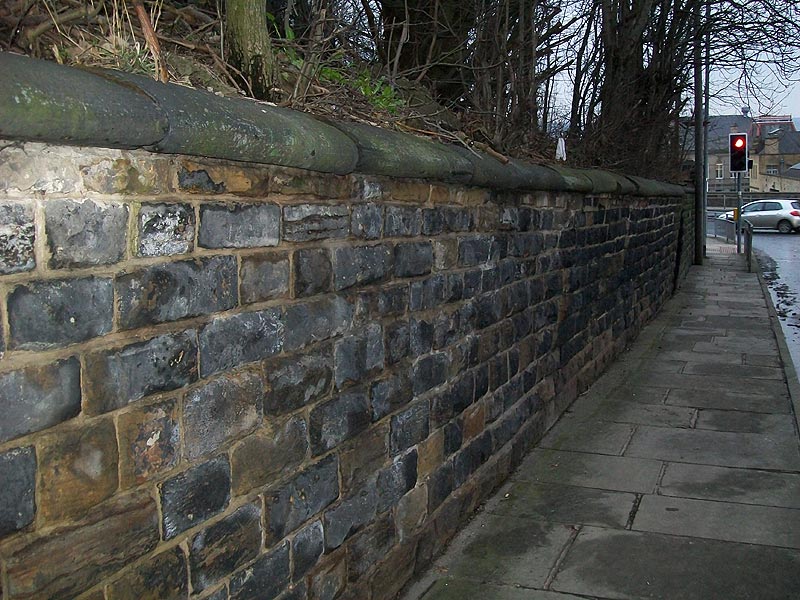
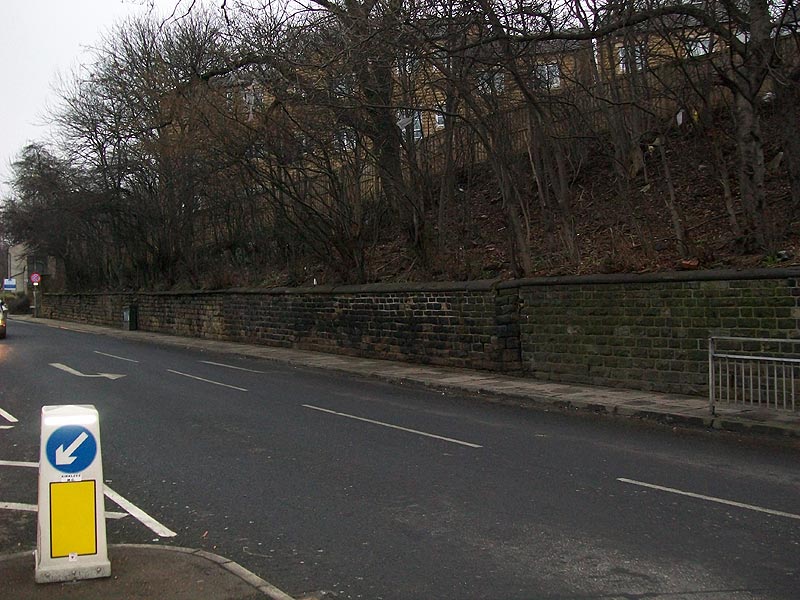
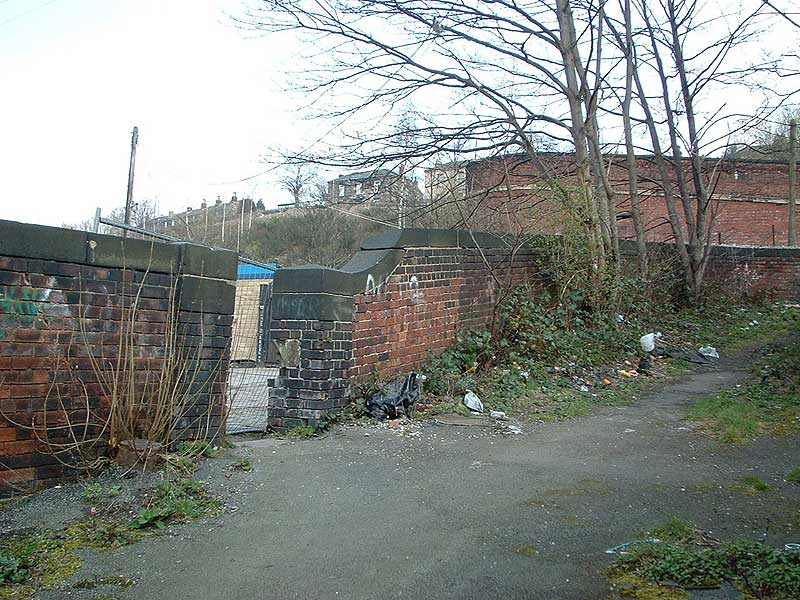
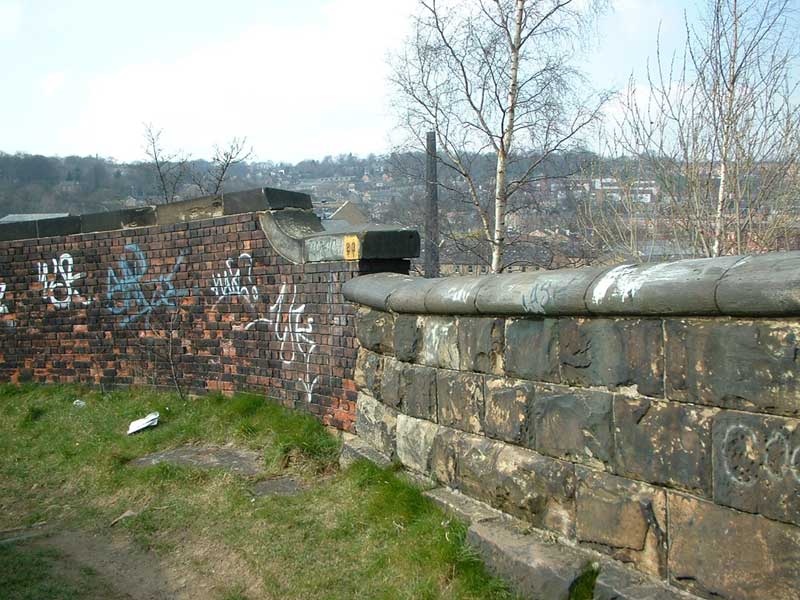
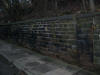
 GN
line retaining wall (13-02-07)
: Andrew Stopford GN
line retaining wall (13-02-07)
: Andrew Stopford
Retaining wall of GN line from Ossett - round the back of Dewsbury
Sainsbury's |
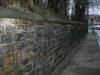
 GN
line retaining wall, Jack lane (13-02-07)
: Andrew Stopford GN
line retaining wall, Jack lane (13-02-07)
: Andrew Stopford
Retaining wall of GN line which went on a 'shelf' under
and parallel to the LNWR line
(which is the one that's there now) between Dewsbury & Batley - from
Jack Lane looking towards Dewsbury. |
 Batley
Carr GNR station (26-03-07) : Andrew Stopford Batley
Carr GNR station (26-03-07) : Andrew Stopford
looking up at the retaining wall carrying the
continuation of the public footpath which has just crossed the GNR and
then goes up to cross the LNWR at its higher level |
 Batley
Carr GNR station (26-03-07) : Andrew Stopford Batley
Carr GNR station (26-03-07) : Andrew Stopford
Pedestrian entrance to the station drive from the
footpath which is about to cross the line on a bridge. |
 Batley
Carr GNR station (26-03-07) : Andrew Stopford Batley
Carr GNR station (26-03-07) : Andrew Stopford
Viewed from the Frontier Night Club car park: the line of
the GNR almost at the point it dived under the LNWR is marked by the red
brick wall behind the trees |
 Batley
Carr GNR LNWR (26-03-07) : Andrew Stopford Batley
Carr GNR LNWR (26-03-07) : Andrew Stopford
Can you see the join? Where the path up from the
bridge over the GNR joins the bridge over the LNWR line. |
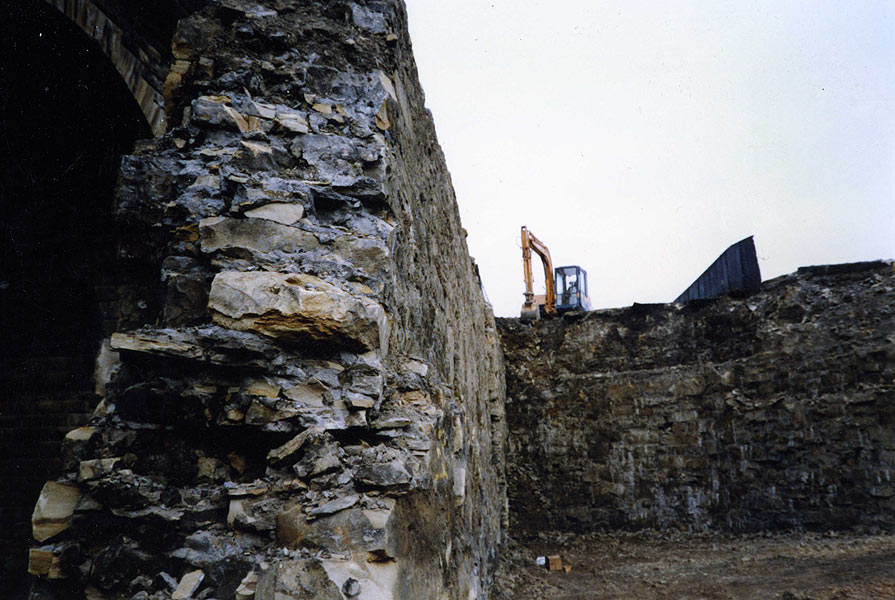
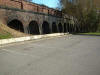
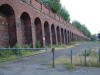
GNR Batley Viaduct
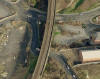 GNR
Batley Viaduct aerial. : Ralph Rawlinson GNR
Batley Viaduct aerial. : Ralph Rawlinson
Birds eye view looking north over Rouse Mill Lane to the present
Batley station. |
 GNR
Batley Viaduct : Ralph
Rawlinson GNR
Batley Viaduct : Ralph
Rawlinson
The viaduct ran to the right and parallel to but slightly lower than
the still existing LNW viaduct. |
 GNR
Batley Viaduct : Ralph Rawlinson GNR
Batley Viaduct : Ralph Rawlinson
Demolition in progress. |
 GNR
Batley Viaduct : Ralph
Rawlinson GNR
Batley Viaduct : Ralph
Rawlinson
Demolition in progress. |
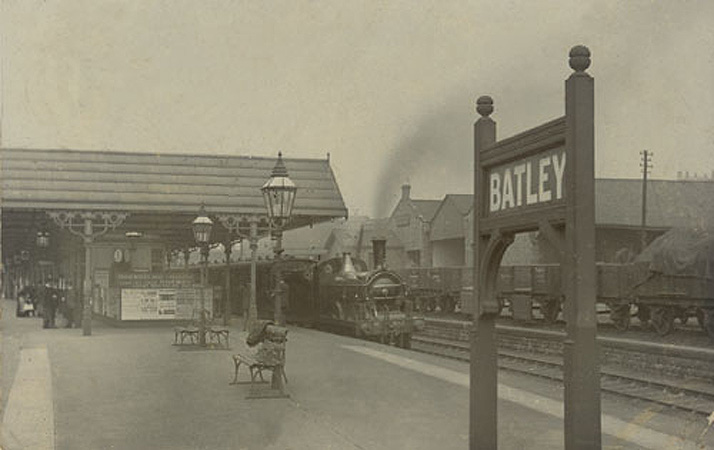
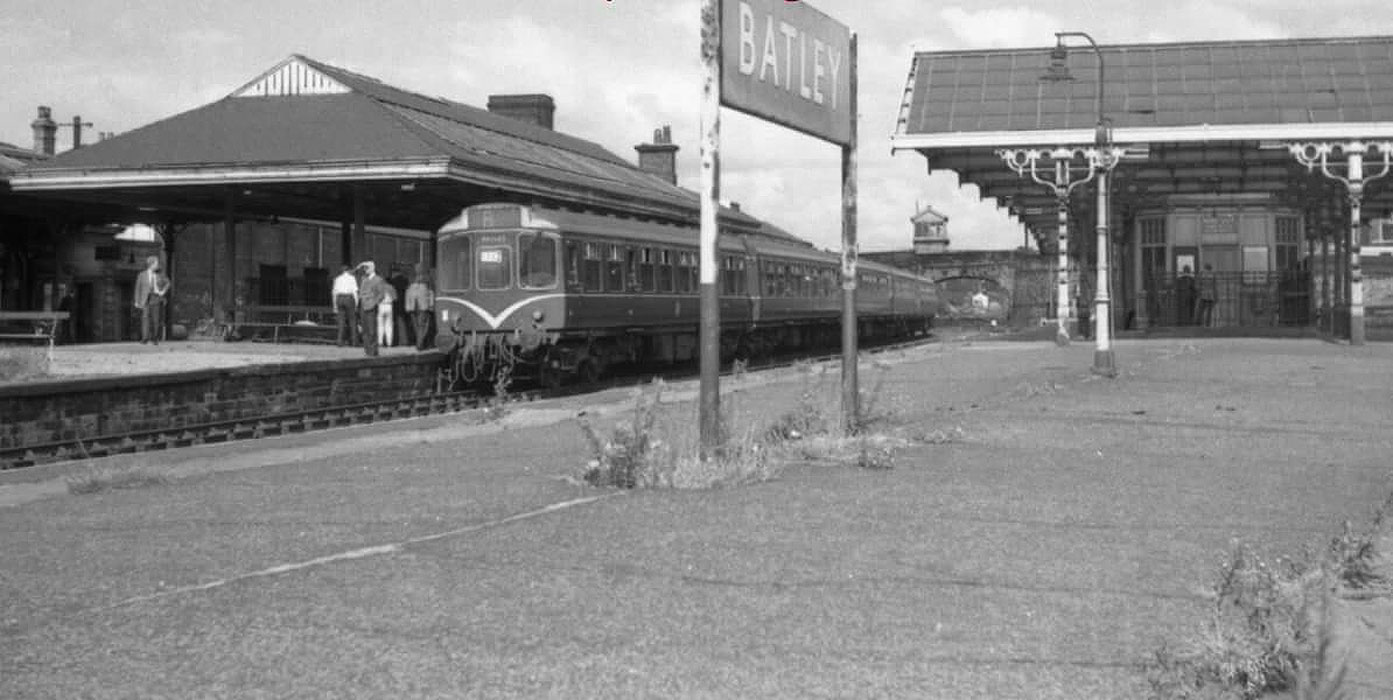
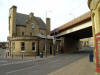
Batley GNR
Opened 01-08-1890. Closed 07-09-1964.
 Batley GNR
c1900 : Paul See Adwalton
to Wakefield line Batley GNR
c1900 : Paul See Adwalton
to Wakefield line
This
is a picture of a platform at Batley station that no longer exists. I
believe it was the island platfrom that trains from Earlsheaton,
Dewsbury, Batley Carr came to. If you go to Batley station and go down
the steps to go over to platform 2 before you go up the steps you can
see where it has been bricked up, where u could carry on going to then
reach this platform. |
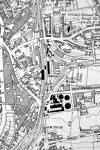 Batley
(c1931) : Malcolm Mallison Batley
(c1931) : Malcolm Mallison
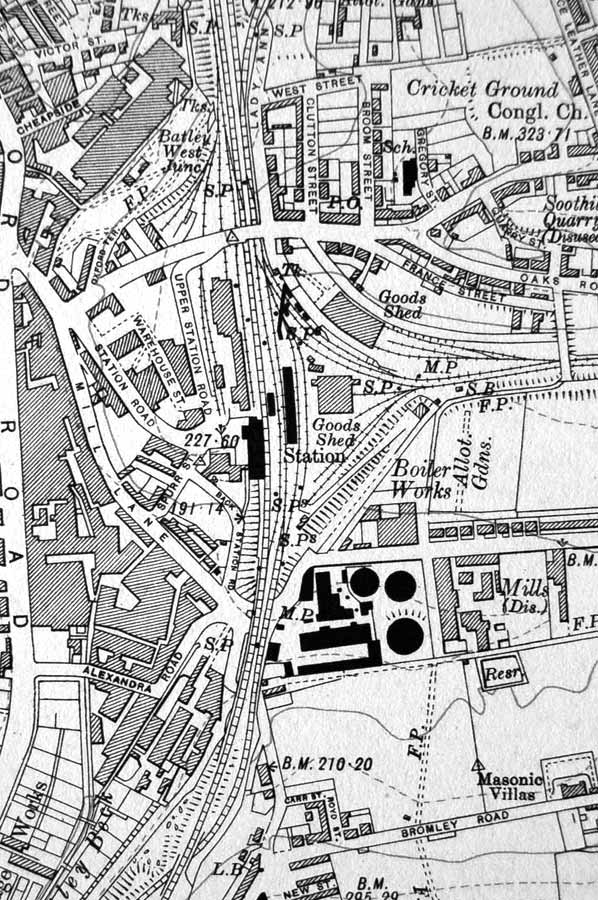
From the 1931 survey- Batley, Dewsbury, Woodkirk |
 Batley
(nd) : Paul Holroyd Batley
(nd) : Paul Holroyd
Batley. |
 Batley
(nd) : Paul Holroyd Batley
(nd) : Paul Holroyd
Batley. |


2/11A_0011.jpg)