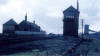
 Laisterdyke
& Cutlers Junction Laisterdyke
& Cutlers Junction
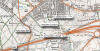
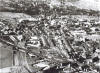
A closer view showing Laisterdyke & all the junctions around Tyersal.
Laisterdyke east junction (situated immediately to the east of
Laisterdyke)
is not labelled on the map.
The Pudsey loop is also shown See
GNR Pudsey Loop
|
 Railway Ramblers gazetteer Railway Ramblers gazetteer
See also the Railway Ramblers gazetteer -
Leeds : GNR Ardsley Laisterdyke |
Ardsley to Laisterdyke
 Ardsley
to Laisterdyke (c1960) : Dennis Sefton Ardsley
to Laisterdyke (c1960) : Dennis Sefton
Unknown location. |
Laisterdyke Station
/Laisterdike_small.JPG) Opened
20.8.1856 Closed 04-07-1966 Opened
20.8.1856 Closed 04-07-1966
Laisterdyke station map (1850) : Malcolm Mallison
Plans of station taken from 1850 6 inch to the mile map.
See also Laisterdyke Shipley
& Leeds - Bradford (GNR) |
/012%20Laisterdyke_small.jpg) Laisterdyke
station map (1890) : Malcolm Mallison Laisterdyke
station map (1890) : Malcolm Mallison
6 inch maps from the 1890 survey. |
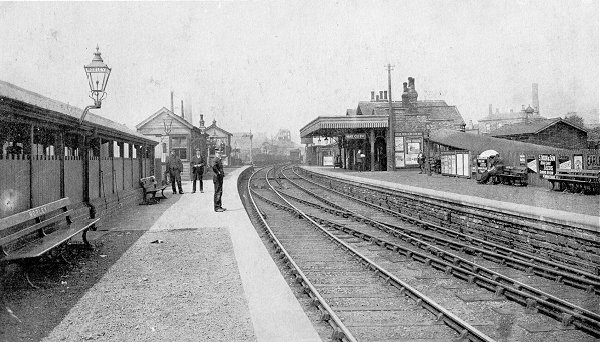
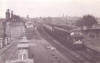
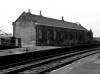
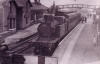
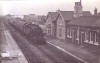
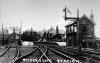
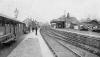
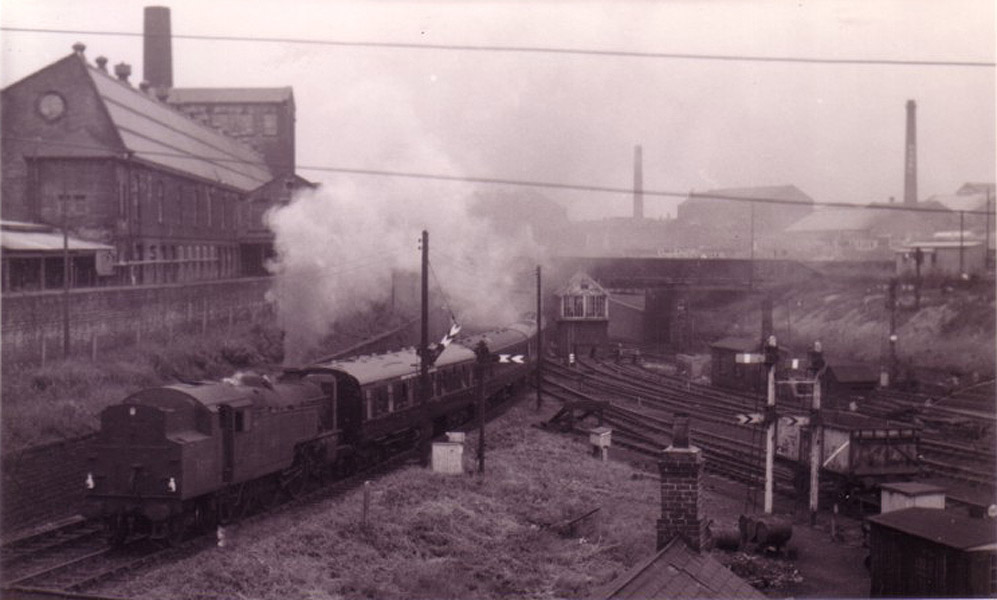
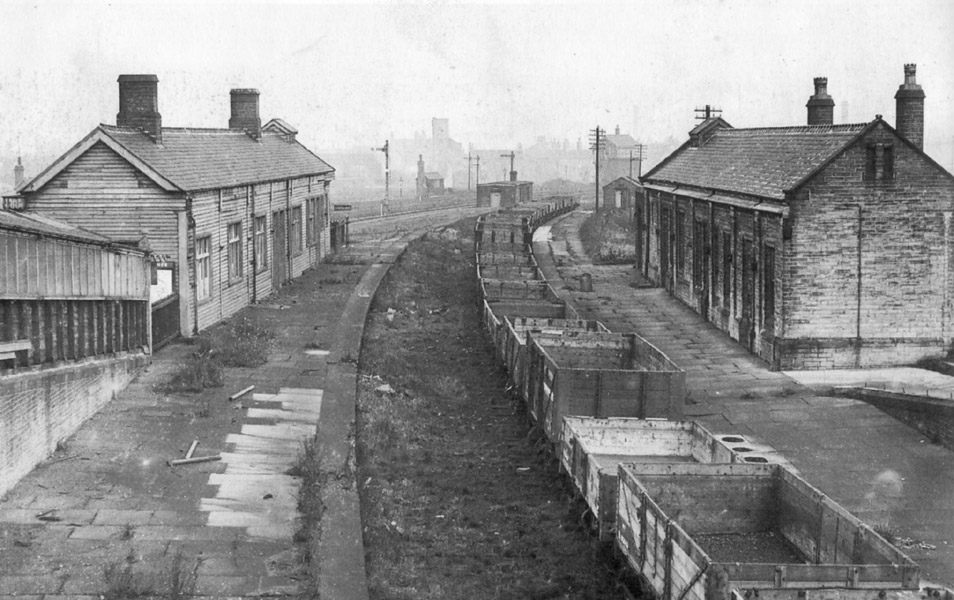
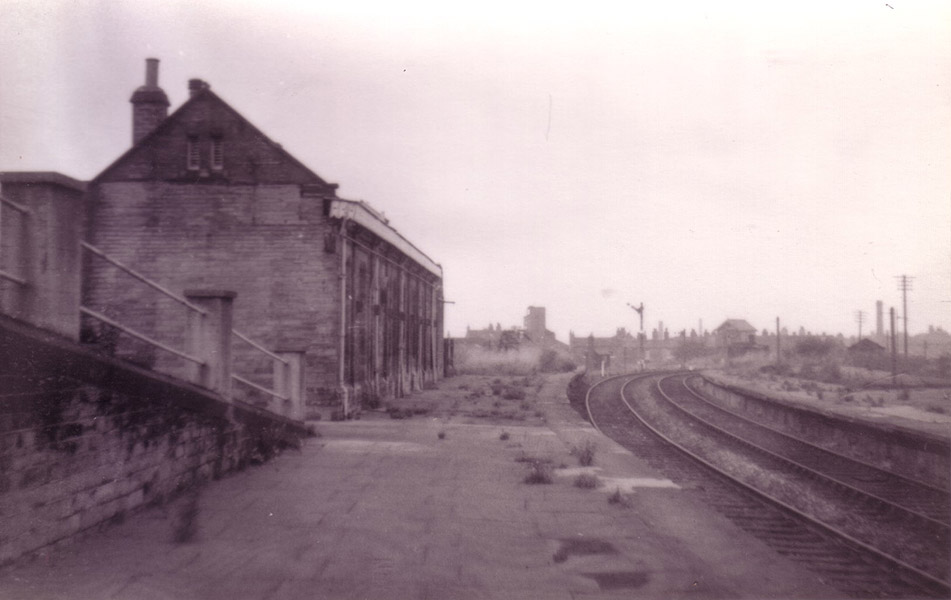
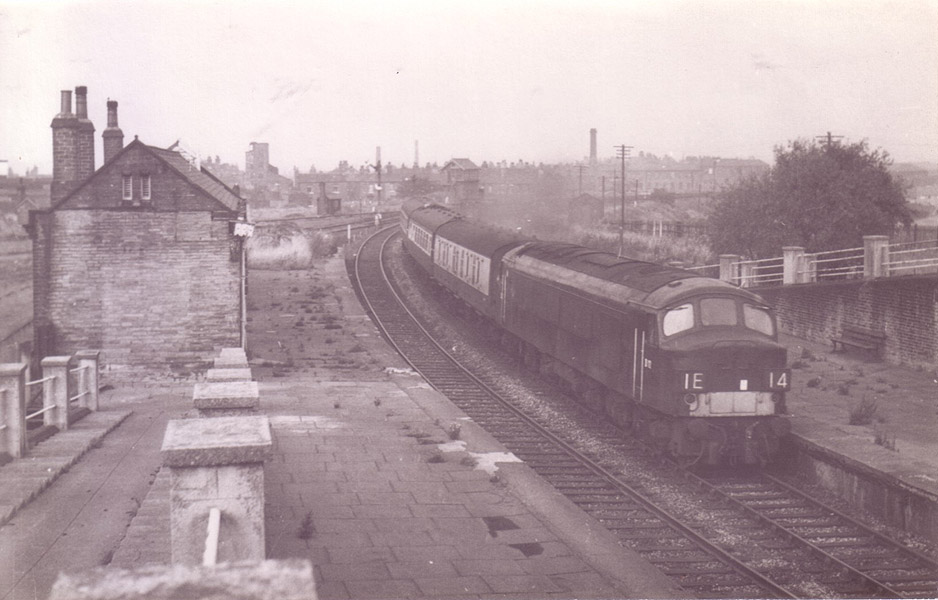
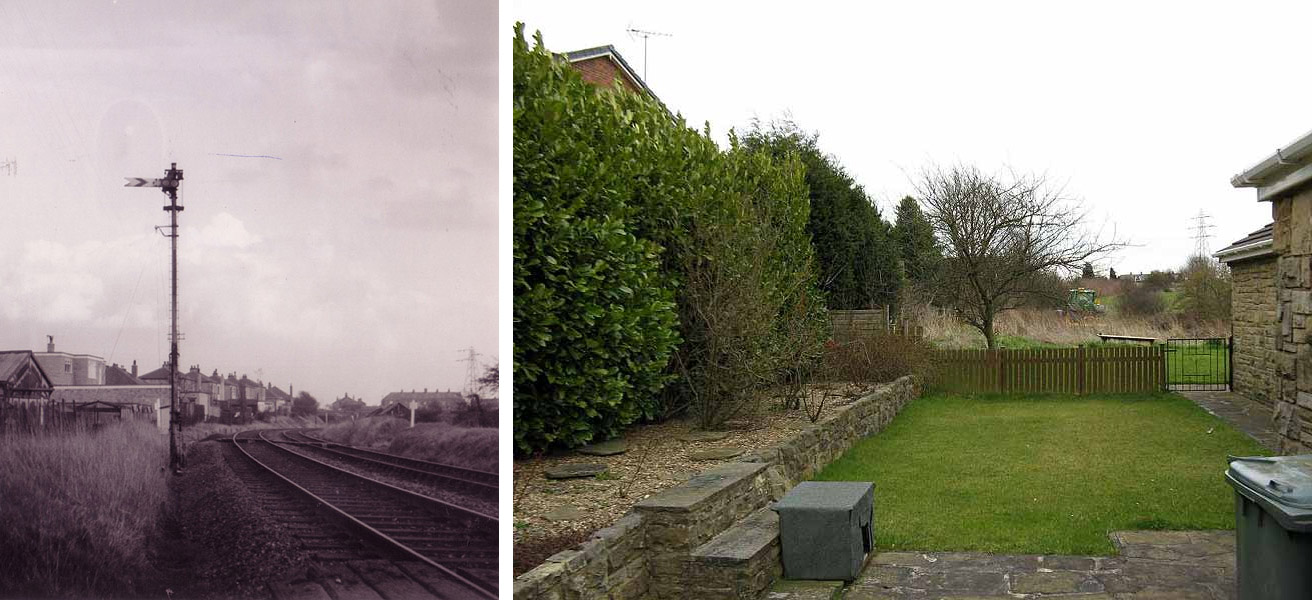
Laisterdyke Station (c1960) :
Dennis Sefton
 Facing west towards Bradford. Facing west towards Bradford. |
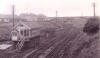
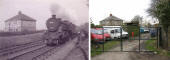
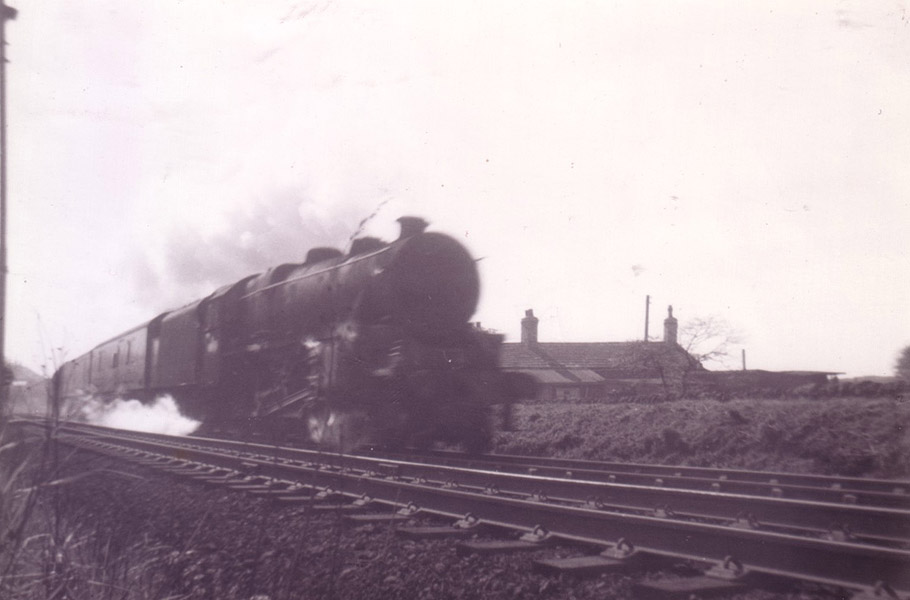
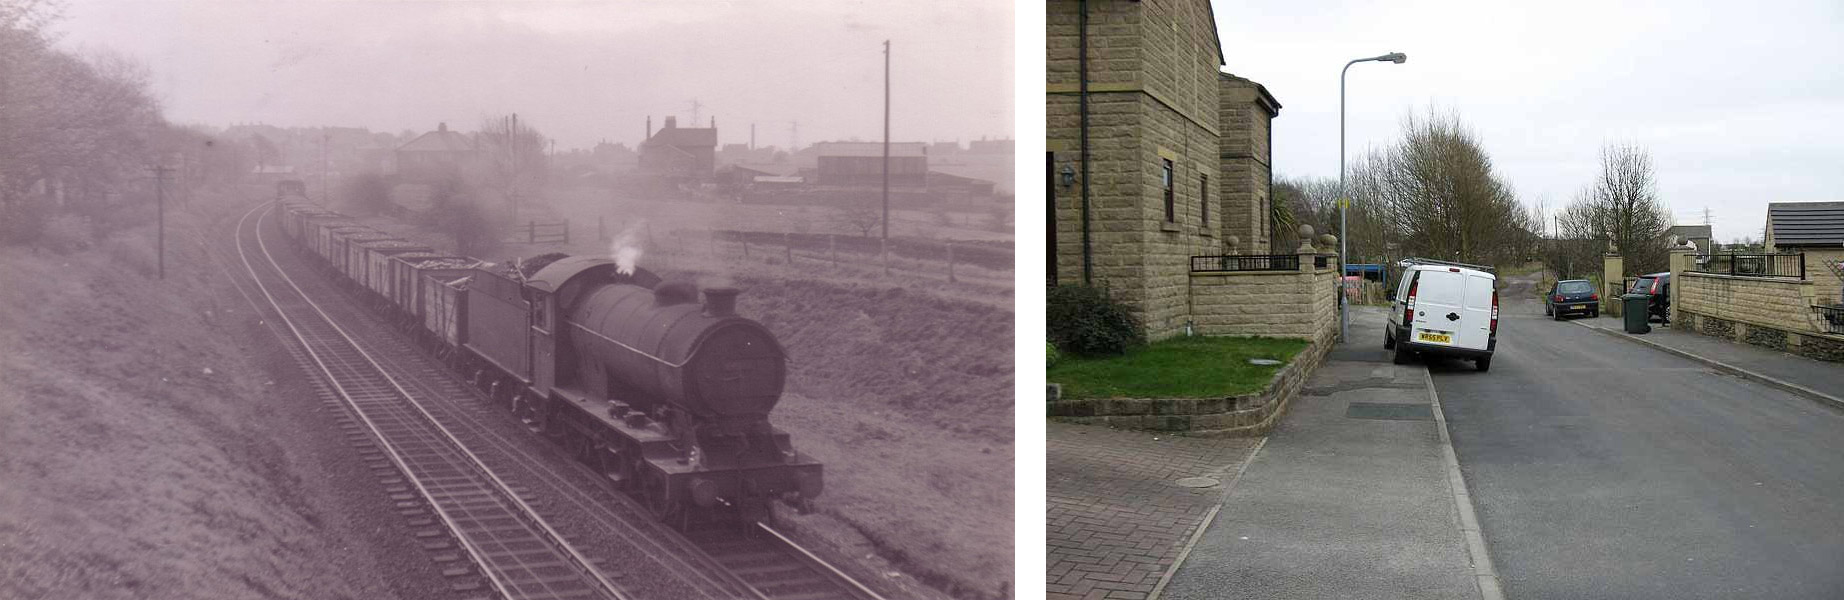
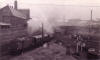 Laisterdyke
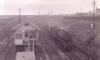
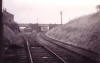
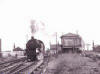
East Junction (c1960) :
Dennis Sefton Laisterdyke
East Junction (c1960) :
Dennis Sefton
The train on the left is taking the line to Cutlers
junction.
The tracks on the right lead off to Quarry Gap junction &
Leeds, via Pudsey & Stanningley. |
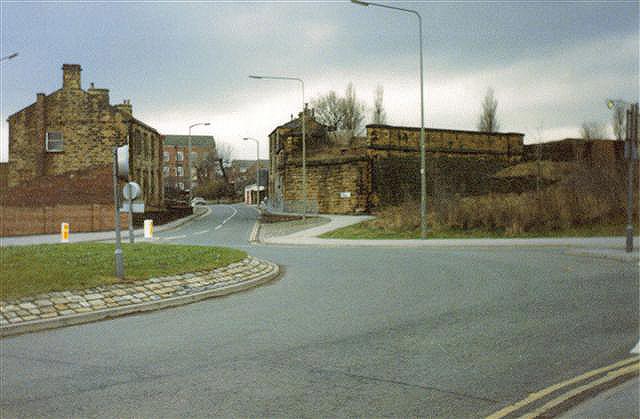
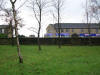
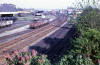
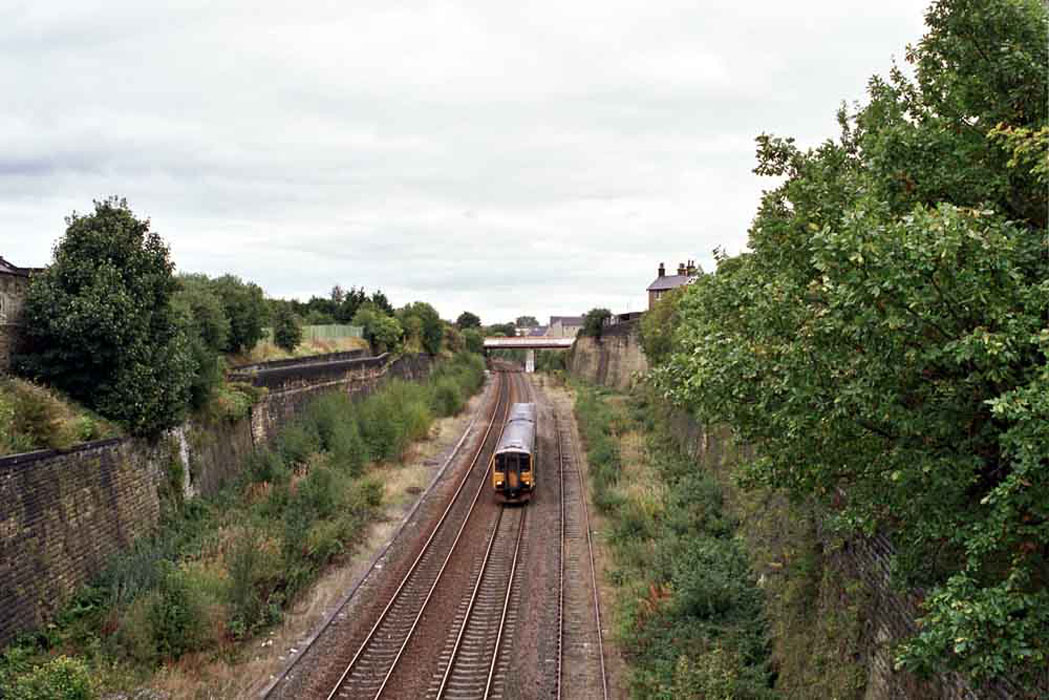
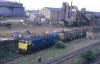 Laisterdyke
(01-08-1986) : C/O Michael Kaye with permission from Paul Corrie Laisterdyke
(01-08-1986) : C/O Michael Kaye with permission from Paul Corrie
47513 at Laisterdyke 1 August 1986. |
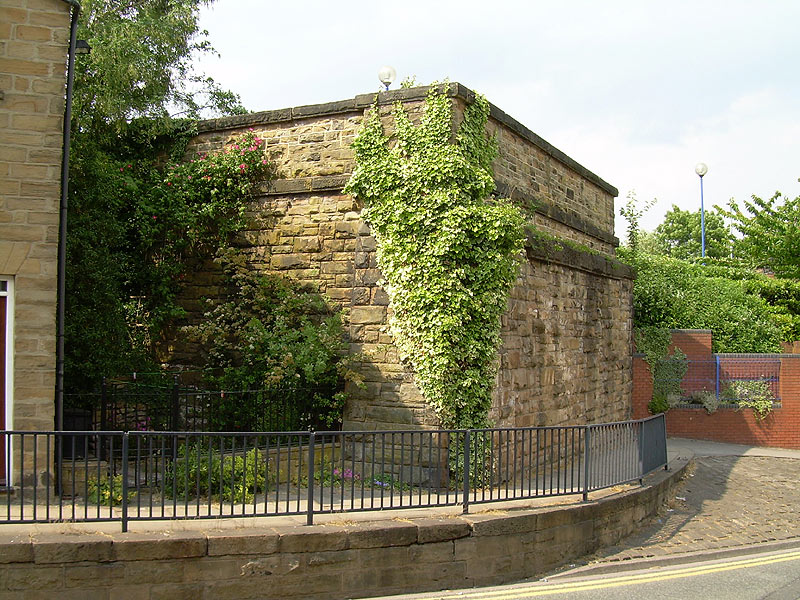
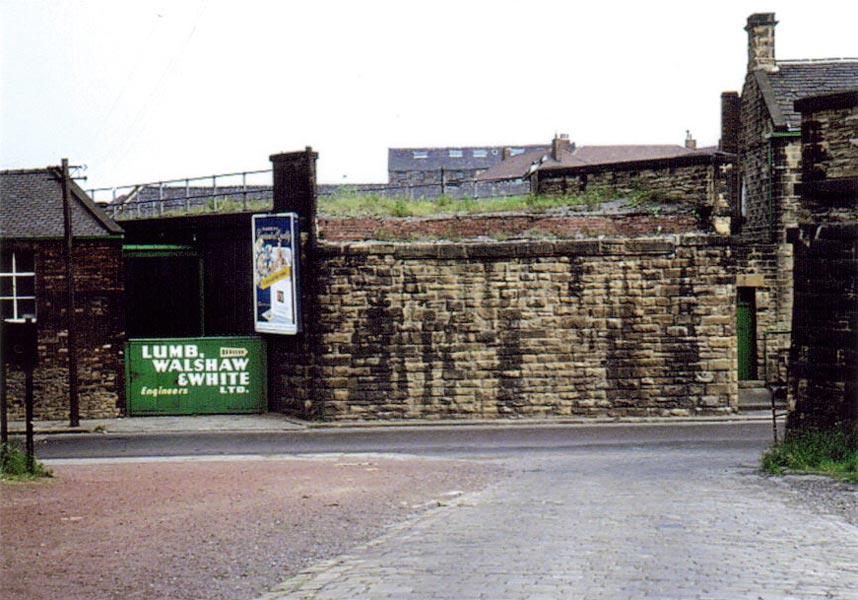
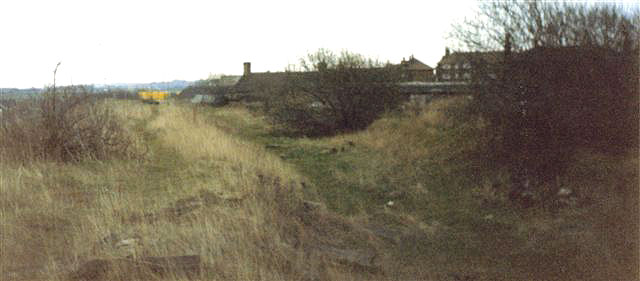
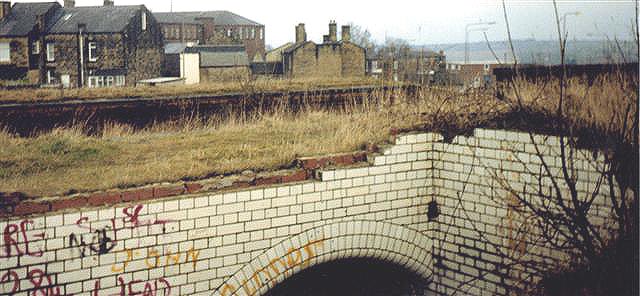
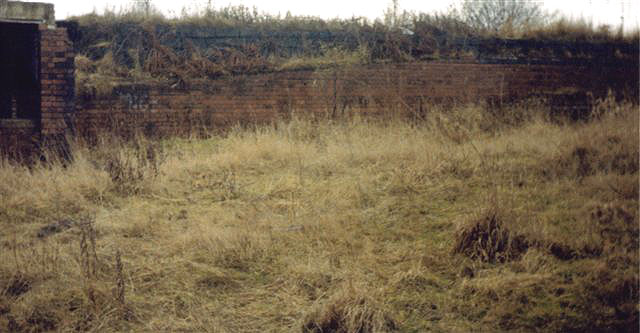
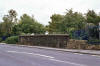
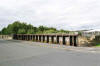
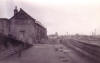
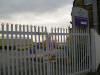
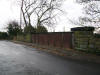
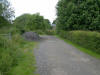
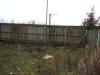
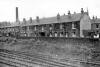
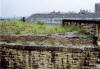
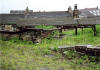
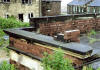
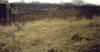
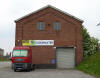
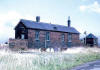
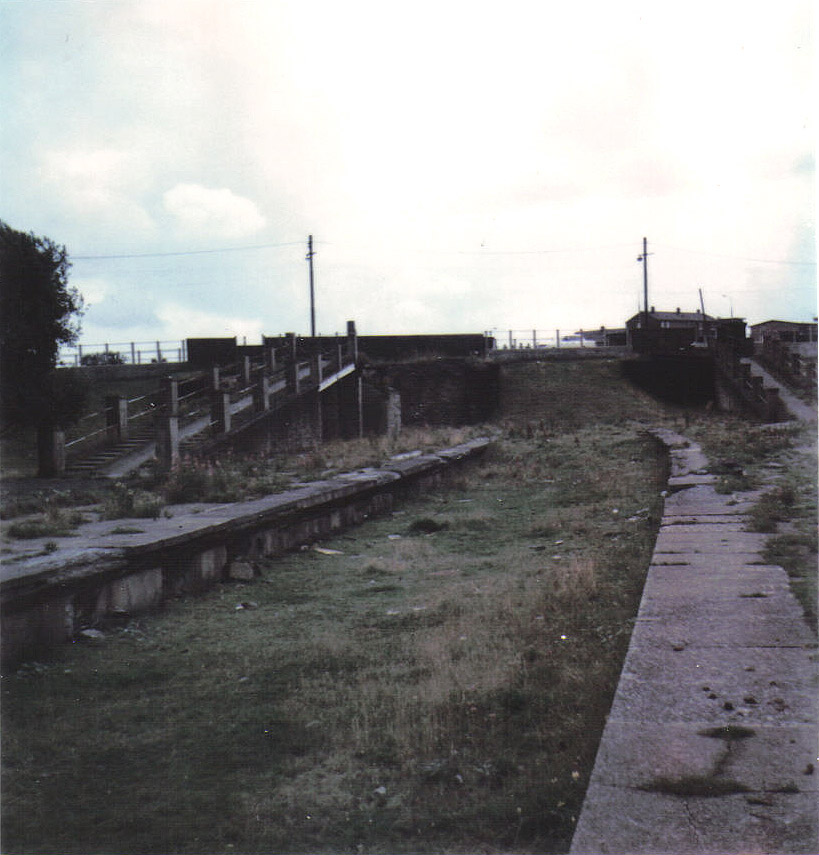
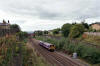  Laisterdyke station (nd) : Malcolm Mallison Laisterdyke station (nd) : Malcolm Mallison
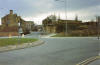
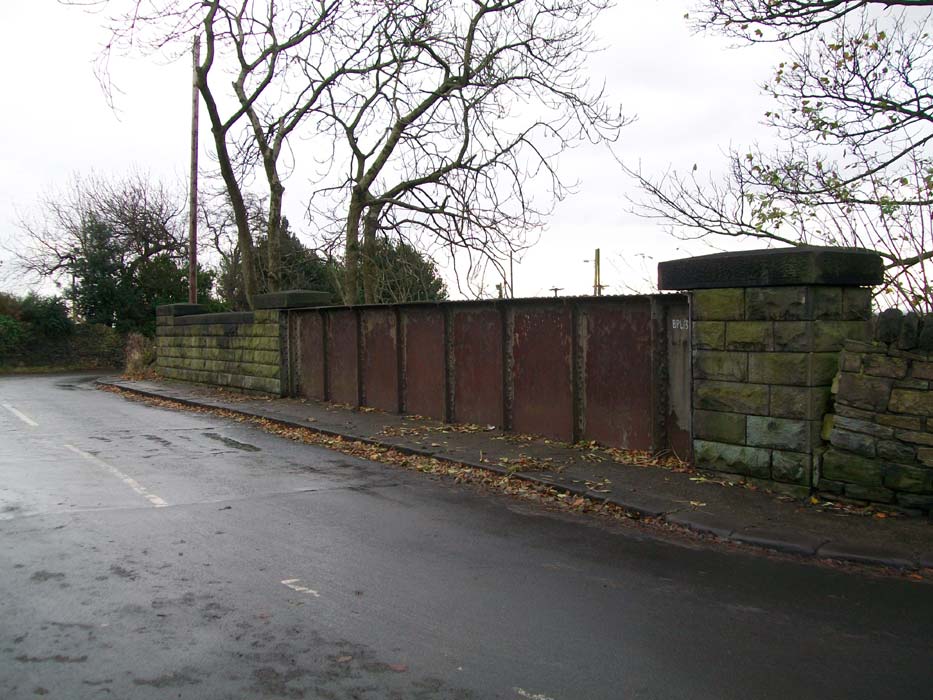
Site of station from road bridges. Not a solitary remnant
of the station can be seen. |
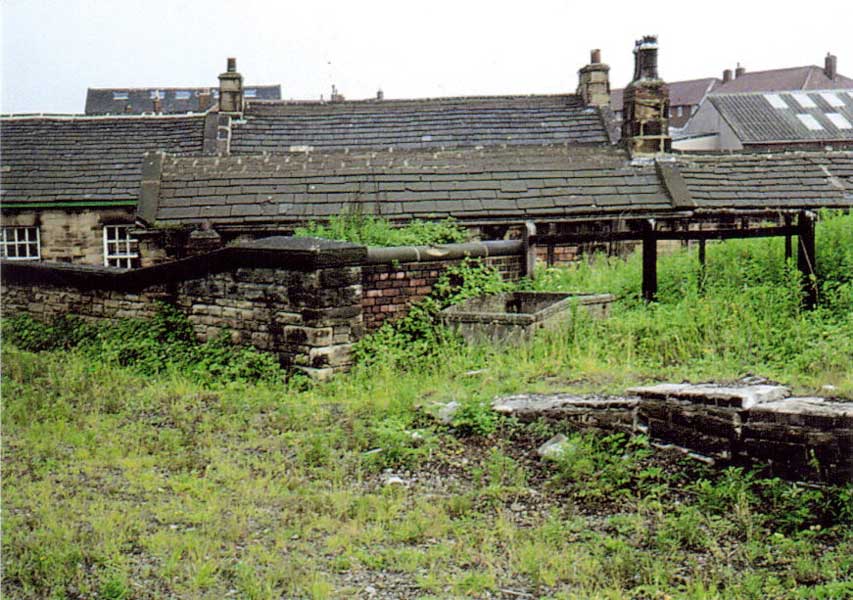
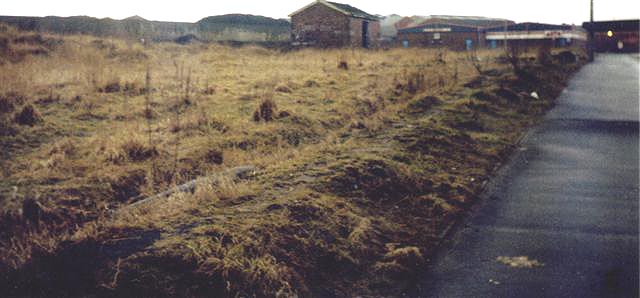
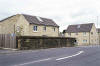
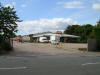
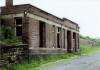
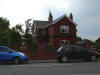
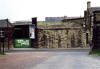
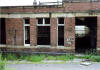
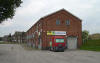
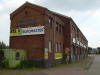
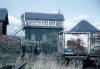
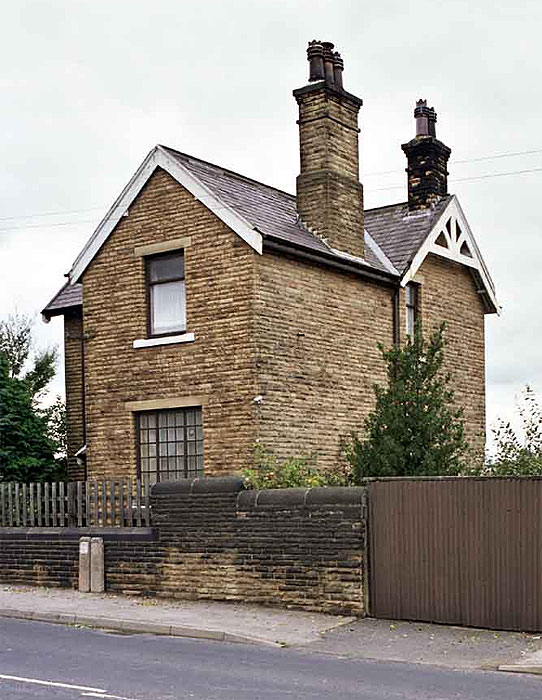
 Laisterdyke station (nd) : Malcolm Mallison Laisterdyke station (nd) : Malcolm Mallison
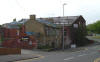
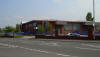
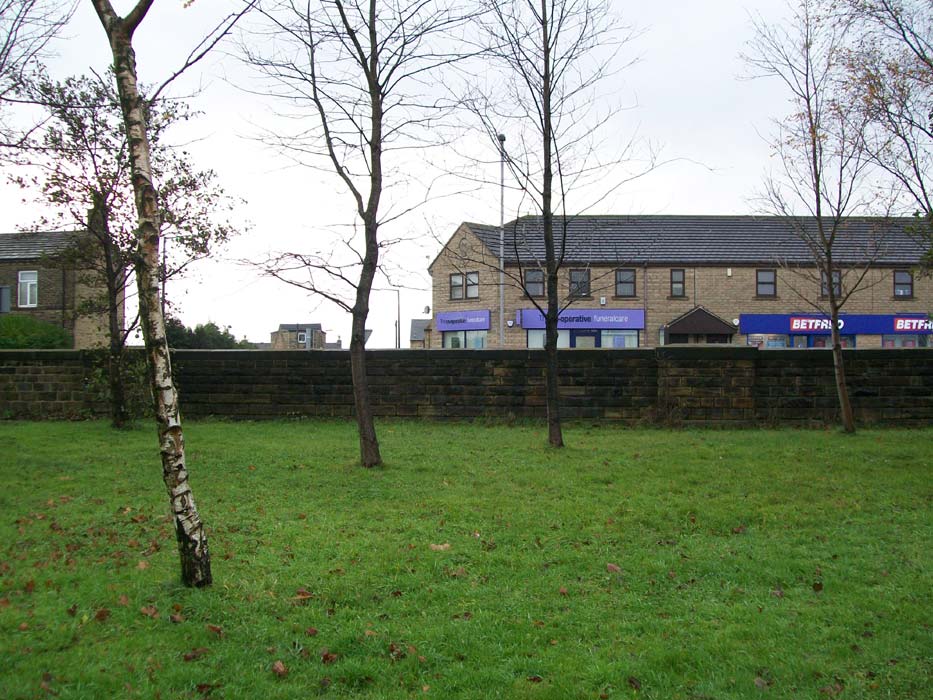
Station House on New Lane, now rather marooned in
post-industrial desert.
Note : Nicholas Kaye
The old station house that overlooked the station has now
been demolished and modern houses built on the land.
There is now nothing left of what was a grand and busy station. |
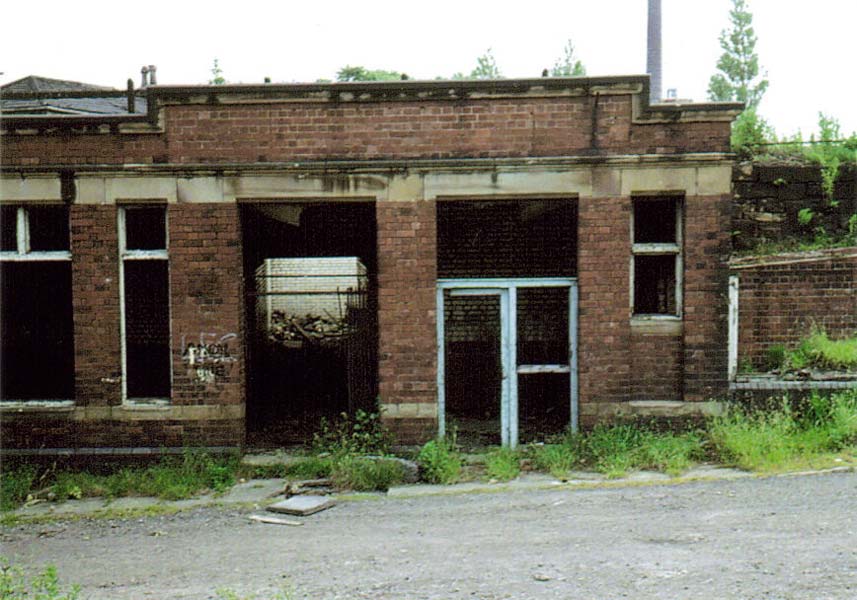
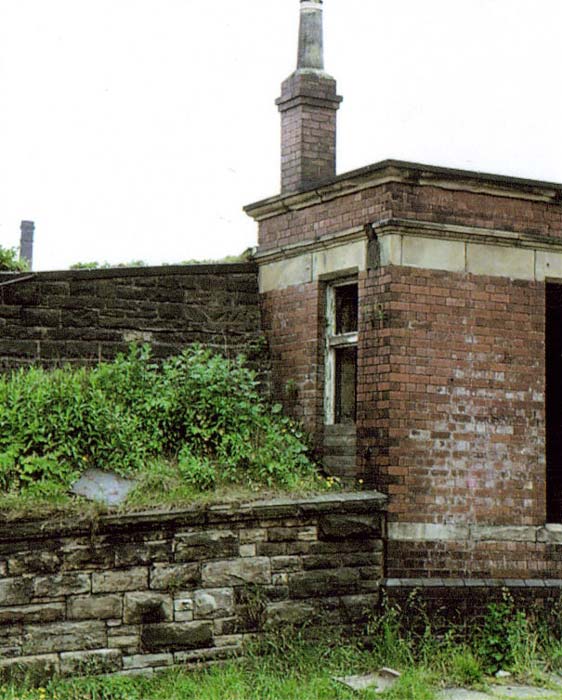
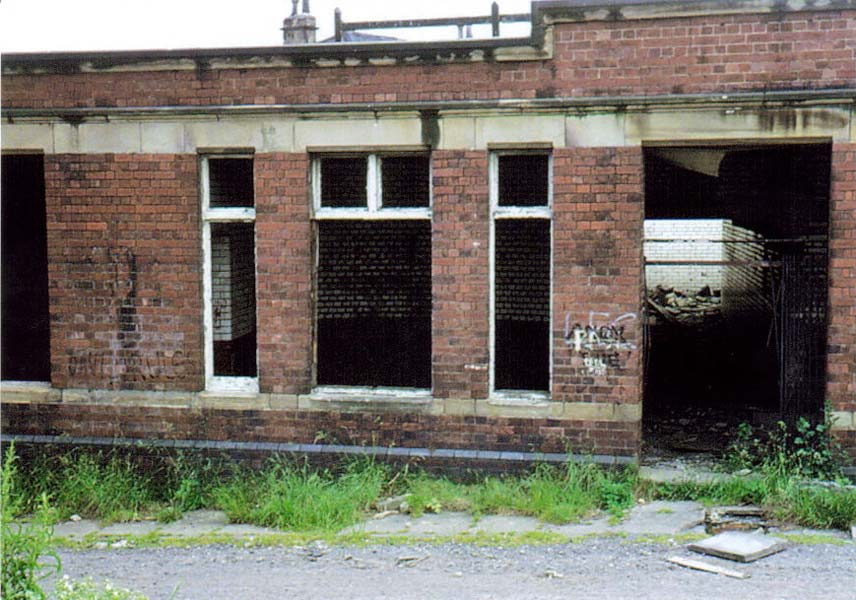
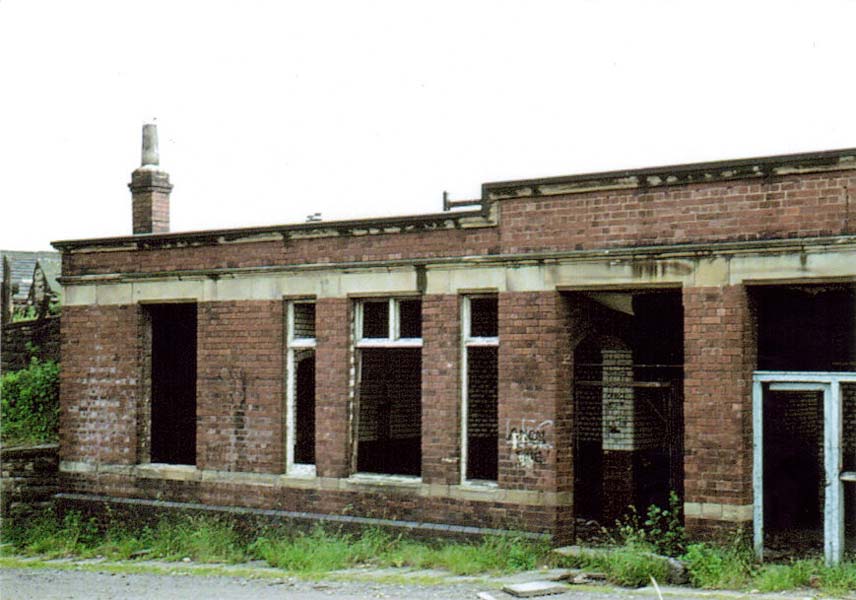
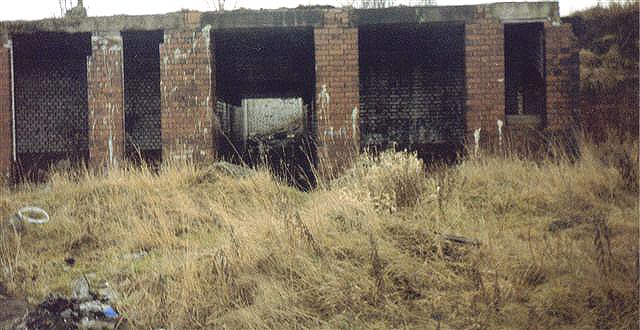
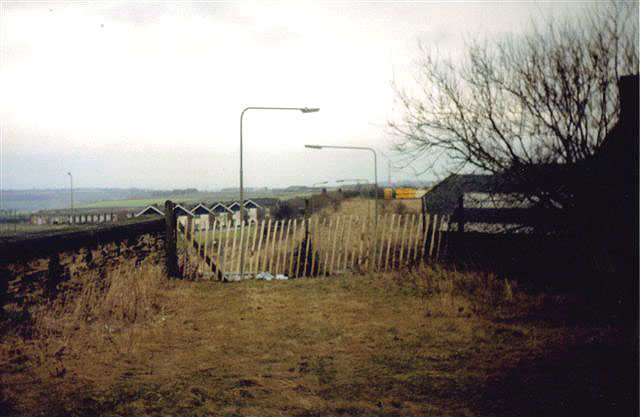
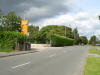
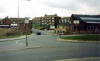
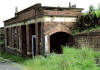
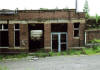
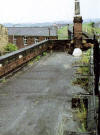
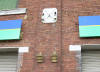
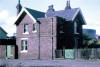
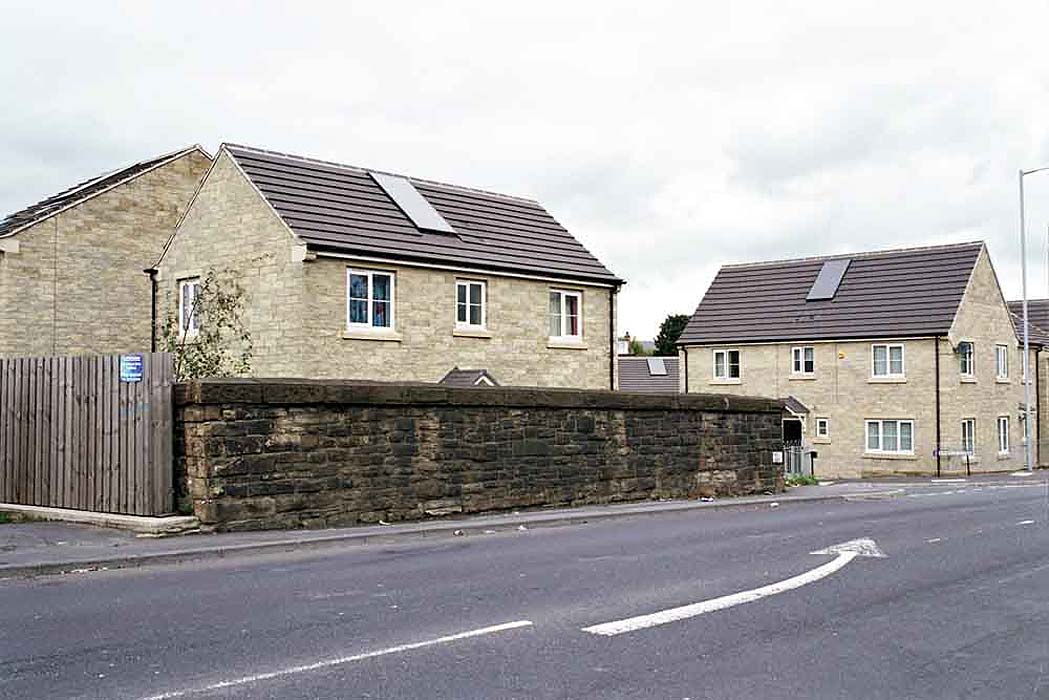
 Laisterdyke station (nd) : Malcolm Mallison Laisterdyke station (nd) : Malcolm Mallison
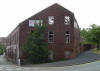
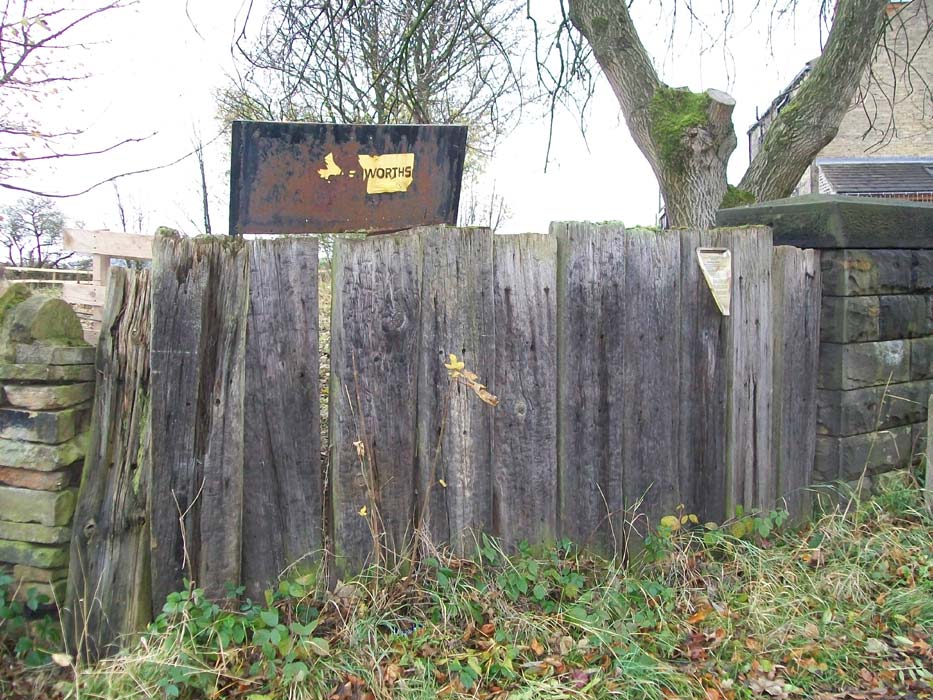
Presumed entrance on Laisterdyke. |
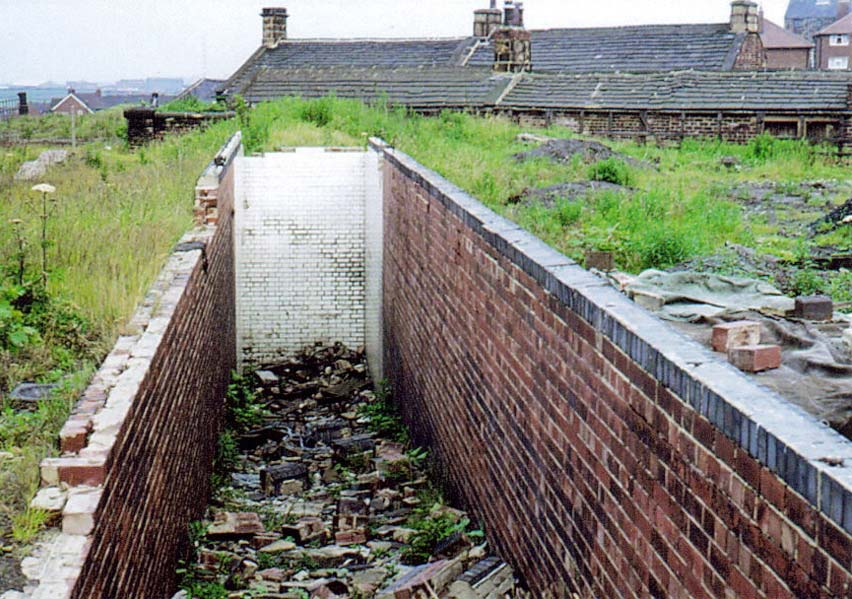
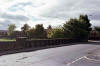
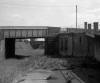
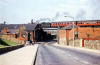
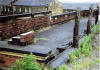
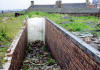
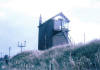
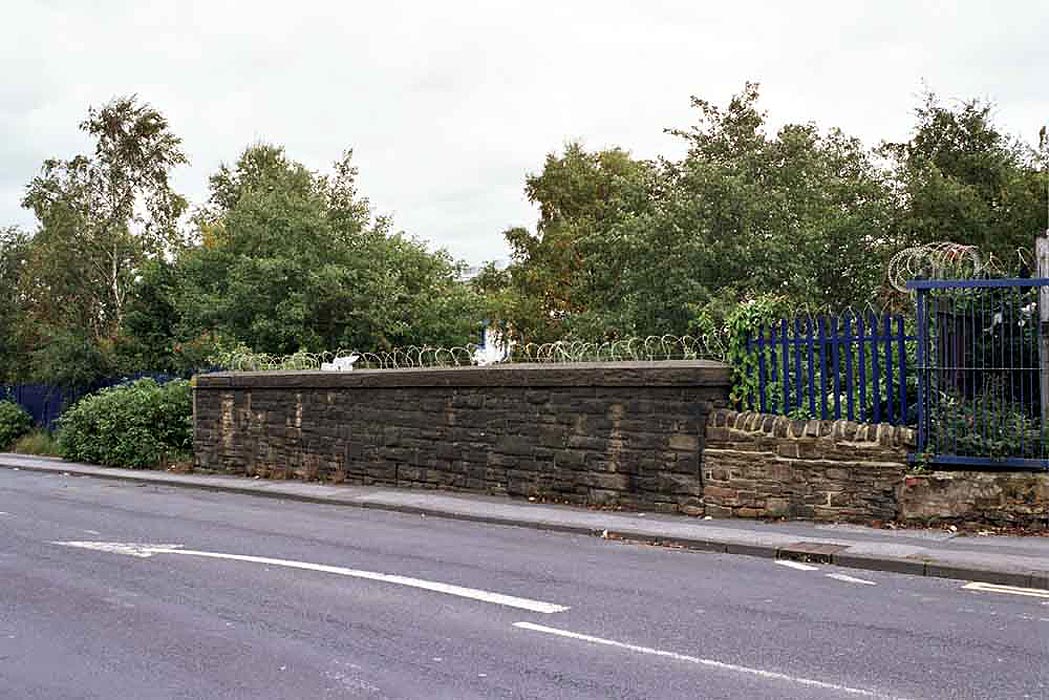
  Dick
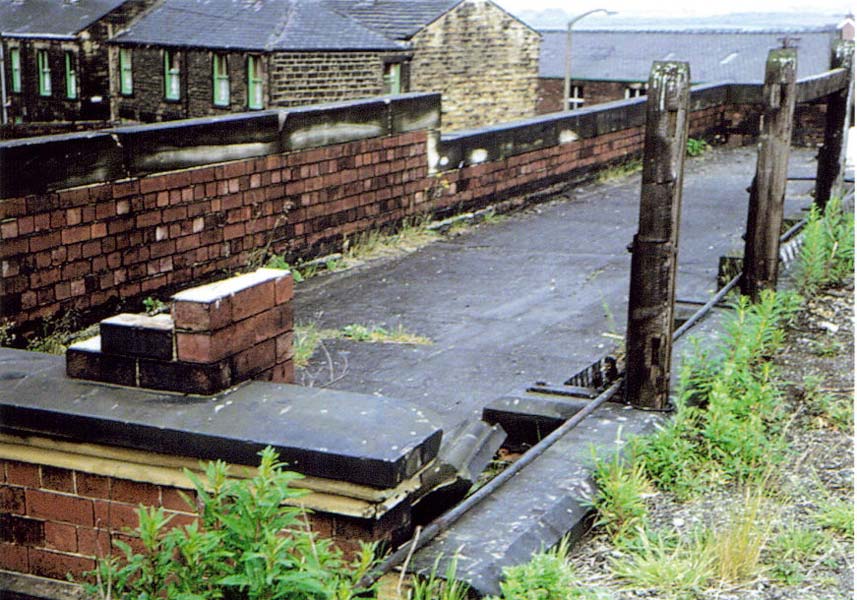
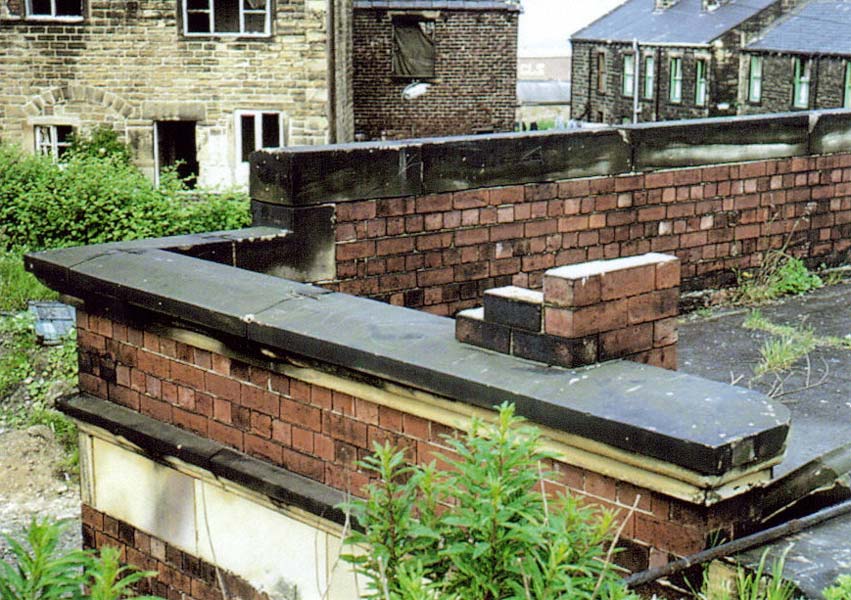
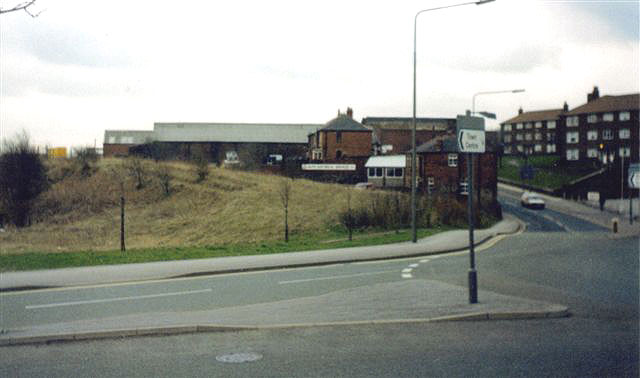
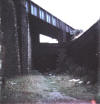
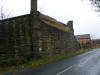
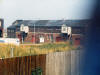
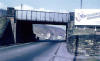
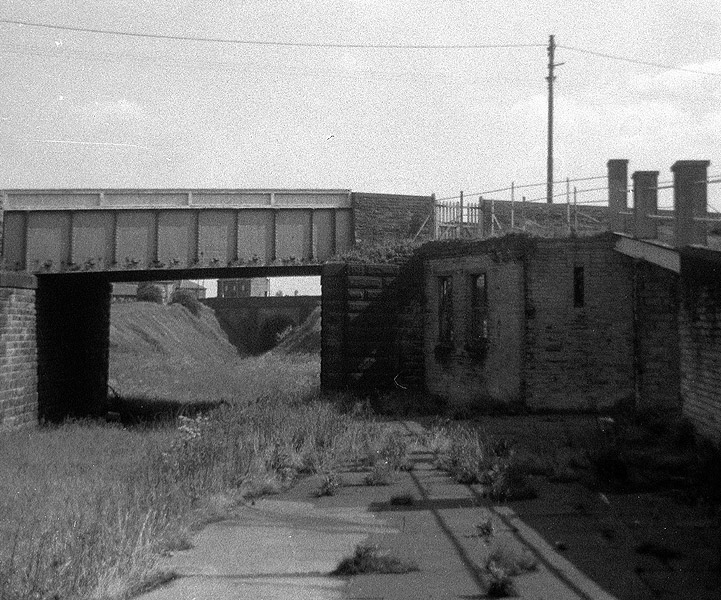
Lane (nd) : Malcolm Mallison Dick
Lane (nd) : Malcolm Mallison
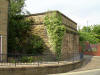
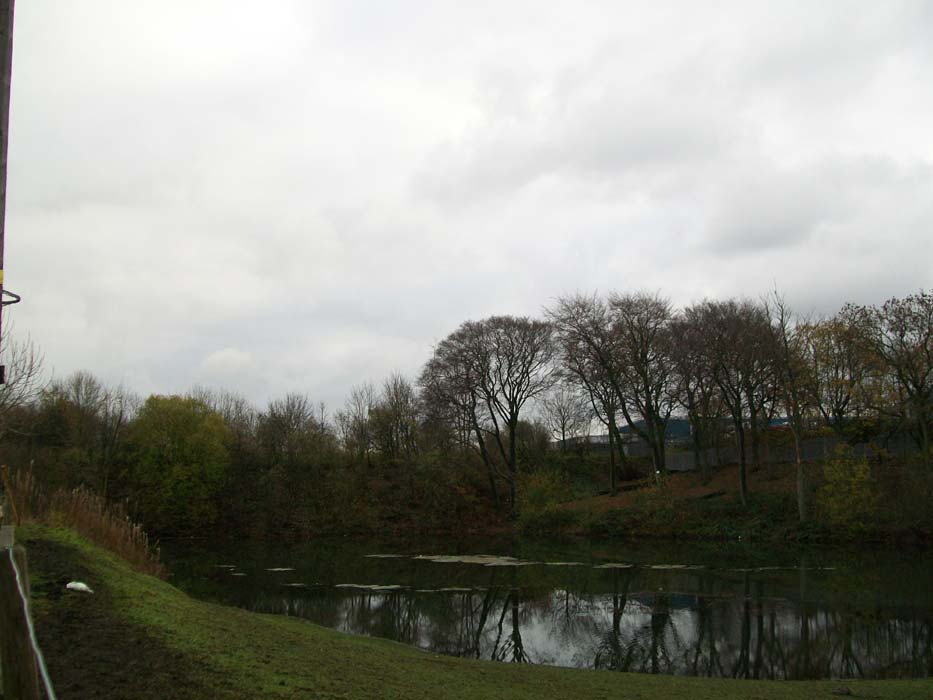
Parapet of bridge crossing Dick Lane. West side of road newly built on.
Cutting on east side silted up and overgrown. |
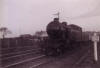
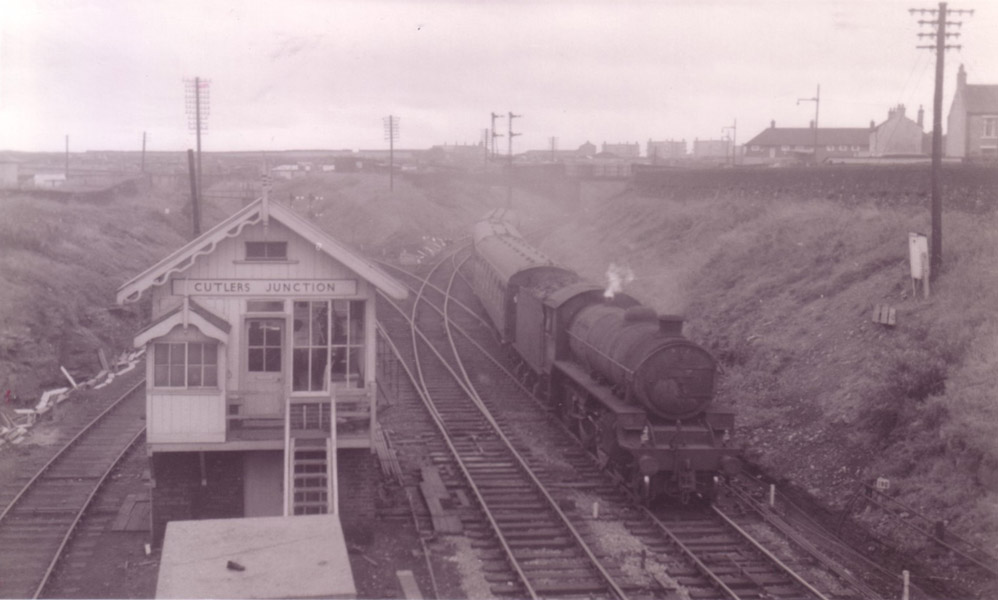
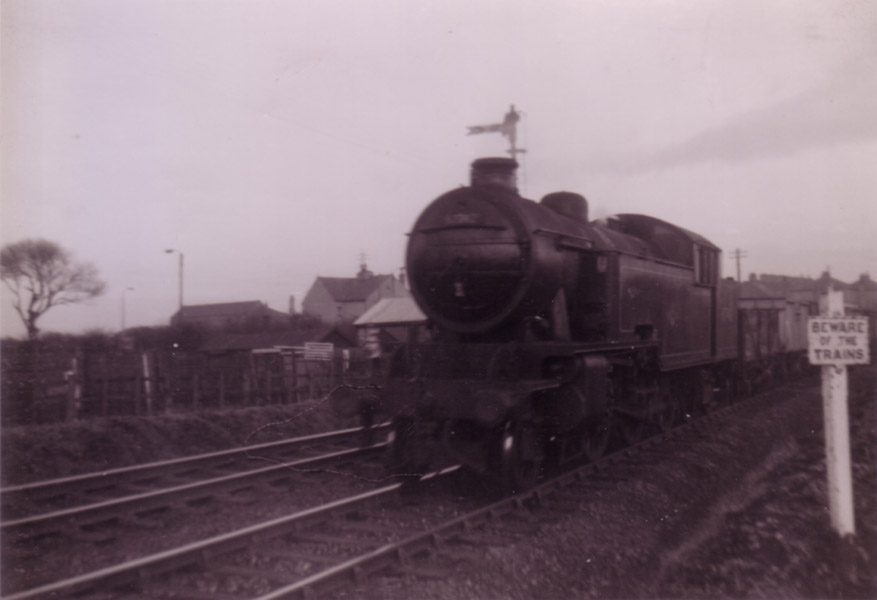
Cutlers
Junction
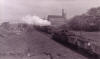
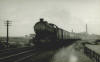
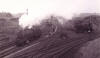 Cutlers Junction (c1960) :
Dennis Sefton See also
Pudsey Loop Cutlers Junction (c1960) :
Dennis Sefton See also
Pudsey Loop
B1 4-6-0 approaching Cutlers junction from Laisterdyke
East junction. The lines to the right head off towards Quarry Gap
junction.
Quarry Gap sidings are visible in the background. |
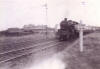
  Cutlers Junction (c1960) :
Dennis Sefton Cutlers Junction (c1960) :
Dennis Sefton
Facing south. The Pudsey Loop line curves off to the
left, via Tyersall junction.
The line to Dudley Hill & Ardsley curves off to the right, via Broad
Lane junction . |
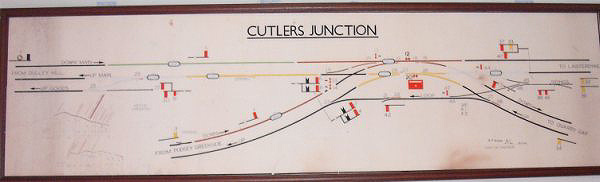
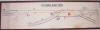 Cutlers
Junction signal box diagram : Mark Neale Cutlers
Junction signal box diagram : Mark Neale
The diagram is dated 29/4/63 signed A F Wigram Chief S&T Engineer. |
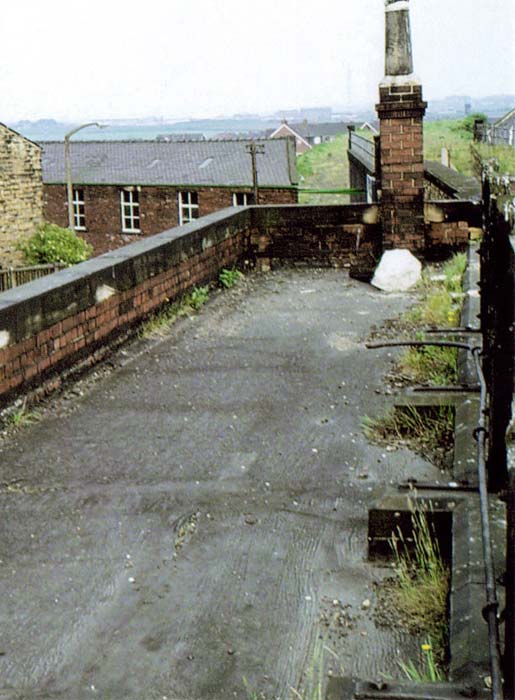
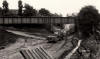
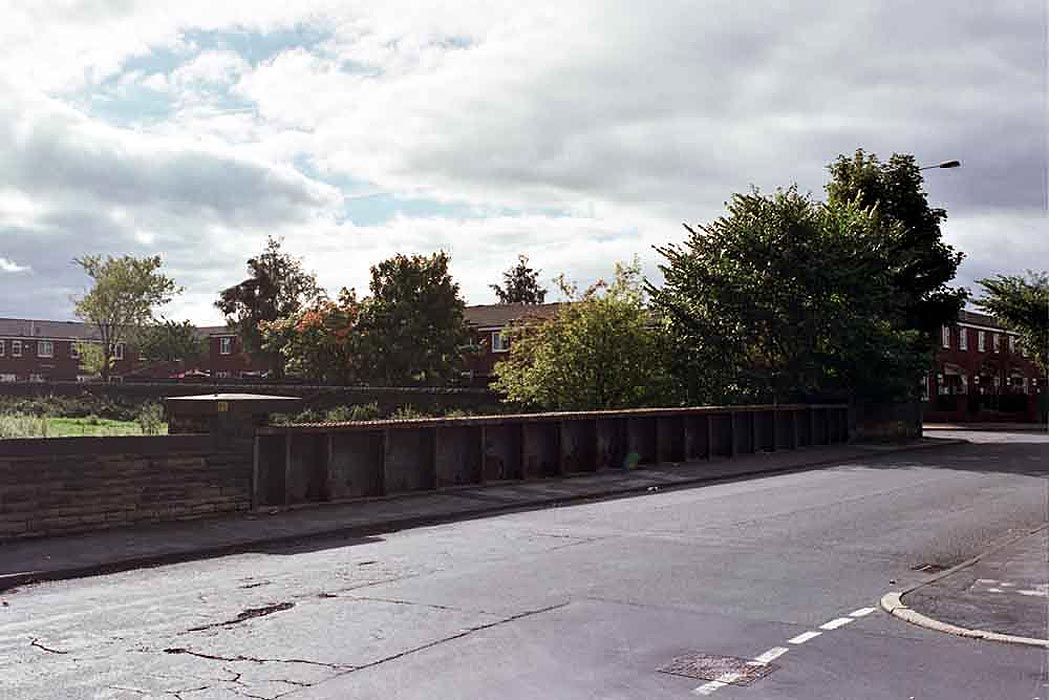
  Arkwright
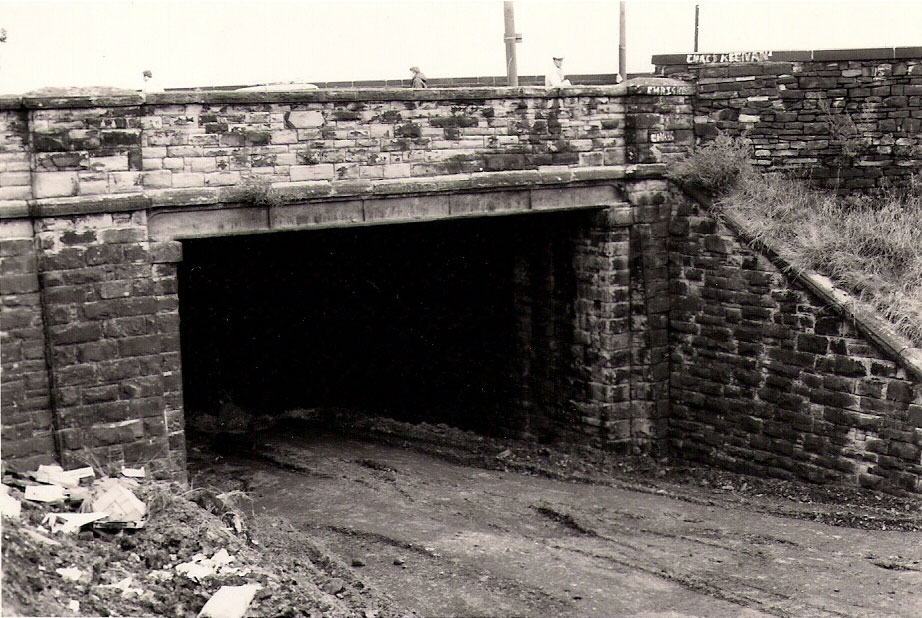
St (nd) : Malcolm Mallison Arkwright
St (nd) : Malcolm Mallison
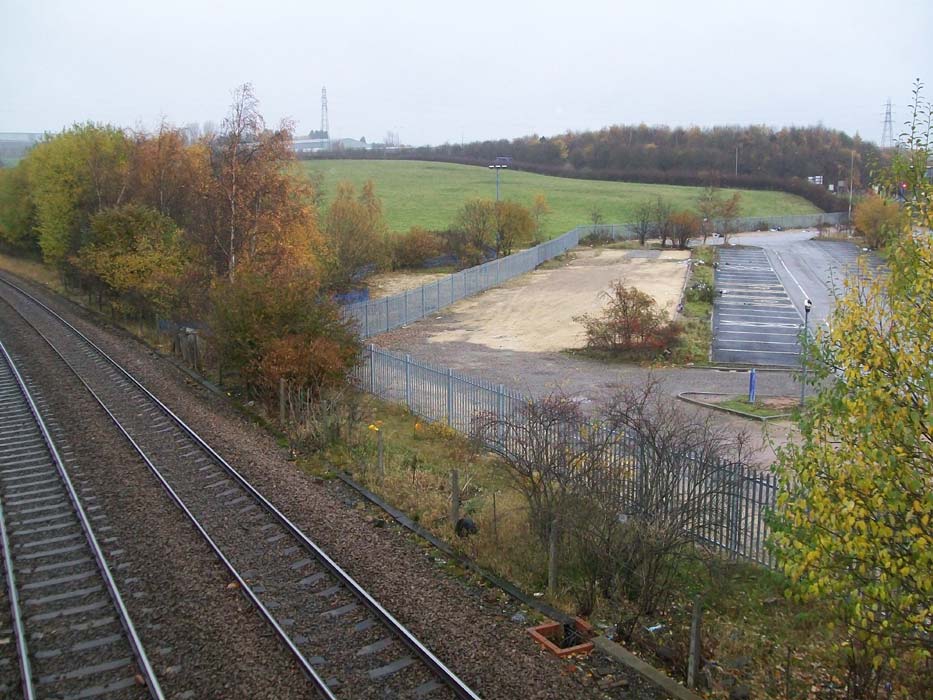
Parapet of bridge crossing Arkwright St. Cutting has been infilled.
(above photos taken from this bridge). |
Dudley Hill Station
/Dudley%20Hill_small.jpg) Opened 20-08-1856 Closed 07-04-1952
(Relocated) Opened 20-08-1856 Closed 07-04-1952
(Relocated)
Dudley
Hill station map (1850) : Malcolm Mallison
Plans of the old station taken from 1850 6 inch to the
mile map. |
Dudley Hill : c/o Graham Smith
Aerial shots from Bradford Museums & Galleries website.
Dudley Hill and Tong and there are some lovely shots of Dudley Hill
station and the weird set of bridges and tunnel that went on to Batley
or down to Low Moor.
http://photos.bradfordmuseums.org/index.php?a=QuickSearch&q=dudley%20hill&WINID=1446035017440
http://photos.bradfordmuseums.org/index.php?a=QuickSearch&q=tong&WINID=1446035366824 |
Dudley Hill :
Bob Cockcroft
Dudley Hill had a station from when the line to
Gildersome was built. The first building was a twin gabled construction
of the same style as the others on the line. It was relocated at least
once to it's later junction site so as to facilitate the burrowing
junction to Low Moor. I cannot confirm that this junction used the land
on which the actual old station was built, but it did take the land on
which the stationmaster's house was built, as this had been built on the
Wakefield main road.
Decline
Dudley Hill was a long time in fall. The canopies went fairly early,
maybe even when the Low Moor traffic ceased in 1916. The station then
had a hagged around look with a roof on one bridge, but not the other.
The covered ways down to the platforms probably lost their roof at this
time resulting in the odd ramps seen later in life. All the buildings
were actually still there in 1947, but it would be in a sorry state. By
1952, when it closed, it would be a mess. In 1955, Gordon Biddle
photographed the booking office from the centre platform, this showed
the booking office and the stone platform building on the Bradford
platform. The wooden centre building had gone by this time.
When I first photographed it in 1967, the track was there, as was
Bradford side of the Dewsbury line building and the goods shed.
The booking office I went again 10 years later, the track was gone and
so were all the buildings, but the base of the booking hall was easier
to get at.
The line to Low Moor looked like it was in the process of being
land-filled. |
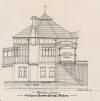
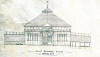
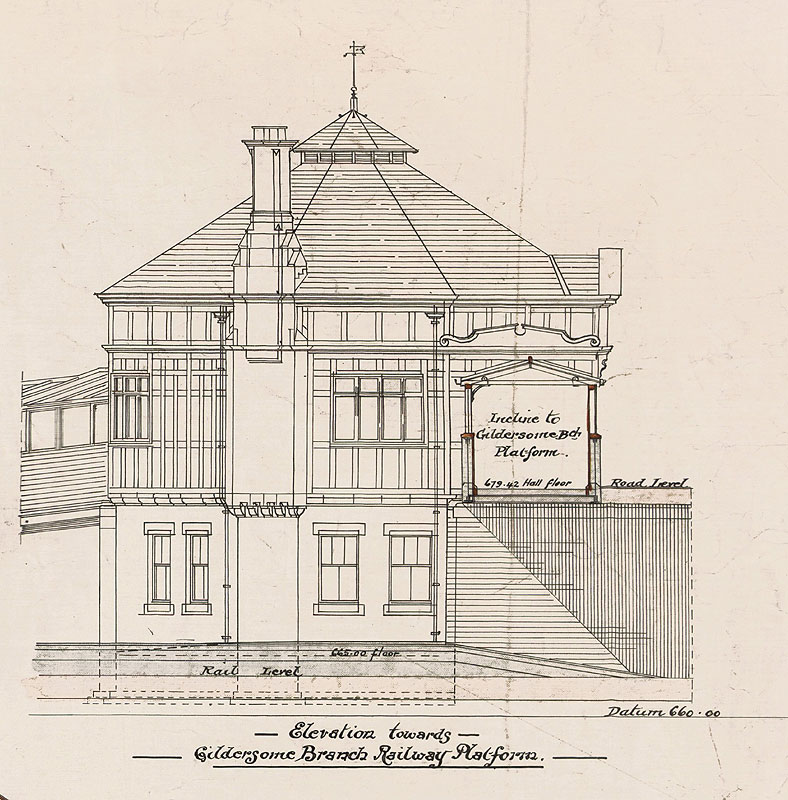
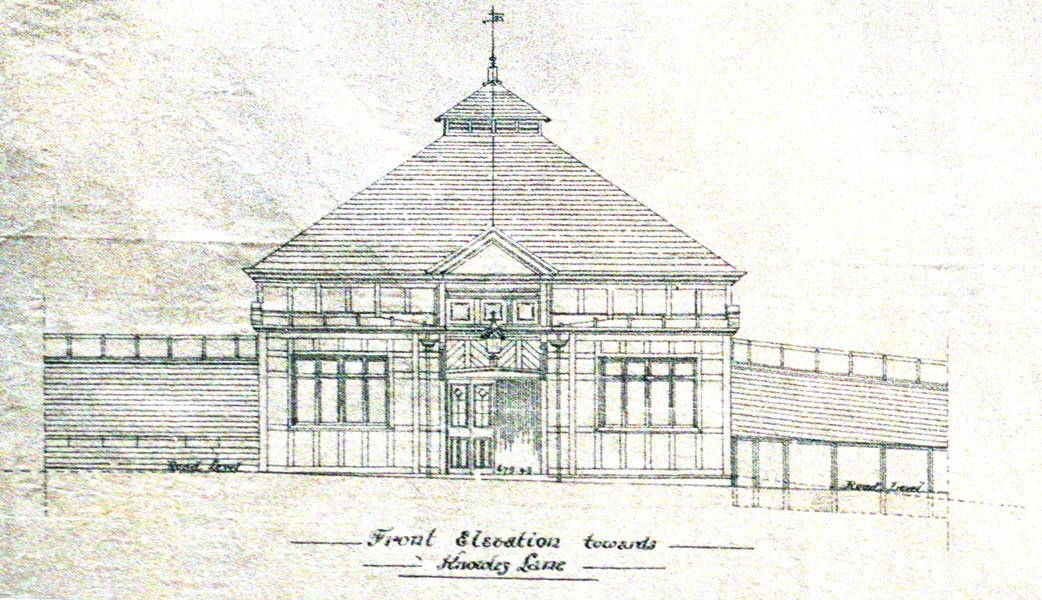
Dudley Hill Architects Drawings :
Bob Cockcroft
The drawings below are all of Dudley Hill, since it isn't there anymore
and the 1890's station was amazingly spectacular. It had a pentagonal
bridge level booking office topped by a lantern and covered bridges to
all four platform faces. All the platforms had canopies and waiting
rooms, but the island platform in the middle had a wood waiting room,
the other two were stone. I'm not certain why this was so, a tramway
tunnelled under the station at the Bradford end, but not under the
buildings. The ticket office building wasn't quite like that in the
drawing because it would have been possible to get off the station on
the outer Low Moor platform without paying. It's fair to say that the
drawing is close to the design except that the ticket office was built
by the exit door on the street. I haven't got any drawings of the goods
depot, only one photograph and it was quite a large structure.
 Dudley
Hill :
Bob Cockcroft Dudley
Hill :
Bob Cockcroft
Dudley Hill booking hall elevation towards Gildersome
platforms. |
 Dudley
Hill :
Bob Cockcroft Dudley
Hill :
Bob Cockcroft
Dudley Hill booking hall elevation towards Knowles Lane. |
_small.jpg) Dudley
Hill :
Bob Cockcroft Dudley
Hill :
Bob Cockcroft
Dudley Hill side platform elevation of west side (from
Gildersome)
The side building is the late survivor and the wooden island building
was an early casualty. (see below) |
_small.jpg) Dudley
Hill :
Bob Cockcroft Dudley
Hill :
Bob Cockcroft
Dudley Hill island platform elevation of east side (from
Low Moor)
It's an interesting station and would be a bugger to build at a layout,
nothing is flat, the Gildersome line climbs and the Low Moor one
declines. The platform at the stair end is substantially higher on one
side of the island platform than on the other. |
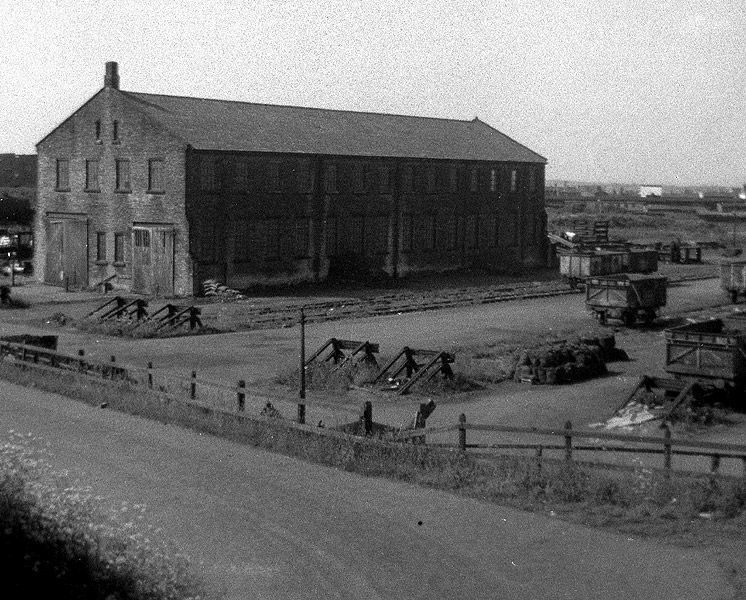
 Dudley
Hill goods shed (1967) :
Bob Cockcroft Dudley
Hill goods shed (1967) :
Bob Cockcroft
Dudley Hill goods shed 1967. |
 Dudley
Hill station, newspaper cutting (nd) : Andrew Wilson Dudley
Hill station, newspaper cutting (nd) : Andrew Wilson
View facing towards Laisterdyke. The wooden building on
the left of photo can be seen in the architect drawings above. |
 Dudley
Hill (c1960)
: Dennis Sefton Dudley
Hill (c1960)
: Dennis Sefton
View facing towards Laisterdyke. |
 Dudley
Hill (c1960)
: Dennis Sefton Dudley
Hill (c1960)
: Dennis Sefton
View facing towards Laisterdyke. |
 Dudley
Hill (1967) :
Bob Cockcroft Dudley
Hill (1967) :
Bob Cockcroft
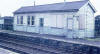
Dudley Hill Bradford side platform building 1967. |
 Dudley Hill (nd) : Alf Mullins Dudley Hill (nd) : Alf Mullins
Dudley Hill station. |
 Dudley
Hill :
Bob Cockcroft Dudley
Hill :
Bob Cockcroft
Dudley Hill booking office foundations view to Low Moor. |
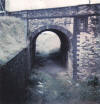
 Dudley
Hill : (c1960) : Dennis Sefton Dudley
Hill : (c1960) : Dennis Sefton
Facing north, back towards Dudley Hill station on the
Gildersome line.
Stone built station building visible through the right hand bridge. |
 Tong
Street (c1978) : Colin Cross Tong
Street (c1978) : Colin Cross
The line being infilled under Tong Street. |
 Dawson
Lane (c1978) : Colin Cross Dawson
Lane (c1978) : Colin Cross
The line being infilled under Dawson Lane. |
 Dudley
Hill : (c1960) : Dennis Sefton Dudley
Hill : (c1960) : Dennis Sefton
Further back facing north, back towards Dudley Hill
station on the Gildersome line. The Low moor line passes below here in a
short tunnel. Top of the tunnel stone work visible on the right of the
photo. The 3 road bridges are - directly in front is Dawson lane, then
Tong Street & just visible beyond is Knowles lane. The station is
situated just the other side of Knowles lane. (See photos below) |
Dudley Hill to Low Moor Section
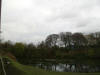
 Dudley Hill (nd) : Alf Mullins Dudley Hill (nd) : Alf Mullins
Dudley Hill to Low Moor looking towards Low Moor. |
 Tong
Street (c1978) : Colin Cross Tong
Street (c1978) : Colin Cross
The line down to Low Moor being infilled as it passes
under Tong Street.
It also passed under the other, main line, it is of course now completely
infilled. |
 Dudley Hill (nd) : Alf Mullins Dudley Hill (nd) : Alf Mullins
Dudley Hill to Low Moor looking towards Dudley Hill. The
bridge under Tong street. |
 Tong
street (24-11-13) : Carbootnut Tong
street (24-11-13) : Carbootnut
Facing south, the bridge under Tong street at the junction with Dawson
lane.
The two mile line opened and closed in a space of just 24
years. |
 Dawson
lane (24-11-13) : Carbootnut Dawson
lane (24-11-13) : Carbootnut
Facing south from Dawson lane. Looking along the line of
the track. |
 Bridge
(24-11-13) : Carbootnut Bridge
(24-11-13) : Carbootnut
Bridge over Shetcliffe Lane. |
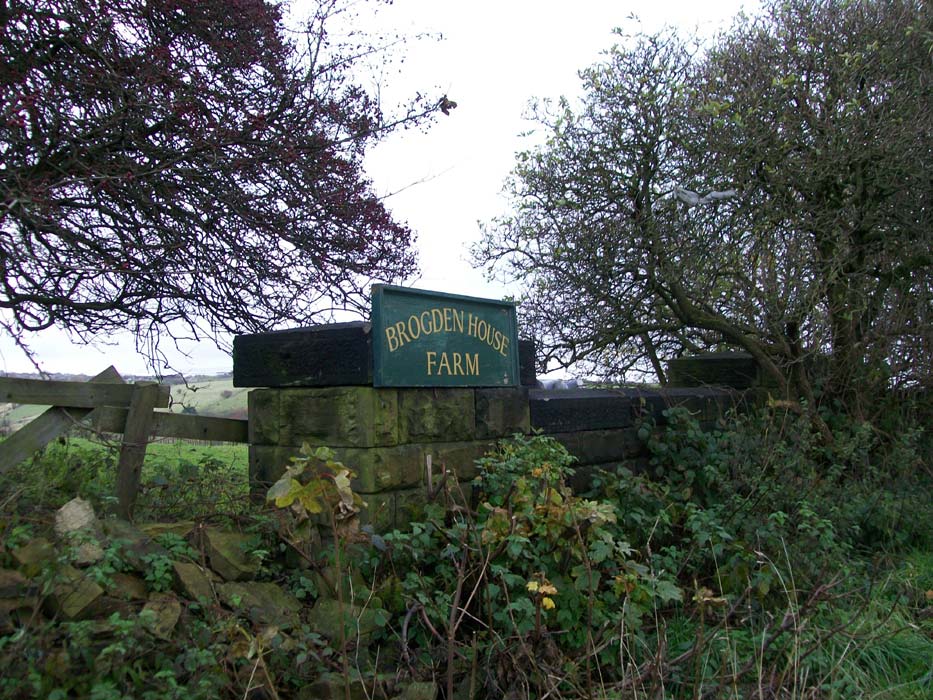
 Farm
access (24-11-13) : Carbootnut Farm
access (24-11-13) : Carbootnut
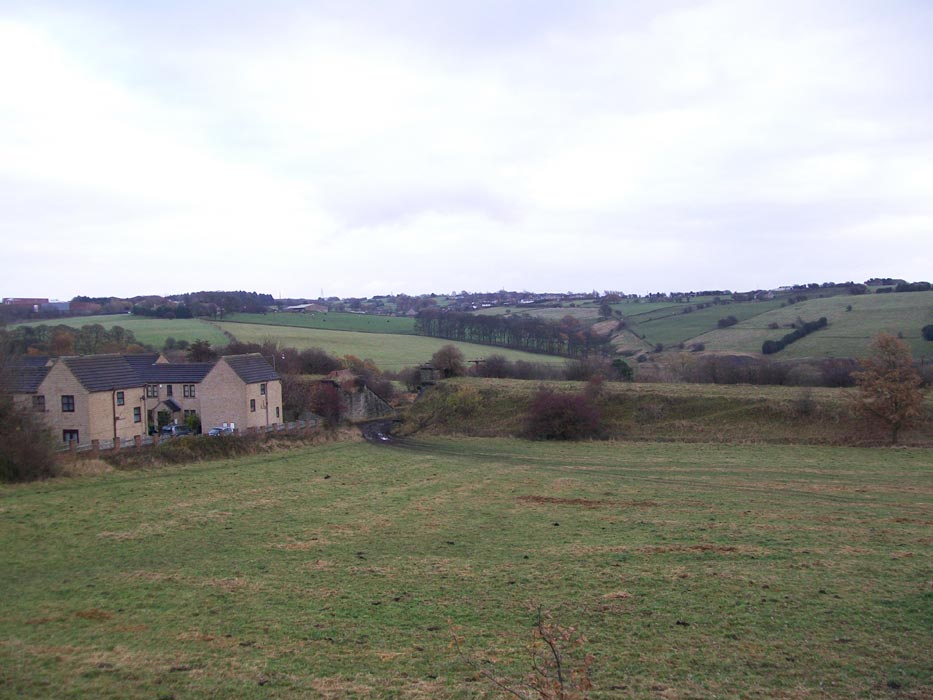
Farm access through the embankment. The houses behind are
on Meadowcroft Rise. |
 Embankment
(24-11-13) : Carbootnut Embankment
(24-11-13) : Carbootnut
The houses are on Fieldhurst court. |
 Bridge(24-11-13)
: Carbootnut Bridge(24-11-13)
: Carbootnut
Farm track over bridge near Spen View lane. |
 Bridge
(24-11-13) : Carbootnut Bridge
(24-11-13) : Carbootnut
Over bridge at the junction of Spen View lane, Boy lane &
Greenfield lane.. |
 Bridge
(24-11-13) : Carbootnut Bridge
(24-11-13) : Carbootnut
Over bridge at Greenfield lane. |
 Embankment
(24-11-13) : Carbootnut Embankment
(24-11-13) : Carbootnut
The embankment, facing south from Rockhill lane. The
buildings are on the Euroway industrial estate. |
 Low
Moor junction (24-11-13) : Carbootnut Low
Moor junction (24-11-13) : Carbootnut
Low Moor junction on the L&Y Halifax to Bradford line. |
Dudley Hill to Ardsley section
East
Bierley
 Edgemoor
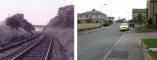
Close : Dennis Sefton (c1960) / Graham Smith (2010) Edgemoor
Close : Dennis Sefton (c1960) / Graham Smith (2010)
Then & now same location, facing west toward Dudley Hill.
The two bridges visible on the old photo are Toftshaw lane & Stead road
respectively. |
 Toftshaw
Lane bridge (c1960) : Dennis Sefton Toftshaw
Lane bridge (c1960) : Dennis Sefton
Note : Colin Cross
In this previously unidentified location, the photograph
was taken from Toftshaw Lane bridge looking towards Dudley Hill. |
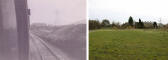
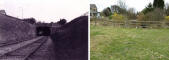
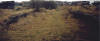
 Edgemoor
Close : Dennis Sefton (c1960) / Graham Smith (2010) Edgemoor
Close : Dennis Sefton (c1960) / Graham Smith (2010)
Then & now same location, facing east towards Birkenshaw
& Tong. Toftshaw Moor follows the line of the old railway. |
 Tong
Street : Dennis Sefton (c1960) / Graham Smith (2010) Tong
Street : Dennis Sefton (c1960) / Graham Smith (2010)
Then & now same location facing towards Dudley Hill.
Photographed from a footpath behind Mulberry Court,
near the junction of Tong street, Westgate Hill street & Bradford road. |
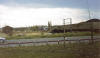
 East
Bierley Bradford Road : Dennis Sefton (c1960) / Graham Smith (2010) East
Bierley Bradford Road : Dennis Sefton (c1960) / Graham Smith (2010)
Then & now same location. Just behind Mulberry Court
off Bradford road, facing towards Birkenshaw & Tong. |
  East
Bierley Bradford Road : Dennis Sefton (c1960) / Graham Smith (2010) East
Bierley Bradford Road : Dennis Sefton (c1960) / Graham Smith (2010)
Same location to above photos, on the other side of the
tracks, facing towards Birkenshaw & Tong.
The houses behind are on Bradford road. |
 East
Bierley : Dennis Sefton (c1960) / Graham Smith (2010) East
Bierley : Dennis Sefton (c1960) / Graham Smith (2010)
Then & now same location. Heading towards Birkenshaw
& Tong, approaching Birkenshaw tunnel, East Bierley.
The row of houses next to the pylon are on South View road. The
crossroads with Bradford road is on top of Birkenshaw tunnel. |
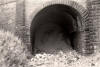
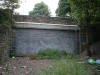
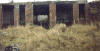
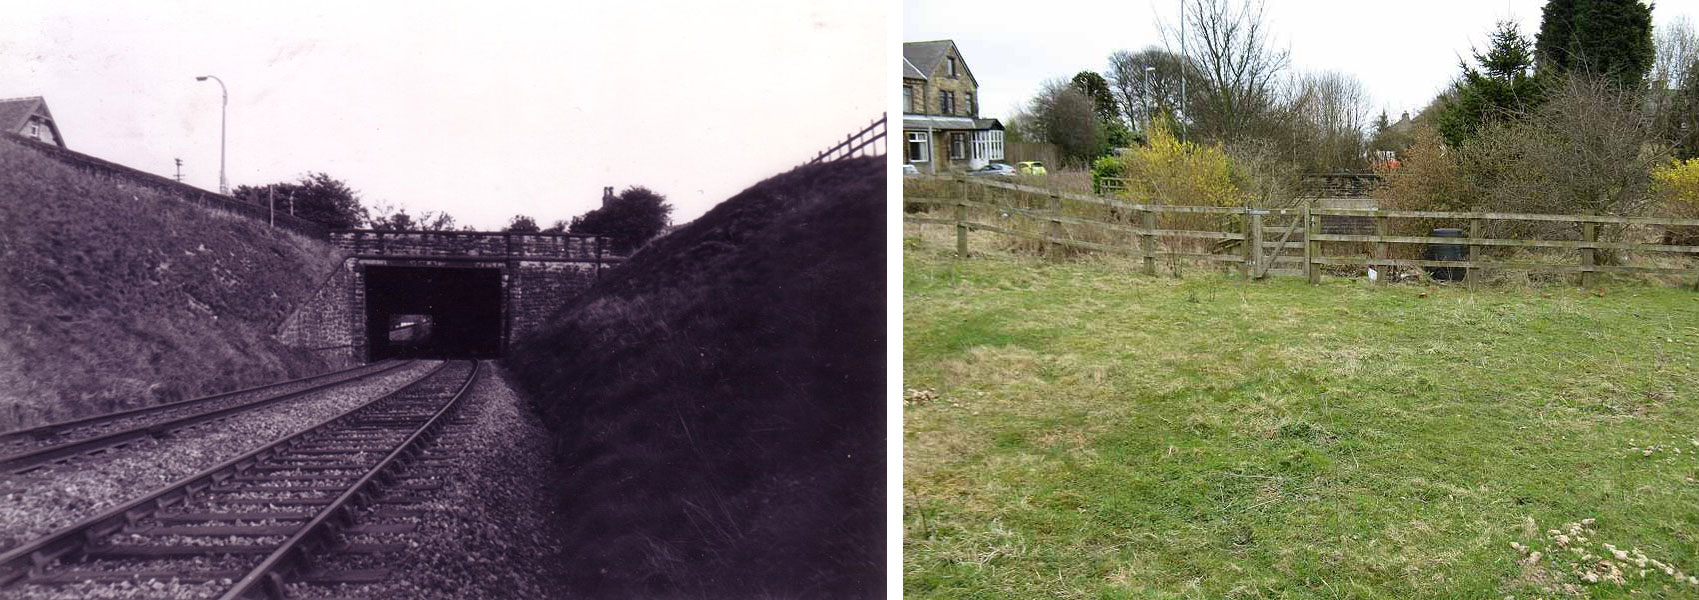
 Birkenshaw
tunnel, East
Bierley : Dennis Sefton (c1960) / Graham Smith (2010) Birkenshaw
tunnel, East
Bierley : Dennis Sefton (c1960) / Graham Smith (2010)
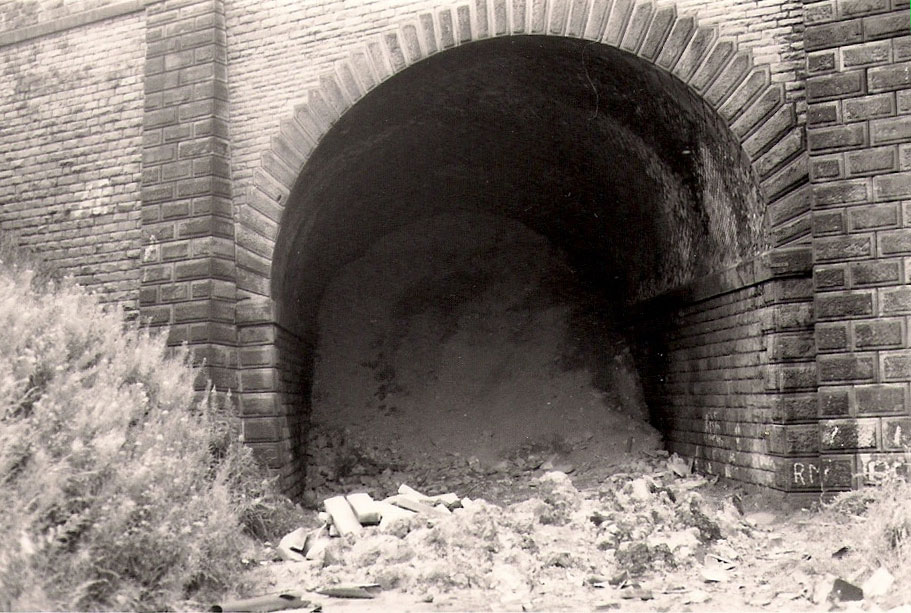
Then & now same location. The north portal of
the106yard Birkenshaw tunnel. |
 Birkenshaw
tunnel, East
Bierley (30-07-06) : Andrew Stopford Birkenshaw
tunnel, East
Bierley (30-07-06) : Andrew Stopford |
 Birkenshaw
tunnel, East
Bierley (30-07-06) : Andrew Stopford Birkenshaw
tunnel, East
Bierley (30-07-06) : Andrew Stopford |
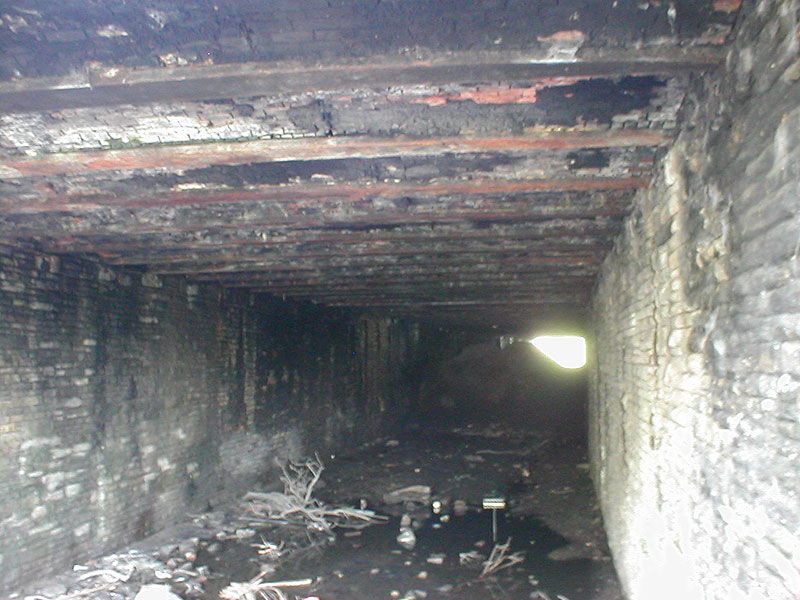
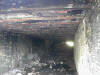 Birkenshaw
tunnel, East
Bierley (1980s) : Alan Thompson Birkenshaw
tunnel, East
Bierley (1980s) : Alan Thompson
The cut and cover tunnel under Bradford Rd East Bierley taken before the
infill.
Known locally as Birkenshaw tunnel, it is at Bierley Bar, the cross road
of North View Rd and Bradford Rd A651. |
_small.jpg) Birkenshaw
tunnel, East
Bierley (1980s) : Alan Thompson Birkenshaw
tunnel, East
Bierley (1980s) : Alan Thompson |
_small.jpg) Birkenshaw
tunnel, East
Bierley (1980s) : Alan Thompson Birkenshaw
tunnel, East
Bierley (1980s) : Alan Thompson |
 Birkenshaw
tunnel, East
Bierley (30-07-06) : Andrew Stopford Birkenshaw
tunnel, East
Bierley (30-07-06) : Andrew Stopford
View from on top of the south portal. The houses in front are on the
A651 Bradford road. |
 Moorlands
road bridge (23-07-11) : David Webdale Moorlands
road bridge (23-07-11) : David Webdale
A hundred & fifty metres or so from East Brierley tunnel. Facing north,
East Brierley to the left, Birkenshaw & Tong to the right, remnants of a
bridge.
Not much to see now all landscaped & filled in. Originally four tracks
under here, the up & down lines with a siding on either side.
A little
further towards East Brierley a hundred or so yards of cutting is still
intact. |
Birkenshaw & Tong
/Birkenshaw_small.jpg) Opened
20-08-1856. Closed 05-10-1953. Opened
20-08-1856. Closed 05-10-1953.
Birkenshaw & Tong station map (1850) :
Malcolm Mallison
Plans of station taken from 1850 6 inch to the mile map. |
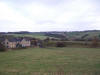
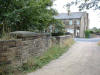
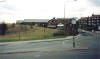
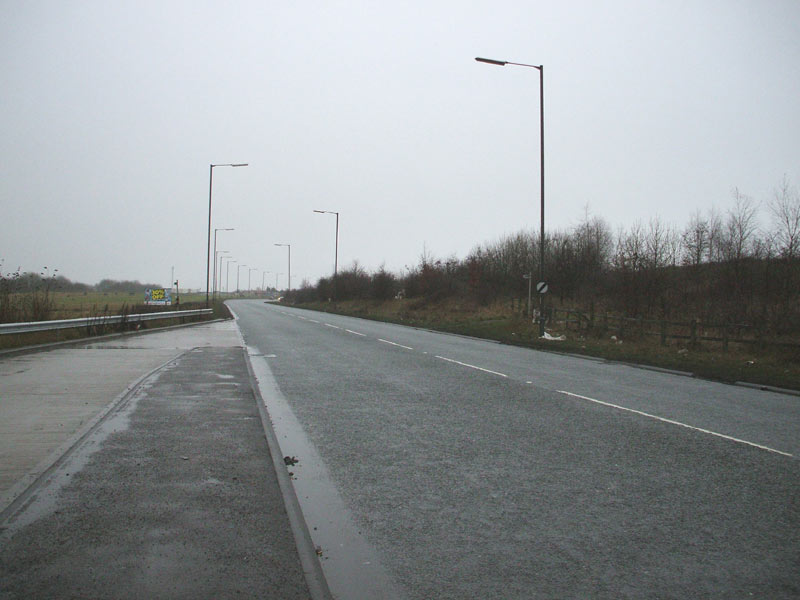
 Birkenshaw
& Tong station site (23-07-11) : David Webdale Birkenshaw
& Tong station site (23-07-11) : David Webdale
Facing west, the view into the station site from Station lane or Cross
lane. Not sure where one turns into the other. |
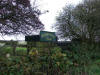
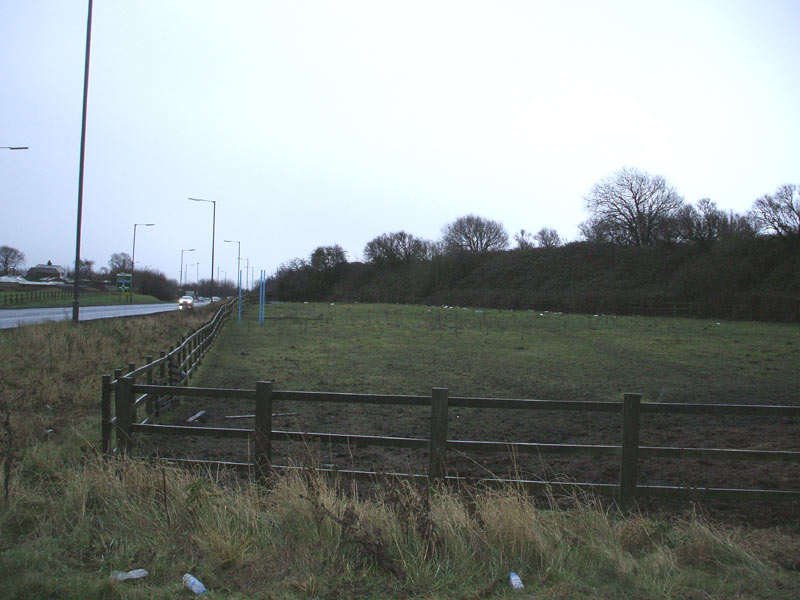
 Birkenshaw
& Tong station site (23-07-11) : David Webdale Birkenshaw
& Tong station site (23-07-11) : David Webdale
Facing North up Station lane or Cross lane. The station was on the left.
A level crossing existed here with a signal box somewhere in the middle
of the road. |
Drighlington
and Adwalton Station
  Opened
20-08-1856 Closed 30-12-1961 Opened
20-08-1856 Closed 30-12-1961
Drighlington and Adwalton station (c1960) :
Dennis Sefton See also Adwalton
junction to Wakefield |
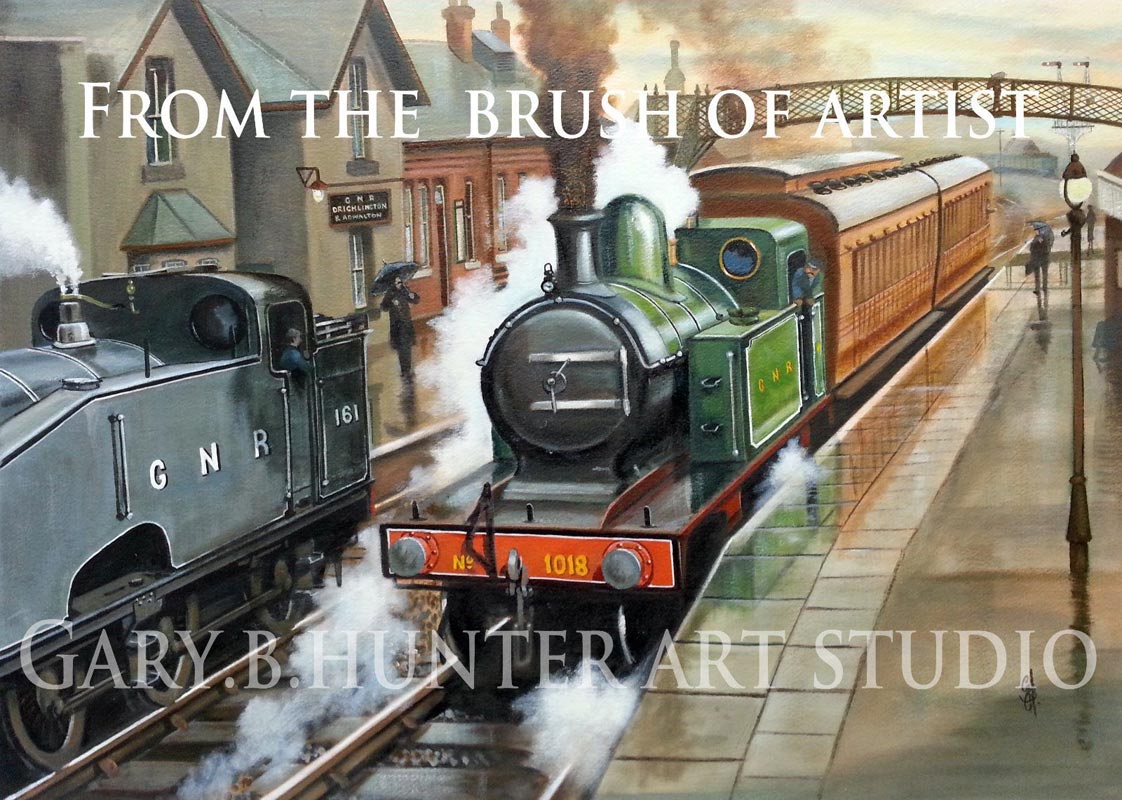
 Drighlington and Adwalton
station painting : Gary Hunter Drighlington and Adwalton
station painting : Gary Hunter |
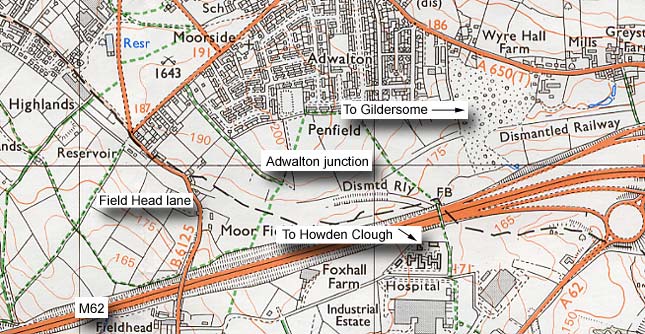
 Adwalton junction
OS map 1985 Adwalton junction
OS map 1985 |
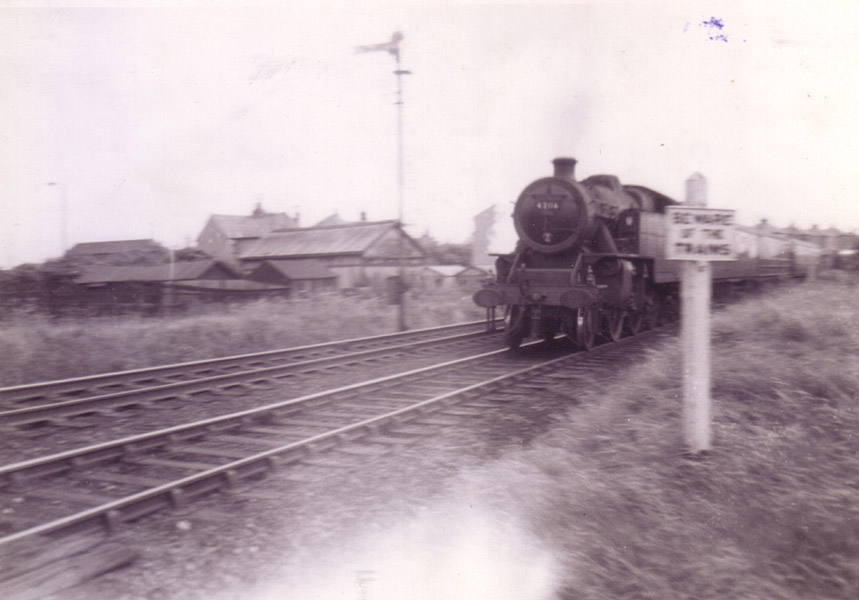
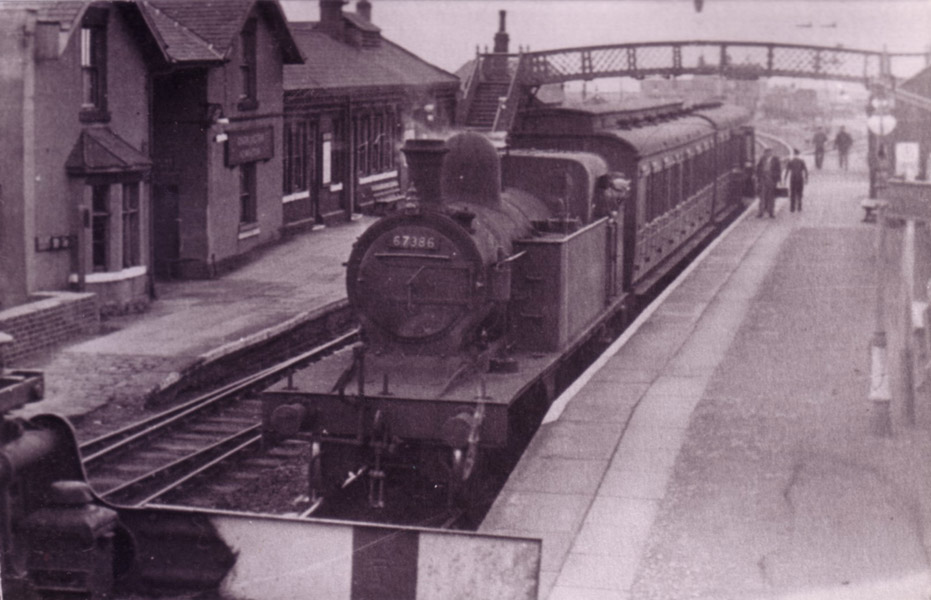
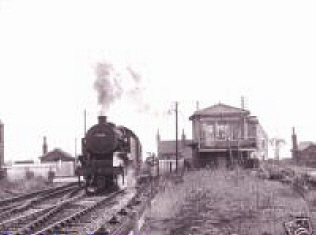
Adwalton c1959 :
Melvyn Aveyard
 This is loco No 42116 at Adwalton junction.
Just behind the train the Adwalton to Dewsbury line,
joins the Adwalton to Tingley line,
which ran through Gildersome & Morley top stations.
I don't know the exact date of the picture,
but believe it to be about 1959.
Adwalton station is just in front of the train,
the picture may well have been taken from the platform.
The road crossing the line is Field Head lane. This is loco No 42116 at Adwalton junction.
Just behind the train the Adwalton to Dewsbury line,
joins the Adwalton to Tingley line,
which ran through Gildersome & Morley top stations.
I don't know the exact date of the picture,
but believe it to be about 1959.
Adwalton station is just in front of the train,
the picture may well have been taken from the platform.
The road crossing the line is Field Head lane. |
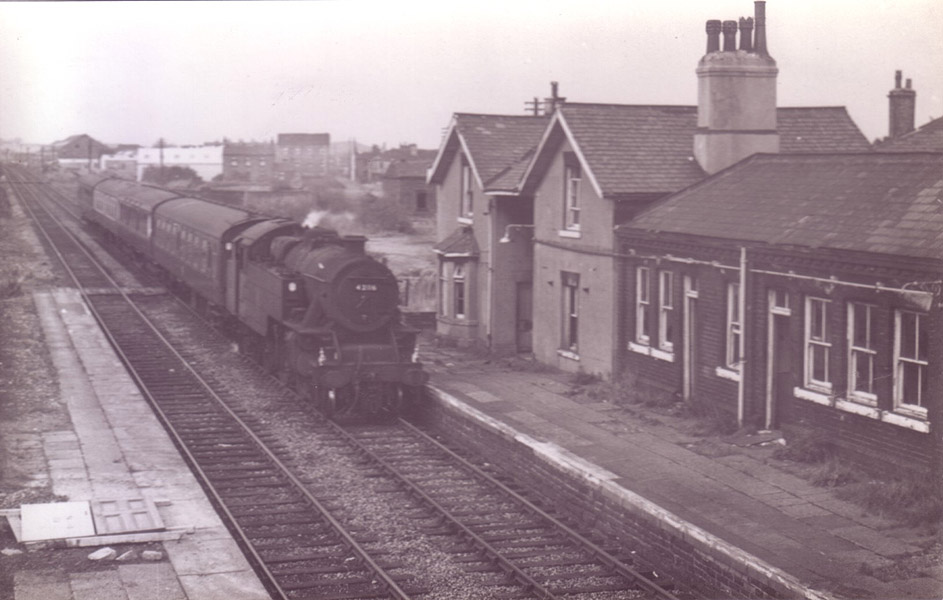
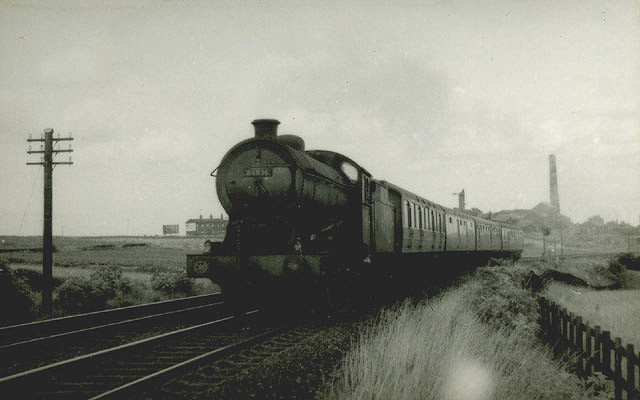
 Adwalton junction : Maggie Blanck
website -
www.maggieblanck.com/Land/PhotosBirstall.html Adwalton junction : Maggie Blanck
website -
www.maggieblanck.com/Land/PhotosBirstall.html
Train approaching Adwalton junction, running from Morley Top via
Gildersome.
The old brickworks chimney visible in the background, still
in existence, this building is now the Brickworks pub (See next photo)
The houses just visible to the front left of the loco are on Wakefield
road at Drighlington. |
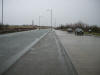 Adwalton
junction (24-12-07) : Andrew Stopford Adwalton
junction (24-12-07) : Andrew Stopford
A650 Drighlington bypass built on the trackbed of the Adwalton
Junction-Bradford line.
This is approximately the site of Adwalton Junction, looking towards
Morley.
Brickworks chimney visible in the background. |
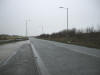 Adwalton
junction (24-12-07) :
Andrew Stopford Adwalton
junction (24-12-07) :
Andrew Stopford
A650 same spot - Looking towards
Drighlington Station & Bradford. |
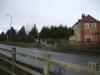 Drighlington
(24-12-07) : Andrew Stopford Drighlington
(24-12-07) : Andrew Stopford
Original crossing point for the B6125. Bypass where the tracks once
were. Bradford to the left. |
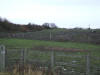
 Drighlington
(24-12-07) : Andrew Stopford Drighlington
(24-12-07) : Andrew Stopford
Embankment, Adwalton Junction-Bradford line, between Drighlington &
Birkenshaw (looking towards Drighlington). |
 Drighlington
(24-12-07) : Andrew Stopford Drighlington
(24-12-07) : Andrew Stopford
Looking towards Birkenshaw. |
 Drighlington
(24-12-07) : Andrew Stopford Drighlington
(24-12-07) : Andrew Stopford
Drighlington & Adwalton Station site - is this a surviving station lamp
post? A650 bypass behind the fence. |
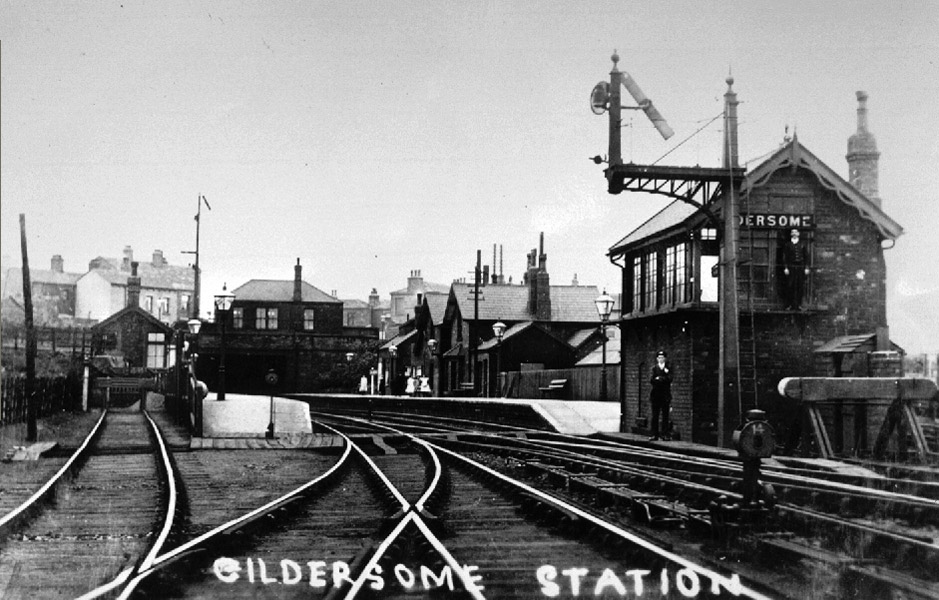
/027%20Gildersome_small.jpg) Gildersome Station Gildersome Station
Opened
20-08-1856 Closed 13-06-1955 Freight 13-03-1968
Gildersome Station (1890) : Malcolm
Mallison
6 inch maps from the 1890 survey. |
Gildersome Station (c1900) : Nick Franks
 I
work for the contractor carrying out junction improvement works at the
M62 J27 Gildersome roundabouts I
work for the contractor carrying out junction improvement works at the
M62 J27 Gildersome roundabouts
and as part of the scheme the situation
of the existing redundant tunnel is to be investigated.
The works are
currently on hold pending a solution to treat the tunnel such that the
new roads are safe from future collapse. |
 Gildersome
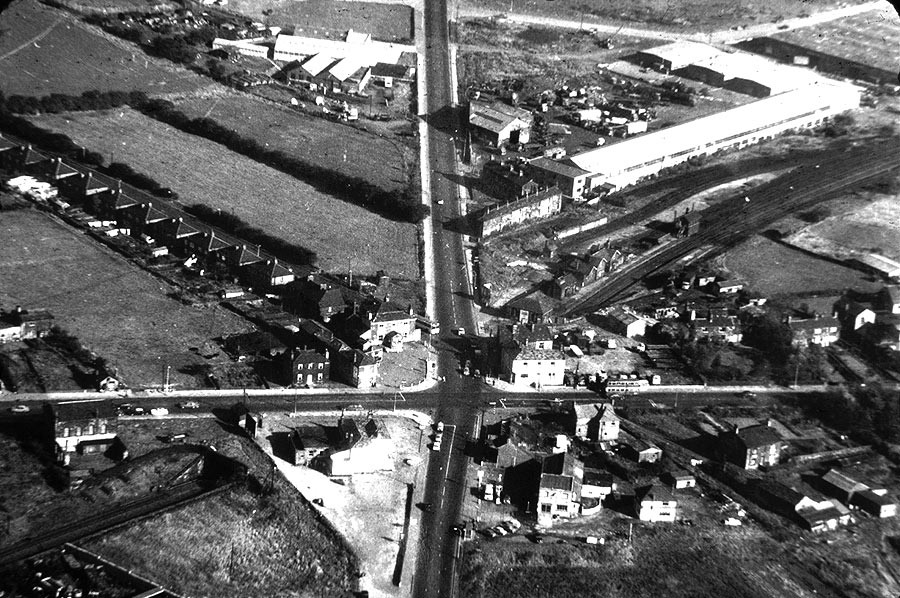
Station & Crossroads (1965) : Nick Franks Gildersome
Station & Crossroads (1965) : Nick Franks |
 Gildersome
Station & Crossroads (c1900) : Nick Franks Gildersome
Station & Crossroads (c1900) : Nick Franks |
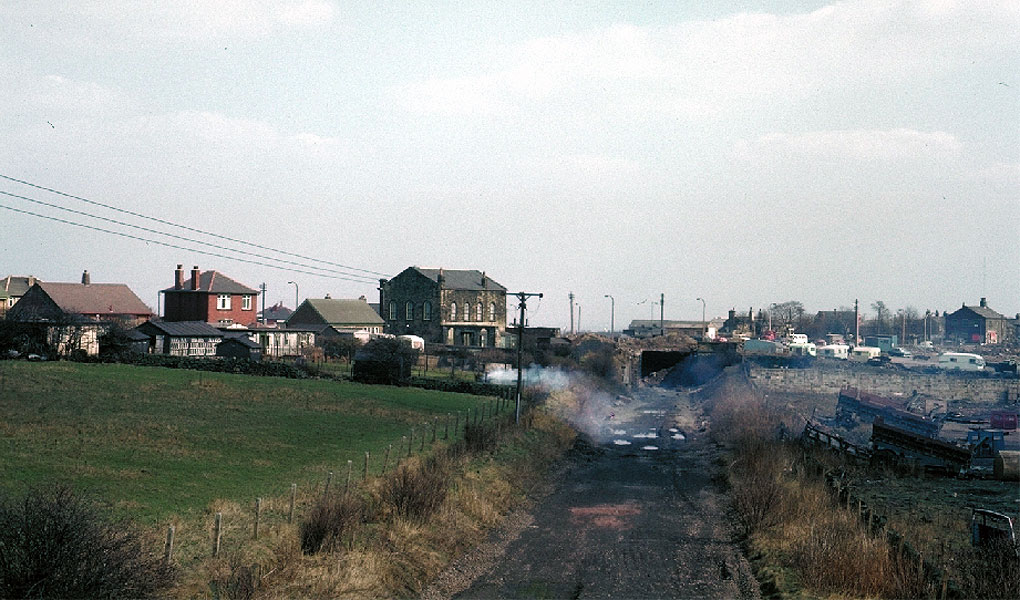
 Gildersome
Station & Crossroads (1968) : Nick Franks Gildersome
Station & Crossroads (1968) : Nick Franks |
/026%20Morley%20Top_small.jpg) Morley Top Station Morley Top Station
Opened 10-10-1857. Closed 31-12-1960. Freight
1969.
Morley Top Station (1890) : Malcolm
Mallison
6 inch maps from the 1890 survey. |
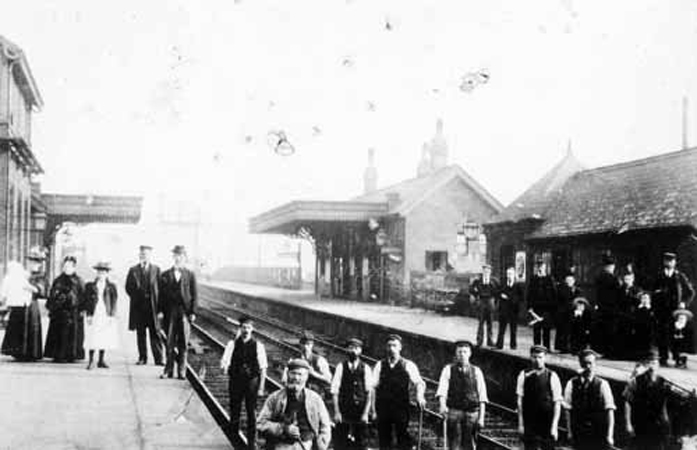
1 Morley
Top Station (c1900) : Andrew Dickinson
 The platform, all I know it was
taken in the
early 1900's.
My grandmother got on trains from here to go to trips to Blackpool. The station was improved in 1904 with a new booking office and subway.
Most of the site of the station and the High Street and Bridge Street
Viaducts have been demolished.
The goods depot survived & stands next to Chartist's Way, a new road
built on the old railway line. The platform, all I know it was
taken in the
early 1900's.
My grandmother got on trains from here to go to trips to Blackpool. The station was improved in 1904 with a new booking office and subway.
Most of the site of the station and the High Street and Bridge Street
Viaducts have been demolished.
The goods depot survived & stands next to Chartist's Way, a new road
built on the old railway line.
(See Morley Top goods depot photo's
below) |
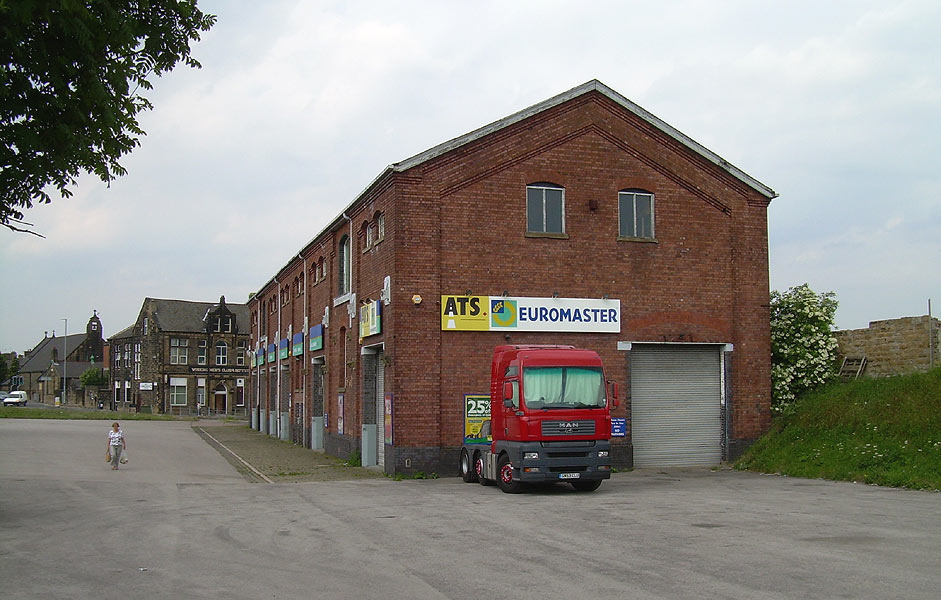
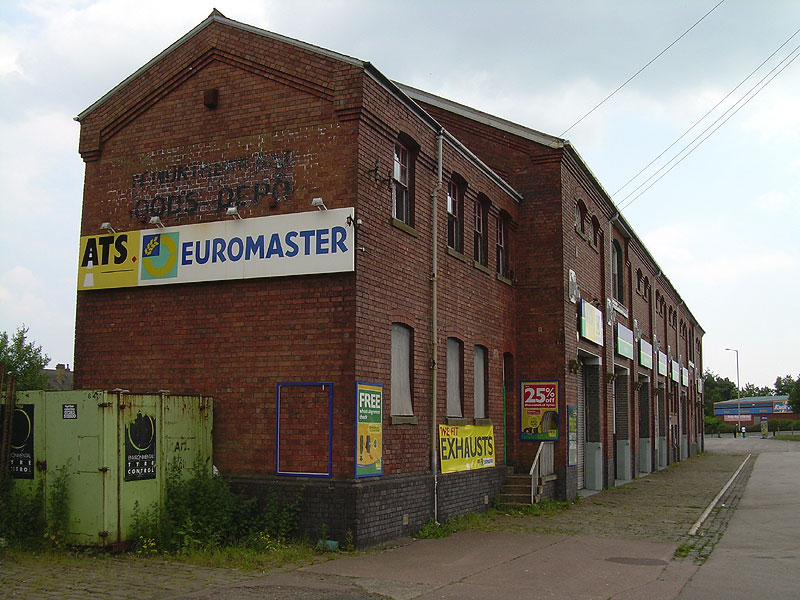
2 Morley Top Station (c1960 - 70) : Andrew Dickinson
 Taken from the Bottom of Fountain St.
Bridge and
looks towards Tingley, I think this may have been taken in the late 60's, early 70's but I'm
not 100% sure. You can just see the edges of the Station
platform in
the distance.
These tracks are long gone
(ever I don't remember them)
Now
an ATS garage and a Road in the place of the Tracks, this area is
unrecognisable from what
the pics shows, to the left
is Morley town
Centre Taken from the Bottom of Fountain St.
Bridge and
looks towards Tingley, I think this may have been taken in the late 60's, early 70's but I'm
not 100% sure. You can just see the edges of the Station
platform in
the distance.
These tracks are long gone
(ever I don't remember them)
Now
an ATS garage and a Road in the place of the Tracks, this area is
unrecognisable from what
the pics shows, to the left
is Morley town
Centre |
 3 Little
Fountain Street (c1960 - 70) : Andrew Dickinson 3 Little
Fountain Street (c1960 - 70) : Andrew Dickinson
More or less
Behind
Picture above,
Taken a little bit Earlier. These Tracks used to run on what is now Morley
High School front field, the houses over the wall
are on Little Fountain
St. but have since been demolished.
|
 4 Bridge
Street (c1960) : Andrew Dickinson 4 Bridge
Street (c1960) : Andrew Dickinson
This Bridge has
long gone, with
only one end still remaining
just off High St.
The train is heading for
Blackpool,
Taken in the 1960's the Pub on the left next to the Blue car is
Called the Albion
and just behind the mill is the Station its self.
Behind
the Picture the road carries on to Tingly bar. (See next photo's) |
 Bridge street (1987)
: Simon Edgerton Bridge street (1987)
: Simon Edgerton
Looking towards Bridge St, the second bridge would have gone across the
road at this point,
instead of explaining, it would be better to view see Andrew Dickinson's
picture 4 above
and use the Albion pub as reference. |
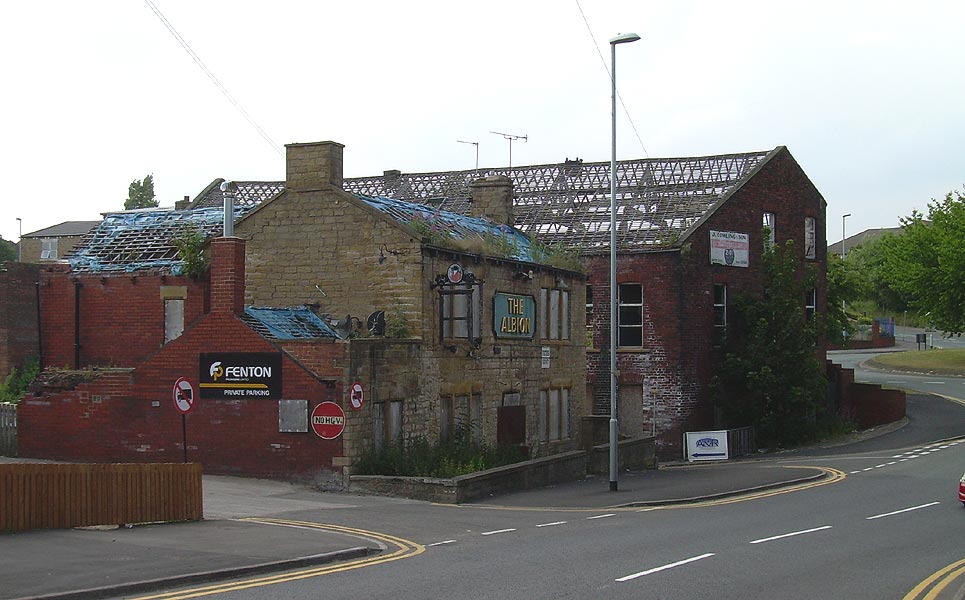
 Bridge
Street (26-06-10) : David Webdale Bridge
Street (26-06-10) : David Webdale
Close up of the Albion & Mill. (See above photo) Soon to be gone by the
look of things. |
 Mill
(26-06-10) : David Webdale Mill
(26-06-10) : David Webdale
The mill taken from under where the viaduct would be, next to the High
street roundabout. The right hand corner of the building looks to be
sliced off to make way for the viaduct. The remaining part of the
viaduct just visible to the right behind that tree, see next photo.
The
red brick wall marks the alignment. |
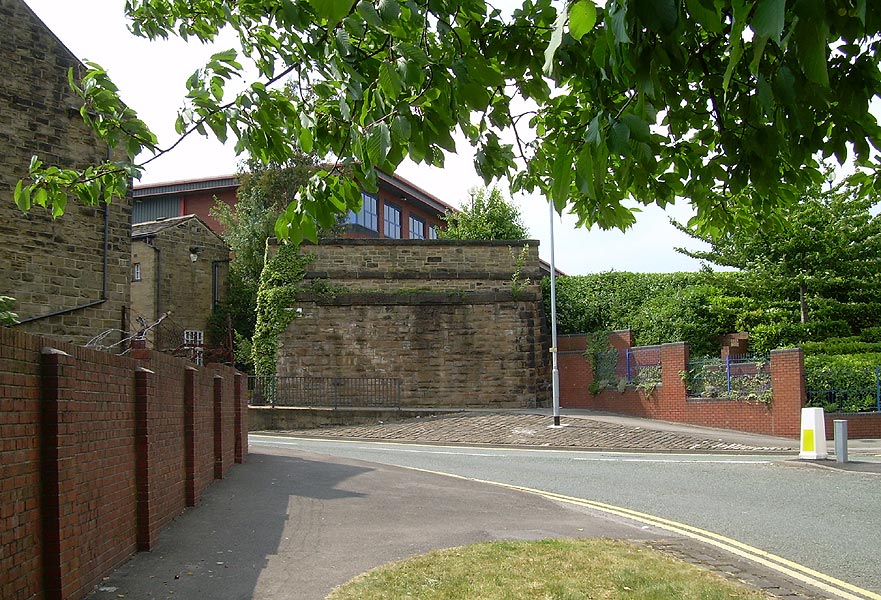
 Viaduct
(26-06-10) : David Webdale Viaduct
(26-06-10) : David Webdale
The remaining part of the viaduct. High street roundabout to the right.
The station was situated on top. (See Simon Edgerton's photo below). |
 Morley
Top (1974) : Simon Edgerton Morley
Top (1974) : Simon Edgerton
Morley Top Station view with bridge abutment in
view, Bridge dismantled in 1971. |
 Viaduct
(26-06-10) : David Webdale Viaduct
(26-06-10) : David Webdale
Closer view of the remaining part of the viaduct. Morley top station &
sidings were on top here.
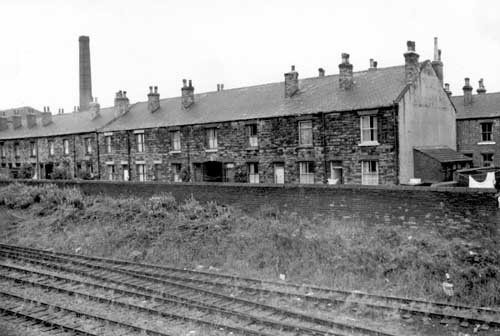
Railway workers houses on the left. |
 High street bridge (1987)
: Simon Edgerton High street bridge (1987)
: Simon Edgerton
Remains of the bridge abutment which crossed High St.
Originally before the roundabout was built, High St would have continued
towards the camera.
Part of the station is visible along with original railway workers
houses. |
 Morley
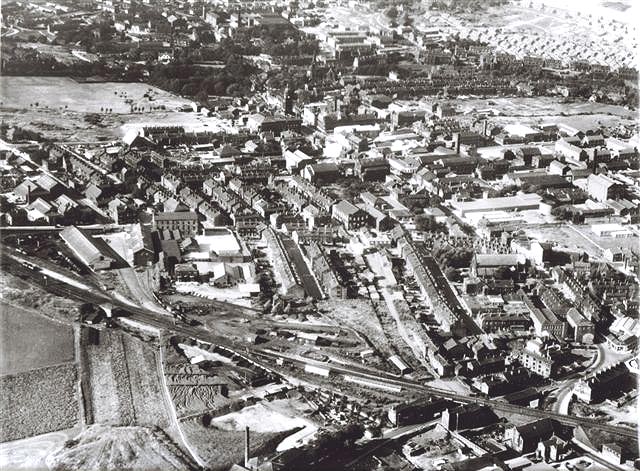
Top (1968) : Simon Edgerton Morley
Top (1968) : Simon Edgerton
Aerial photo of Morley Top Station taken in 1968, shortly before the
track was dismantled. |
 Morley
Top (26-06-10) : David Webdale Morley
Top (26-06-10) : David Webdale
The station site today, taken from the end of Great Northern street at
junction with Chartists way. |
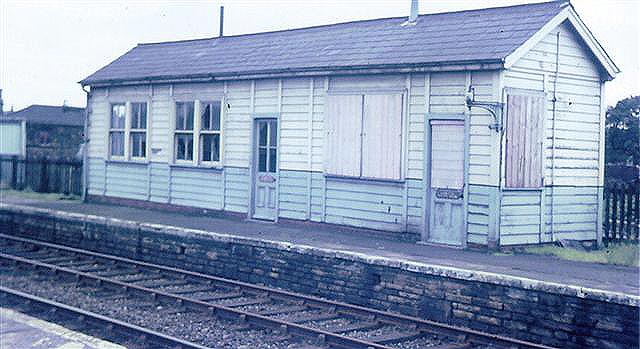
 Station
building (1968) : Simon Edgerton Station
building (1968) : Simon Edgerton |
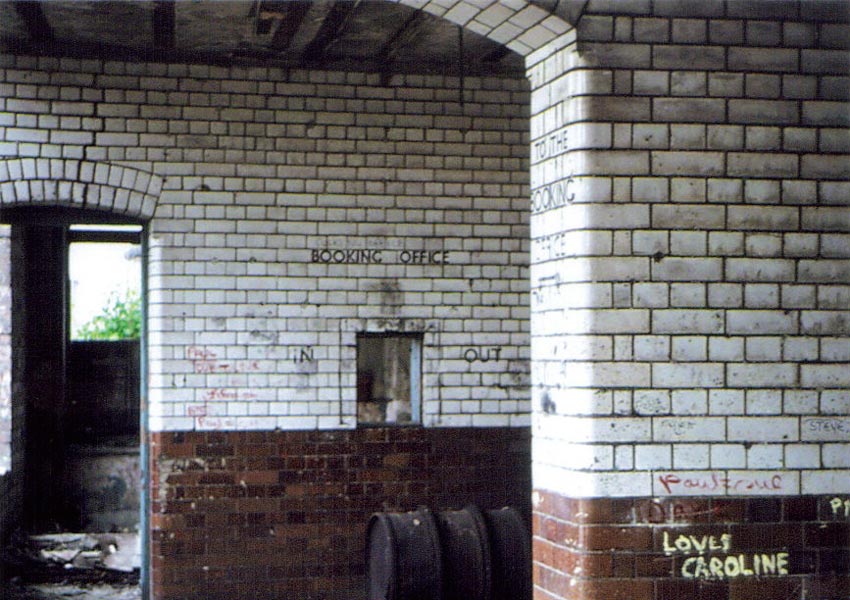
 Morley
Top 16 (1974) : Simon Edgerton Morley
Top 16 (1974) : Simon Edgerton
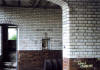
View of the Booking Office from 1974, Typical
tilled wall for a GNR station that still survived well into the 80's |
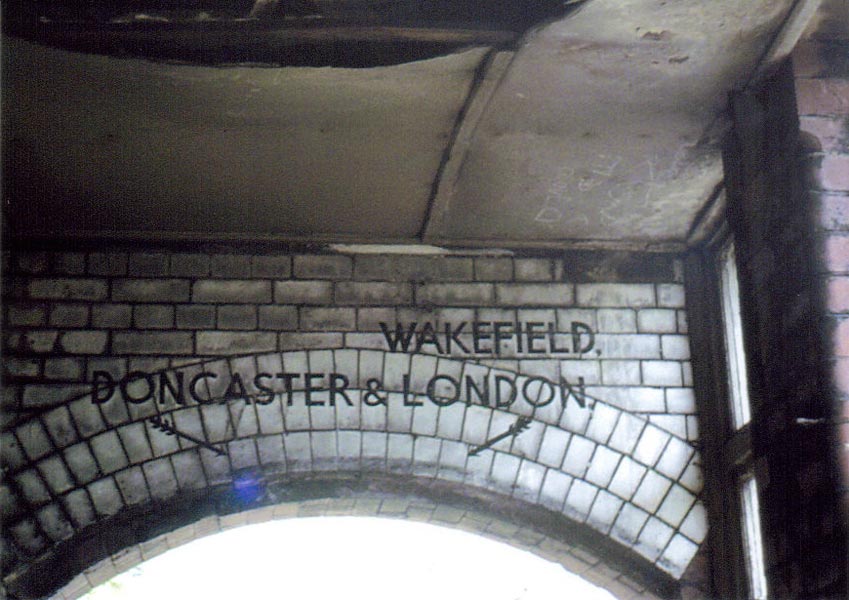
 Morley
Top 17 (1974) : Simon Edgerton Morley
Top 17 (1974) : Simon Edgerton
Signs for London, Doncaster and Wakefield.
Seems incredible to find you could have gone to the capital city from
Morley Top not so long ago.
|
 Morley
Top 18 (1974) : Simon Edgerton Morley
Top 18 (1974) : Simon Edgerton
A view of the line to Wakefield from Morley Top,
this disused section would soon be demolished for a new roundabout. |
 Morley
Top 19 (1974) : Simon Edgerton Morley
Top 19 (1974) : Simon Edgerton
Morley Top Station in reasonable condition after
13 years of non-use. |
 Morley
Top 20 (1974) : Simon Edgerton Morley
Top 20 (1974) : Simon Edgerton |
Morley
Top 21 (1974) : Simon Edgerton
Morley Top Station view with bridge abutment in
view, Bridge dismantled in 1971. |
 Morley
Top 22 (1974) : Simon Edgerton Morley
Top 22 (1974) : Simon Edgerton
View of platform looking towards Great Northern
Street.
Note : David Webdale
The smart red brick building to the left of the
chimney in the background is the station masters house on Great Northern street. |
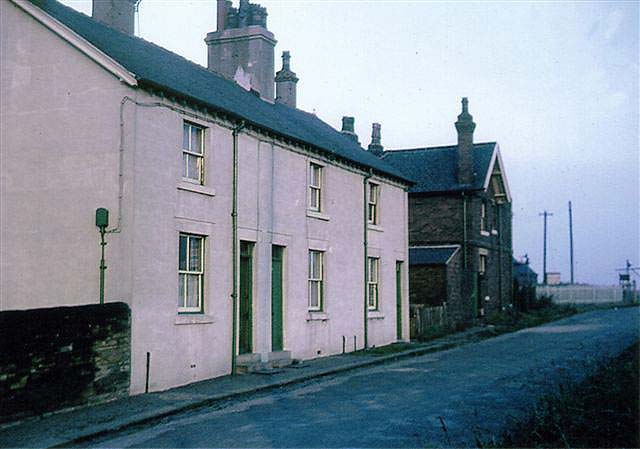
 Station
masters house (26-06-10) : David Webdale Station
masters house (26-06-10) : David Webdale
The station masters house on Great Northern street. |
 Morley
Top 23 (1974) : Simon Edgerton Morley
Top 23 (1974) : Simon Edgerton |
 Morley
Top 24 (1974) : Simon Edgerton Morley
Top 24 (1974) : Simon Edgerton
Looking across High Street from the forecourt of
Morley Top. Lumb Walshaw and White engineers opposite. |
 Morley
Top 25 (1974) : Simon Edgerton Morley
Top 25 (1974) : Simon Edgerton |
 Morley
Top 26 (1974) : Simon Edgerton Morley
Top 26 (1974) : Simon Edgerton |
 Morley
Top 27 (1974) : Simon Edgerton Morley
Top 27 (1974) : Simon Edgerton |
 Morley
Top 28 (1974) : Simon Edgerton Morley
Top 28 (1974) : Simon Edgerton |
 Morley
Top 29 (1974) : Simon Edgerton Morley
Top 29 (1974) : Simon Edgerton |
 Morley
Top 30 (1974) : Simon Edgerton Morley
Top 30 (1974) : Simon Edgerton |
 Morley
Top 31 (1974) : Simon Edgerton Morley
Top 31 (1974) : Simon Edgerton |
 Morley
Top 32 (1974) : Simon Edgerton Morley
Top 32 (1974) : Simon Edgerton |
 1
Morley Top facing west (1987) : Simon Edgerton 1
Morley Top facing west (1987) : Simon Edgerton
Looking West towards Bradford, the line would have
curved slightly towards the right,
on the left is a coal depot which originally had it's own siding.
|
 2
Morley Top facing east (1987) : Simon Edgerton 2
Morley Top facing east (1987) : Simon Edgerton
View of station in distance looking east towards Wakefield, small
maintenance building on the left, this was not the signal box as some
people thought at the time. The road in the foreground cuts across the
trackbed, this leads onto a private housing estate built in the 70's |
 3
Morley Top facing east (1987) : Simon Edgerton 3
Morley Top facing east (1987) : Simon Edgerton
Looking east towards Wakefield, remains of platform on either side,
just beyond is where the bridge was situated which crossed High St and
Bridge St.
|
 4
Morley Top (1987) : Simon Edgerton 4
Morley Top (1987) : Simon Edgerton
Main Station building was below the track with the subway visible for
the trains to Bradford. Although I dont have any photos of this.
If you
went inside, it still said 'Kings Booking Office' on the tiled wall. Not
sure what the station looked like when it was used.
if anyone has any
photos of this please contact myself
edgey2001@hotmail.com
or
lost.railways@ntlworld.com |
 5
Subway facing north east (1987) : Simon Edgerton 5
Subway facing north east (1987) : Simon Edgerton
This is looking north east from the top of the subway on the Bradford
platform,
this would have originally been covered by a wooden canopy.
The condition of the platforms at this end are still in reasonable
condition. |
 6
Morley Top (1987) : Simon Edgerton 6
Morley Top (1987) : Simon Edgerton
Looking towards Bradford, the line would have gone from left to right at
the top of the picture
with view of maintenance building. |
7
High street bridge (1987) : Simon Edgerton
Remains of the bridge abutment which crossed High St.
Originally before the roundabout was built, High St would have continued
towards the camera.
Part of the station is visible along with original railway workers
houses. |
8
Bridge street (1987) : Simon Edgerton
Looking towards Bridge St, the second bridge would have gone accross the
road at this point,
instead of explaining, it would be better to view Andrew Dickinsons
picture 4 further up this page
and use the Albion pub as reference. |
 9
Morley Top (1987) : Simon Edgerton 9
Morley Top (1987) : Simon Edgerton
Looking towards Wakefield from the end of the
platform, their would have been 2 bridges here, the first crossed High
St, the second Bridge St, you can see how the warehouse was constructed
at an angle to compensate for the railway bridge. |
 10
Morley Top (1987) : Simon Edgerton 10
Morley Top (1987) : Simon Edgerton
Looking further east is where the embankment for
the track is situated, this was partly cleared away when the bridge was
dismantled in 1971. |
 11
Morley Top (1987) : Simon Edgerton 11
Morley Top (1987) : Simon Edgerton
View of the ramp which went up to the platform for the trains to
Wakefield and London.
|
Morley
Top Goods Depot
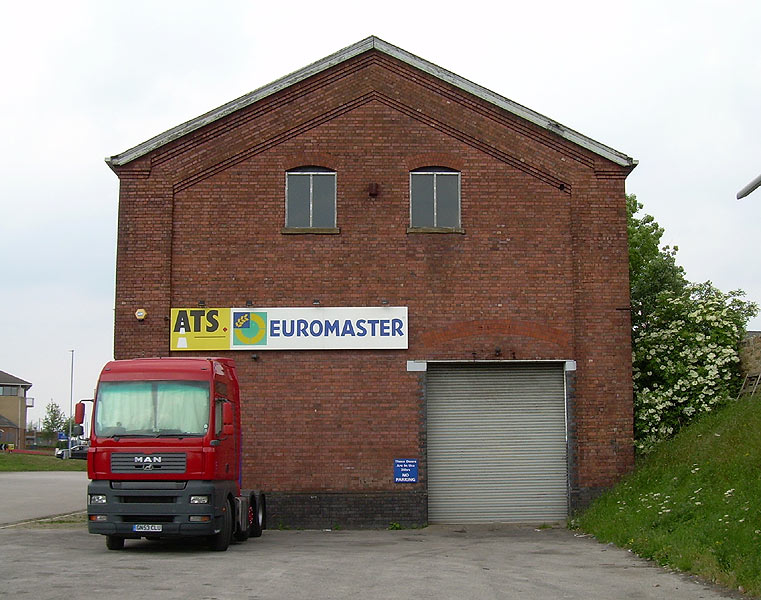
 Morley
Top Goods Depot (26-06-10) : David Webdale Morley
Top Goods Depot (26-06-10) : David Webdale
The depot taken from Chartists way facing north. Morley Top station
would have been 200 yards or so behind me.
The working men's club on Fountain street in the background. |
 Morley
Top Goods Depot (26-06-10) : David Webdale Morley
Top Goods Depot (26-06-10) : David Webdale
The side view showing 2 levels, arched windows & doorways with blue
engineering brick sides. |
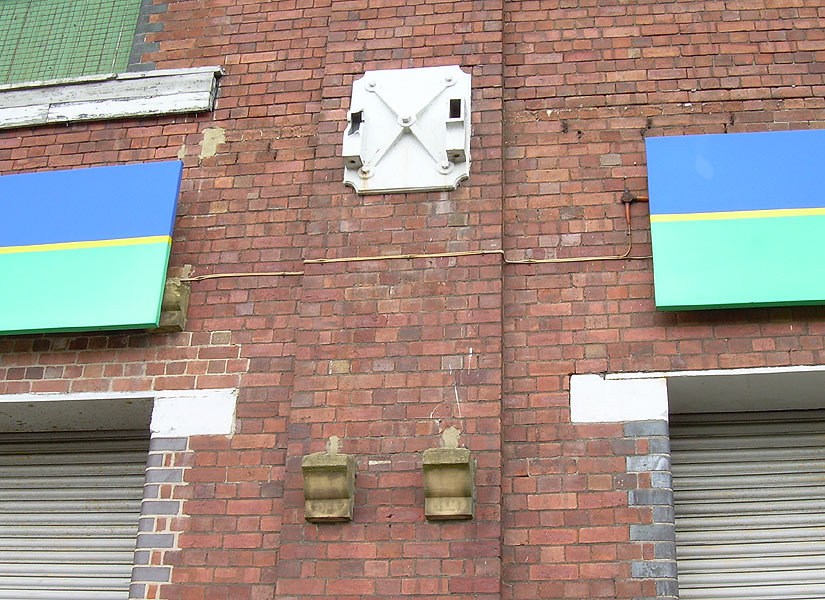
 Morley
Top Goods Depot (26-06-10) : David Webdale Morley
Top Goods Depot (26-06-10) : David Webdale
Close up of the side of the building showing one of the sets of stone
corbels & cast iron bracket canopy supports.
The small stone corbel on the left, just behind the sign, supported a
loading bay canopy. See Barbara Wards photo below. |
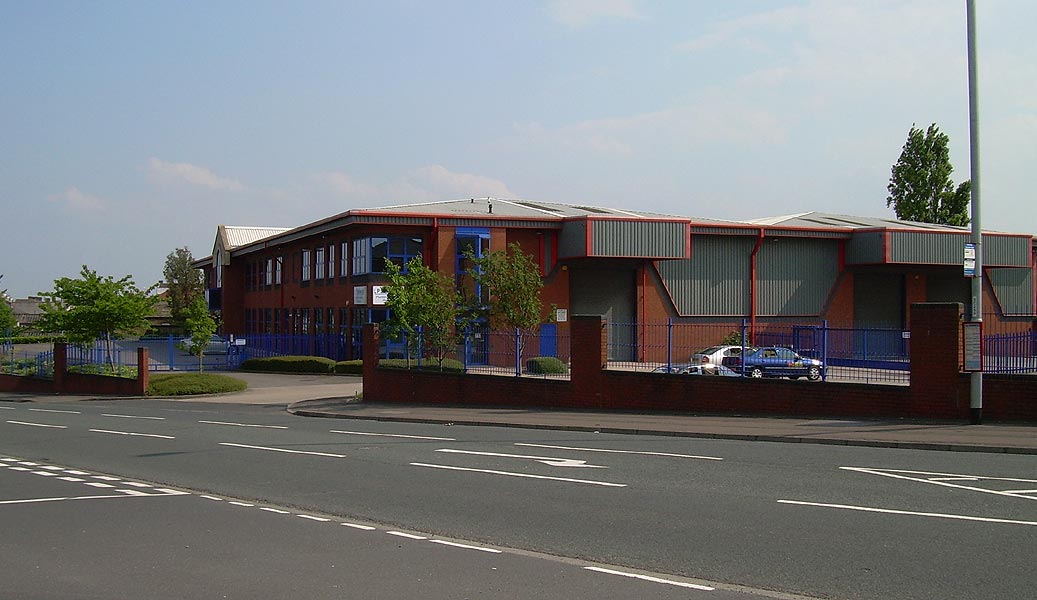
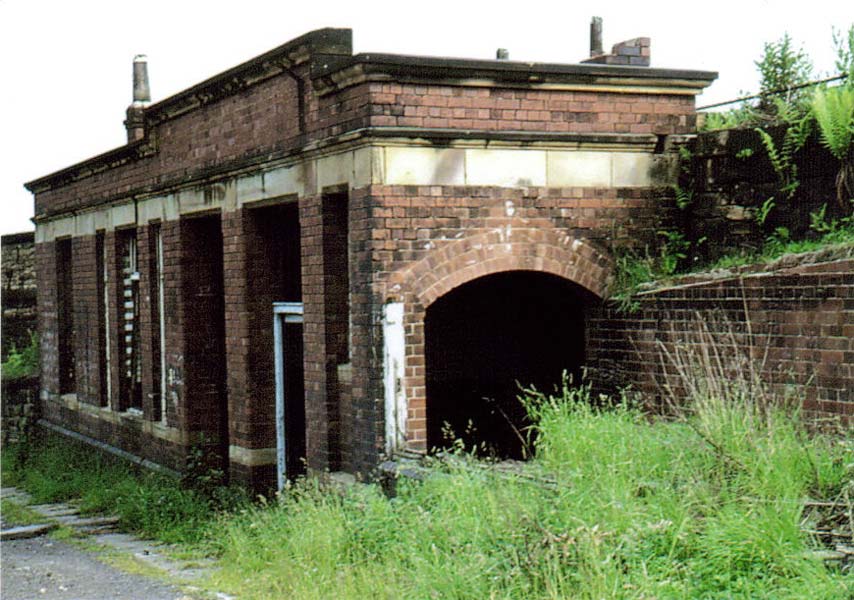
 Morley
Top Goods Depot (c1980s) : Barbara Ward Morley
Top Goods Depot (c1980s) : Barbara Ward
Morley top goods depot, the photo was taken sometime between 1982 and
1987. The now removed loading bay canopies are clearly visible.
The roof shows signs of a ventilation system. |
 Morley
Top Goods Depot (26-06-10) : David Webdale Morley
Top Goods Depot (26-06-10) : David Webdale
Closer view of the end of the building. A single track entered through
this doorway. |
 Morley
Top Goods Depot (26-06-10) : David Webdale Morley
Top Goods Depot (26-06-10) : David Webdale
Brick detail at the apex. |
 Morley
Top Goods Depot (26-06-10) : David Webdale Morley
Top Goods Depot (26-06-10) : David Webdale
View from the other end. The words Great Northern Goods Depot still
visible above the ATS sign. |
Tingley
Station
 Opened
01-08-1890 Closed 01-02-1954 Freight
1964 Opened
01-08-1890 Closed 01-02-1954 Freight
1964
Tingley
station 1900 : Jonathan Arey
See also Batley Beeston
A busy junction in its day, situated between four major
towns.
Passengers would change trains here for Leeds, Wakefield, Bradford & Batley. |
 Tingley
station buildings 1968 :
Simon Edgerton Tingley
station buildings 1968 :
Simon Edgerton |
 Tingley
station
buildings 1968 :
Simon Edgerton Tingley
station
buildings 1968 :
Simon Edgerton
|
 Tingley
station
buildings 1968 :
Simon Edgerton Tingley
station
buildings 1968 :
Simon Edgerton
|
 Dewsbury
Road bridge 1968 :
Simon Edgerton Dewsbury
Road bridge 1968 :
Simon Edgerton
A653 Dewsbury Road, near what is now the road maintenance
depot at the traffic lights
opposite to the entrance to Tingley Gasworks looking down towards Leeds.
(1968) |
 Signal
box 1968 :
Simon Edgerton / Tony Glynn Signal
box 1968 :
Simon Edgerton / Tony Glynn
Note : Tony Glynn
My grandfather Tom Broughton was a signalman at Tingley
station during the 1940s and 1950s.
Until his death in early 1960's he lived at 97 Middleton Road Morley. |
 Signal
box 1968 :
Simon Edgerton Signal
box 1968 :
Simon Edgerton |
 Station
buildings & signal box 1968 :
Simon Edgerton Station
buildings & signal box 1968 :
Simon Edgerton |
 Tingley
Viaduct Tingley
Viaduct
Tingley viaduct (02/2005) : David Taylor.
Tingley Viaduct crossing the Ardsley - Leeds line. |
Ardsley Station
Opened
05-10-1857 Closed 02-11-1964
Ardsley :
Tony Glynn
Note: My uncle Derek Broughton was a
trainee signal-man in 1950's at East Ardsley station.
This is also where
the father of Ernie Wise worked as a porter in the 1930's. |

/Laisterdike.JPG)
/012%20Laisterdyke.jpg)


/Dudley%20Hill.jpg)
.jpg)
.jpg)


.jpg)
.jpg)


/Birkenshaw.jpg)


/027%20Gildersome.jpg)

/026%20Morley%20Top.jpg)