The Leeds New Line route maps
The six pages of the Leeds New Line are divided into a series of six
modern street maps.
The route of the old railway line is combined with modern street maps &
shows the crossings over or under roads where possible.
Of course many of the road bridges over the line have now been filled in
underneath & the railway bridges over the roads have been demolished.
We follow the
route northwards from
Heaton Lodge junction Huddersfield to Farnley junction Leeds.
|
You are here: Map 1 Mirfield
Heaton Lodge junction -Dunbottle lane |
|
|
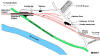
 Map 1 Mirfield Map 1 Mirfield
Heaton Lodge Junction to Dunbottle lane
L.N.W.R Leeds New Line shown in red
|
 The
Leeds New Line part 1: Darren Hosker c/o Paul Holroyd The
Leeds New Line part 1: Darren Hosker c/o Paul Holroyd
Youtube from Darren Hosker
https://www.youtube.com/watch?v=C34BcKc6ZzE |
 The
Leeds New Line part 2: Darren Hosker c/o Paul Holroyd The
Leeds New Line part 2: Darren Hosker c/o Paul Holroyd
Youtube from Darren Hosker
https://www.youtube.com/watch?v=ERNSc1rsxx8 |
 The
Leeds New Line part 3: Darren Hosker c/o Paul Holroyd The
Leeds New Line part 3: Darren Hosker c/o Paul Holroyd
Youtube from Darren Hosker
https://www.youtube.com/watch?v=H7kRAeeNlAU |
 The
Leeds New Line part 4: Darren Hosker c/o Paul Holroyd The
Leeds New Line part 4: Darren Hosker c/o Paul Holroyd
Youtube from Darren Hosker
https://www.youtube.com/watch?v=hT0gN55dXBA |
 The
Leeds New Line part 5: Darren Hosker c/o Paul Holroyd The
Leeds New Line part 5: Darren Hosker c/o Paul Holroyd
Youtube from Darren Hosker
https://www.youtube.com/watch?v=BH78f6J24Wk |
 The
Leeds New Line part 6: Darren Hosker c/o Paul Holroyd The
Leeds New Line part 6: Darren Hosker c/o Paul Holroyd
Youtube from Darren Hosker
https://www.youtube.com/watch?v=wHsvFJz5oE0 |
 The
Leeds New Line part 7: Darren Hosker c/o Paul Holroyd The
Leeds New Line part 7: Darren Hosker c/o Paul Holroyd
Youtube from Darren Hosker
https://www.youtube.com/watch?v=ne3997fa0S4&feature=youtu.be
|
 The
Leeds New Line part 8: Darren Hosker c/o Paul Holroyd The
Leeds New Line part 8: Darren Hosker c/o Paul Holroyd
Youtube from Darren Hosker
https://www.youtube.com/watch?v=fnppPBgEaSo |
 The
Leeds New Line part 9: Darren Hosker c/o Paul Holroyd The
Leeds New Line part 9: Darren Hosker c/o Paul Holroyd
Youtube from Darren Hosker
https://www.youtube.com/watch?v=Gts6-AVhCRE |
 The
Leeds New Line: c/o Paul Holroyd The
Leeds New Line: c/o Paul Holroyd
Found this on Youtube from Darley Transport and Travel.
https://youtu.be/FeHqisg1Mxc |
 Mirfield : c/o Graham Smith Mirfield : c/o Graham Smith
Aerial shots from Bradford Museums & Galleries website. Mirfield
with some rare shed and New Line shots.
http://photos.bradfordmuseums.org/index.php?a=QuickSearch&q=mirfield&WINID=1446034986327 |
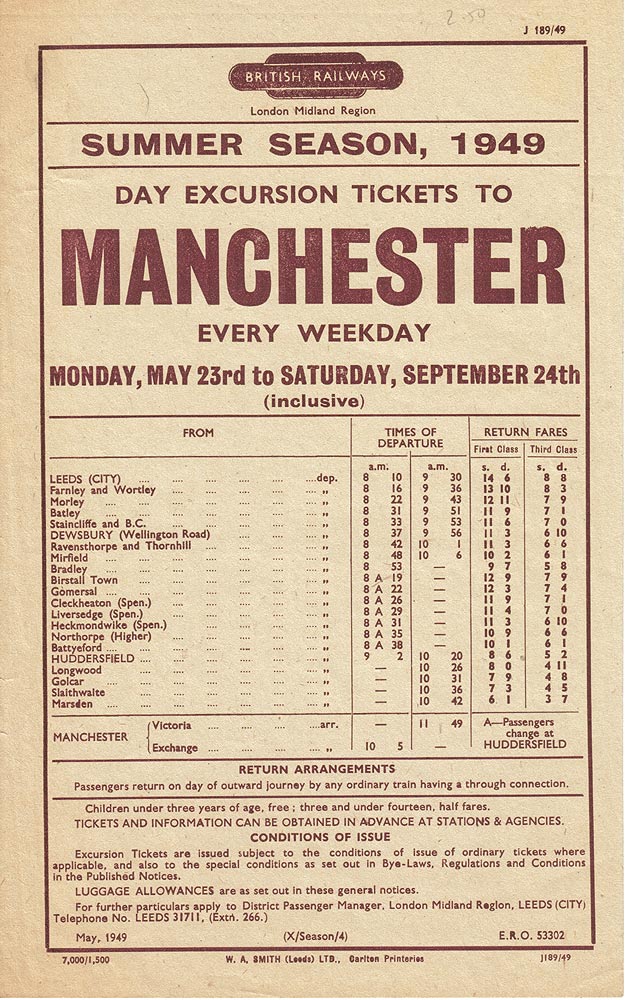
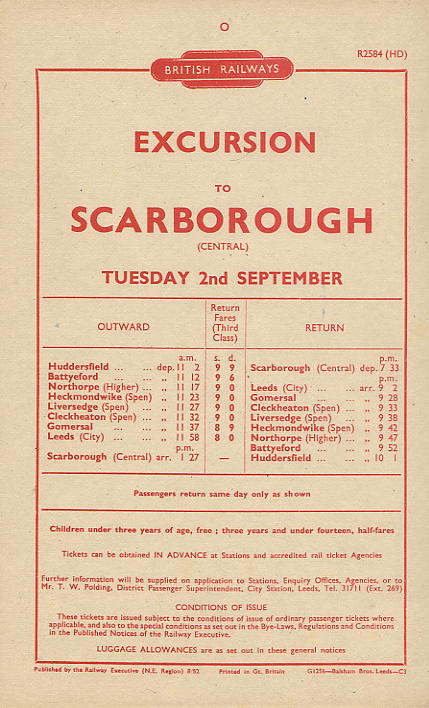
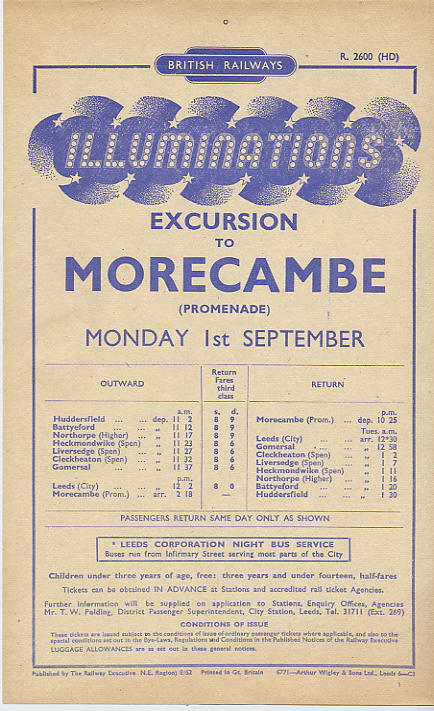
 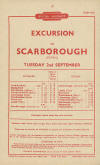 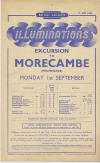 Excursion
Hand Bills Paul Holroyd / S Baggot website -
Vintage Carriages Trust
see also Vintage Carriages Excursion
Hand Bills Paul Holroyd / S Baggot website -
Vintage Carriages Trust
see also Vintage Carriages
1952 Excursion handbill for Morcambe
1952 Excursion handbill for Scarborough
1949 Excursion handbill for Manchester
All via Leeds New Line. |
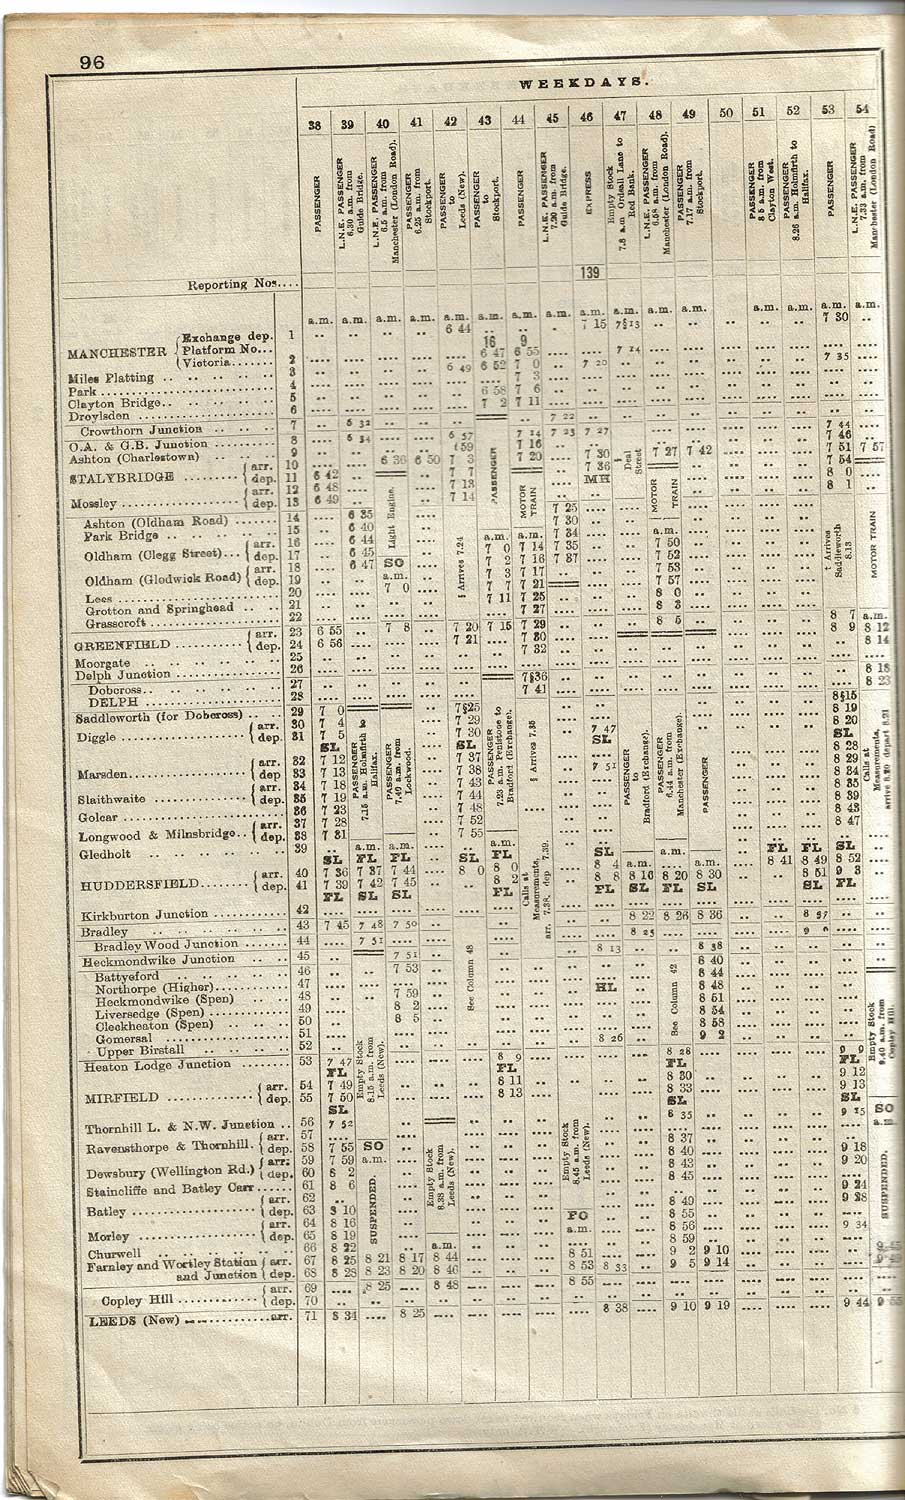
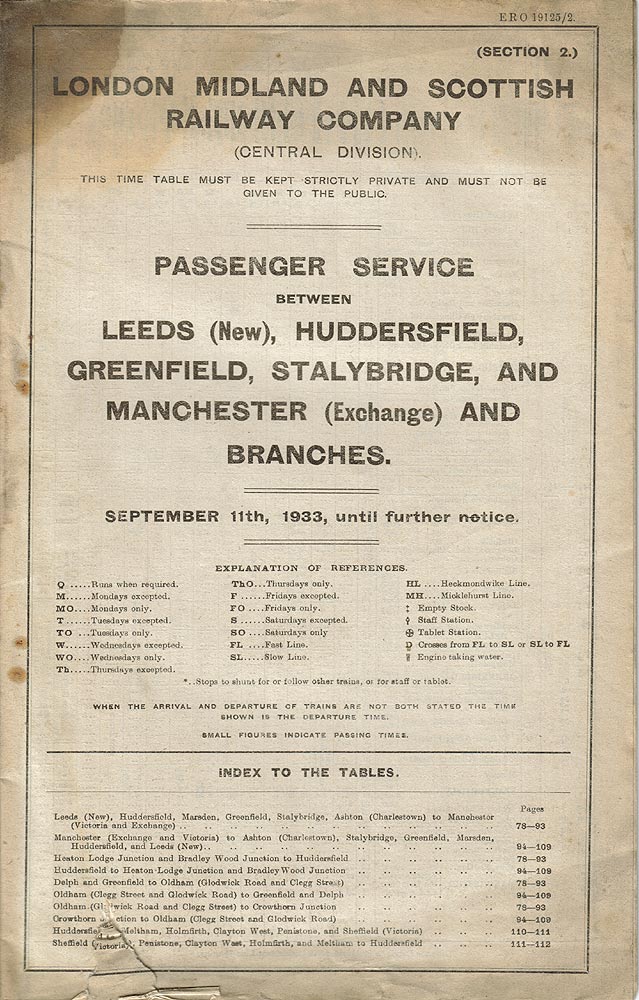
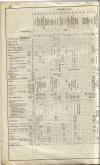 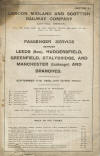 Working
timetable. Paul Holroyd website -
Vintage Carriages Trust Working
timetable. Paul Holroyd website -
Vintage Carriages Trust
September 1933 working timetable. |
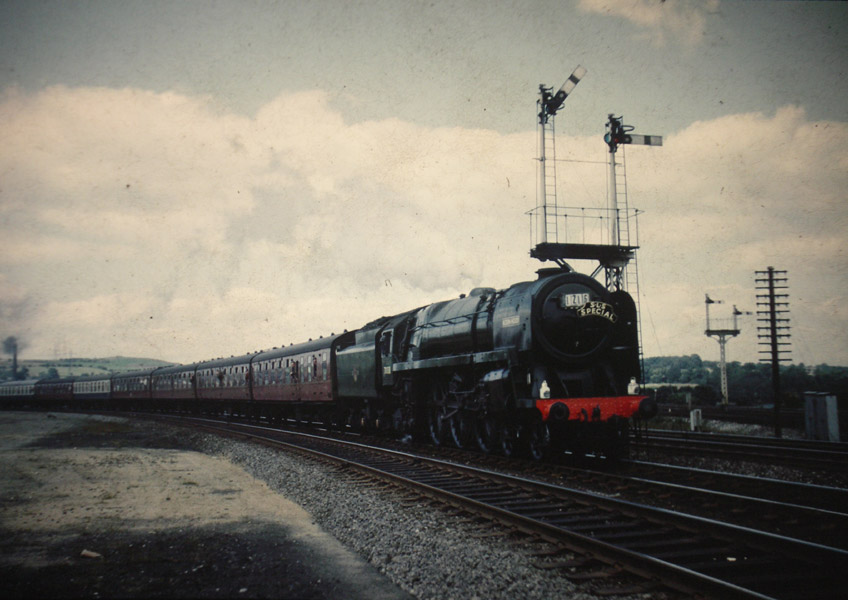
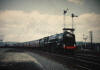 Heaton
Lodge : Bernard Coomber Heaton
Lodge : Bernard Coomber
Britannia 'Robin Hood' rounds the curve from
Huddersfield at Heaton Lodge eastbound. |
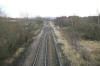
%20%20(24%2008-06-03)/24%20spen%20valley%20junction_small.jpg) Spen
Valley Junction (08-06-03) : David Webdale Spen
Valley Junction (08-06-03) : David Webdale
The start of the Leeds New Line. This location
is just a bit further left around the corner towards Huddersfield than
is shown on above map. Originally six tracks at this location and a
signal box to the right.
This photo taken from the Road bridge
(see Bottom left of Heaton Lodge Junction map). |
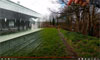
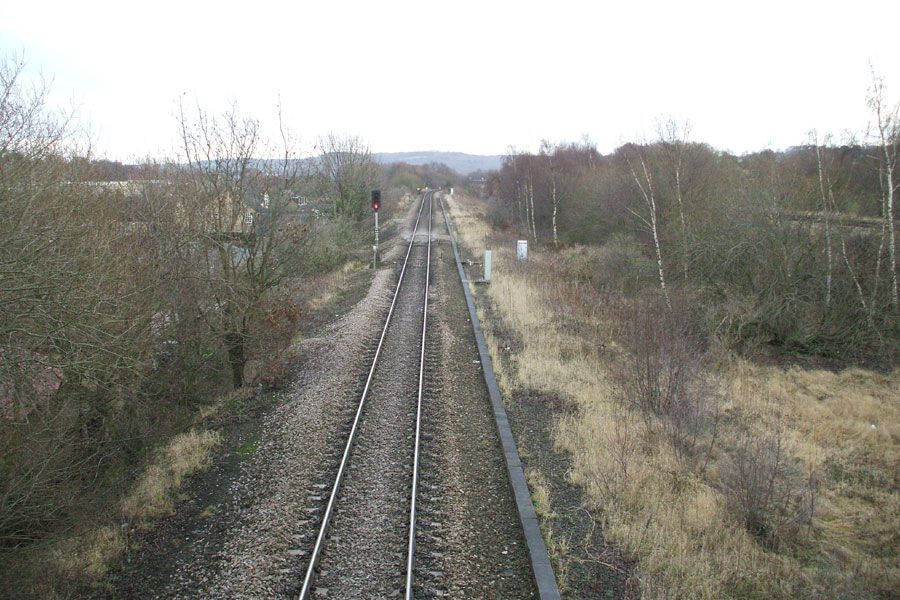
 Spen Valley Junction (26-12-07)
: Andrew Stopford Spen Valley Junction (26-12-07)
: Andrew Stopford
Last surviving stretch of Leeds New Line
|
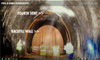
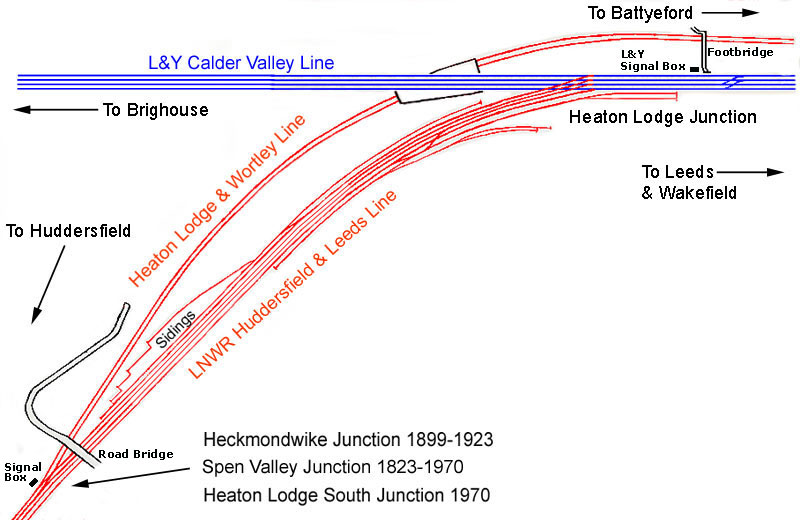
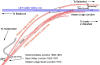 Heaton
lodge junction map 1908 : David Webdale Heaton
lodge junction map 1908 : David Webdale
Officially Heckmondwike & Heaton Lodge Junction.
Two short single bore tunnels, take the Leeds New Line
under the L & Y Calder Valley main line,
forming a flying junction. |
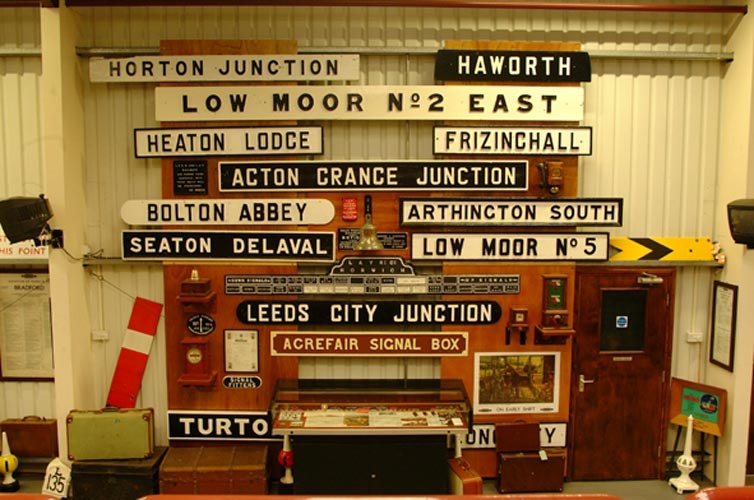
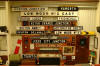 Heaton lodge junction sign : Paul Holroyd 18-03-06
website -
Vintage Carriages Trust Heaton lodge junction sign : Paul Holroyd 18-03-06
website -
Vintage Carriages Trust
And a few others, currently on display in the Museum of Rail Travel, Ingrow near Keighley. |
%20%20(24%2008-06-03)/23%20heaton%20lodge%20foot%20bridge%20east_small.jpg) Heaton
lodge footbridge (07-06-03) : David Webdale Heaton
lodge footbridge (07-06-03) : David Webdale
Still in use, & re timbered. Built to provide
access over the Leeds New Line,
to the Lancashire & Yorkshire Signal box (see top right of
Heaton Lodge Junction Map). |
/1%20heaton%20lodge%20north_small.jpg) Heaton
Lodge Facing North (14-07-02) : David Webdale Heaton
Lodge Facing North (14-07-02) : David Webdale
A Couple of hundred yards further towards Mirfield,
only just visible behind the single track on the far side, is an
embankment.
This led onto the 700 ton 267 feet Battyeford girder
bridge, at a gradient of 1 in 90.
The single track once a double, formed
part of the Leeds new line,
but was connected back onto the original
main line back in 1970 to form a flying junction. |
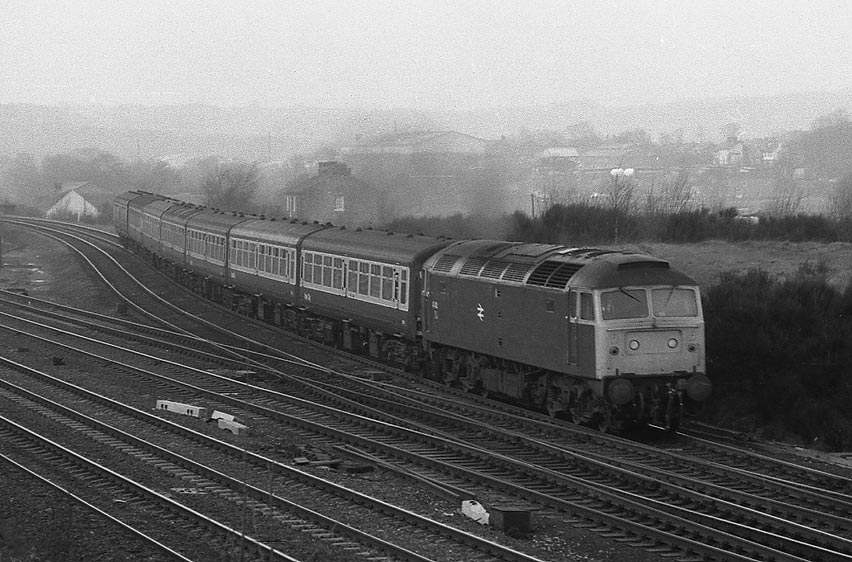
 Heaton
Lodge Facing North (c1980) : David Webdale Heaton
Lodge Facing North (c1980) : David Webdale
Class 47 passenger at Heaton Lodge joining
back onto the mainline, having passed underneath the flying junction.
More tracks & loco hauled passenger trains in those days. |
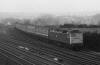
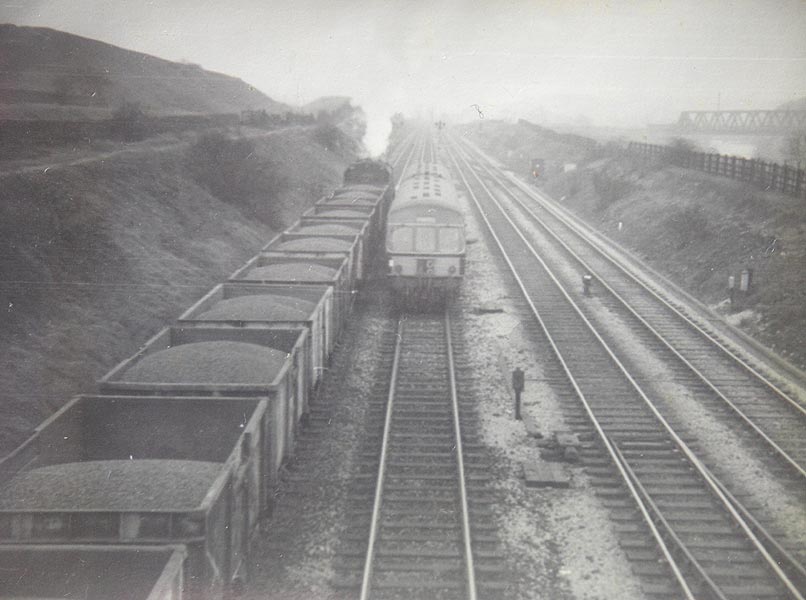
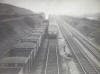 Mirfield : Bernard Coomber Mirfield : Bernard Coomber
A westbound coal train passes a local DMU looking west from Woodend Lane
bridge Mirfield.
Note the girder bridge for the Leeds New Line. |
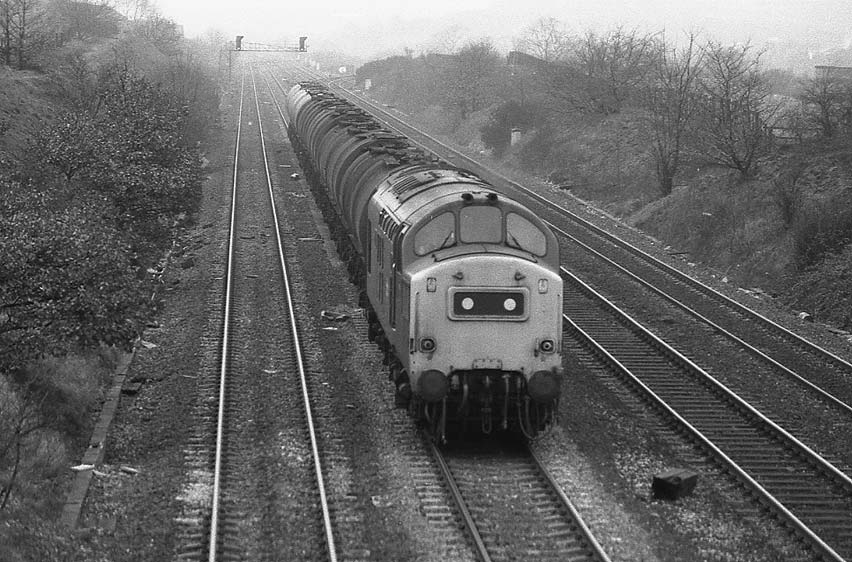
 Mirfield
(c1980) : David Webdale Mirfield
(c1980) : David Webdale
Nothing much to do with the Leeds New Line, a class 37 & tankers heading toward Mirfield.
Just visible on the right is part of the stone pillar
supporting Battyeford girder bridge. Heaton lodge junction just
visible in distance. |
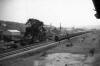 Battyford
girder bridge : c/o Michael Kaye. Photograph by kind permission
from John Wraithmell Battyford
girder bridge : c/o Michael Kaye. Photograph by kind permission
from John Wraithmell
Class 40 taken from the back of Heaton Lodge Junc
Box, you can see Battyford Bridge. |
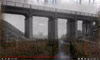
/18%20battyeford%20girder%20bridge%20s%20west_small.jpg) Battyford
girder bridge Facing West (25-04-04) : David Webdale Battyford
girder bridge Facing West (25-04-04) : David Webdale
Taken from the east bank of the river Calder,
facing back toward Heaton lodge Junction.
A clearer view of the stone pillar.
Construction was a single span
latticed warren riveted bridge,
267 ft long weighing 700 tons.
The gradient of 1 in 90 was to provide a
minimum head room of 15 ft above the river. |
 Battyford
girder bridge Facing South (29-08-05) : David Webdale Battyford
girder bridge Facing South (29-08-05) : David Webdale
Photographed from my mates barge.
A closer view of the stone pillars on the west bank |
 Battyford
girder bridge Facing East (29-08-05) : David Webdale Battyford
girder bridge Facing East (29-08-05) : David Webdale
Another photograph from the barge.
Girder Bridge pillar & end view of viaduct on the east bank of the
river. |
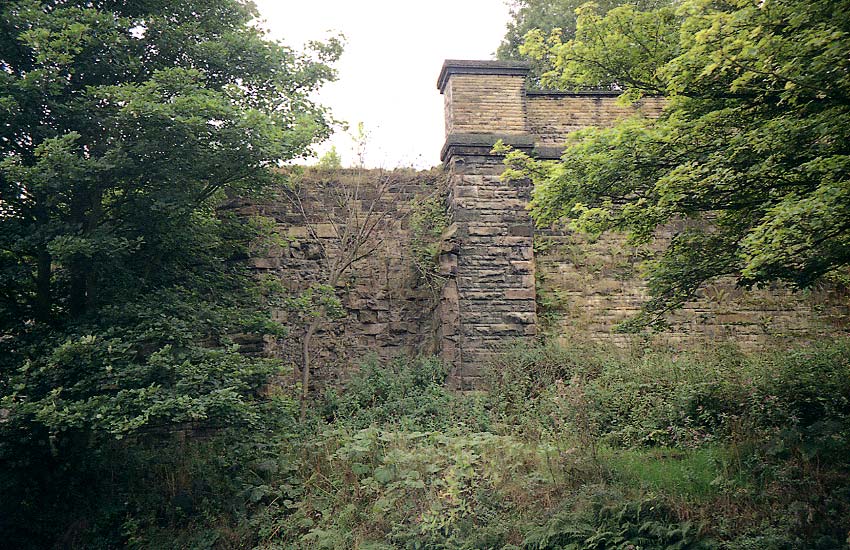
/3%20heaton%20lodge%20east_small.jpg) Heaton
Lodge Facing East (14-07-02) : David Webdale Heaton
Lodge Facing East (14-07-02) : David Webdale
A side on view of the three of the remaining
arches of a stone viaduct originally
89 yards long.
This lead onto the blue brick Battyeford viaduct. |
%20%20(24%2008-06-03)/17%20battyeford%20viaduct%20east%20close%20up_small.jpg) Battyeford
viaduct Facing East (07-06-03) : David Webdale Battyeford
viaduct Facing East (07-06-03) : David Webdale
Close up of the the ten or so remaining arches of
the Battyeford viaduct,
originally 193 yards long & built of blue
engineering brick. |
%20%20(24%2008-06-03)/21%20battyeford%20viaduct%20next%20to%20east_small.jpg) Battyeford
viaduct Facing East (07-06-03) : David Webdale Battyeford
viaduct Facing East (07-06-03) : David Webdale
Even closer up.
Apparently the firm hired to
demolish the remaining section of the viaduct went bust after several
failed attempts using explosives. |
/4%20battyeford%20station%20west_small.jpg) Battyeford
Viaduct Facing West (14-07-02) : David Webdale Battyeford
Viaduct Facing West (14-07-02) : David Webdale
The other end of the remaining section of the
viaduct taken form the A644 Huddersfield road.
Half the length of the Battyford station platforms were carried on the
viaduct over the road at this point. |
Battyeford Station
Opened 01-10-1900. Closed 03-01-1953.
 Battyeford
station map 1908 : David Webdale Battyeford
station map 1908 : David Webdale
The station buildings were of timber construction,
platforms were brick with stone flags.
Goods yard consisted of -
Stone warehouse, loading dock, stables & coal merchant. |
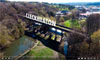
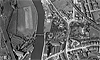
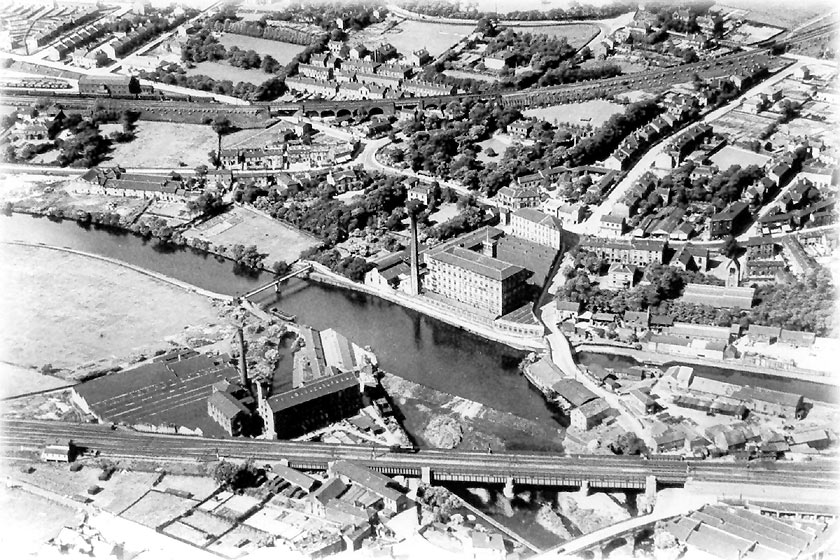
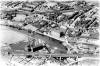 Battyford
& Mirfield viabuct (n.d)
Photo: Eric Ellis website - Mirfield
memoriesRailways Battyford
& Mirfield viabuct (n.d)
Photo: Eric Ellis website - Mirfield
memoriesRailways
In this Ariel photo, kindly donated by Eric Ellis,
the Mirfield viaduct is visible across the top of photo.
From left to right - Top left Battyford goods warehouse , iron bridge
crossing Nettleton road, five viaduct arches, iron bridge crossing
Doctor lane, four arches leading onto an embankment
& top right an iron
bridge (I think) crossing Knowle road. |
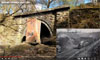
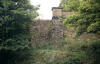
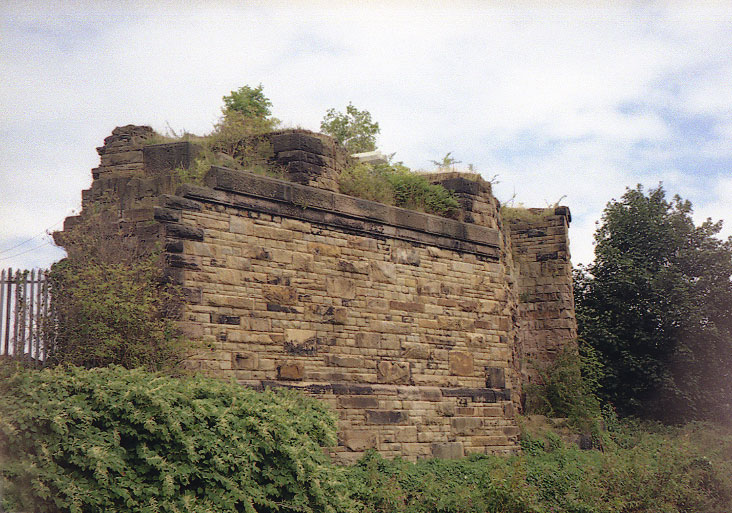
/6%20battyeford%20station%20east_small.jpg) Battyeford
Station Facing East (14-07-02) : David Webdale Battyeford
Station Facing East (14-07-02) : David Webdale
Here Part of the original blue brick used as a
garden wall next to the pavement.
Behind the houses are what remains of Battyeford station, retaining walls & some bricked up arches.
I don't know what the arches were for. |
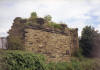
/7%20battyeford%20station%20east_small.jpg) Battyeford
Station Facing East (14-07-02) : David Webdale Battyeford
Station Facing East (14-07-02) : David Webdale
Up on top facing the same direction.
Hard to
believe there was a station here at all.
Wilson terrace is in the centre of photo in the distance. |
%20(8%20to%2016%2031-05-03)/19%20battyeford%20littlemoor%20rd%20houses_small.jpg) Twelve L.N.W.R Houses Littlemoor
road (31-05-03) : David Webdale Twelve L.N.W.R Houses Littlemoor
road (31-05-03) : David Webdale
The L.N.W.R re-housed a number of people displaced
by the construction of the railway in Battyeford & Heckmondwike.
The
contract to build 12 houses on Littlemoor road, was awarded in August
1895.
They are all built to the same design as the 80 houses in Heckmondwike
(see page 3)
Total Cost - Houses £3,084 - Streets £300 |
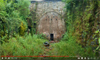
/9%20oddfellows%20st%20west_small.jpg) Oddfellows
Street Facing West (14-07-02) : David Webdale Oddfellows
Street Facing West (14-07-02) : David Webdale
This is the only evidence I have found where the
line may have crossed Doctor lane on the last part of the Mirfield
viaduct.
The viaduct was constructed of blue engineering brick & 190 yards
long.
A sloping stone wall to the left & an old engineering
brick wall on the right.
It may just be re-used stone & bricks, I don't know. |
/13%20parker%20lane%20east_small.jpg) Parker
Lane Facing East (14-07-02) : David Webdale Parker
Lane Facing East (14-07-02) : David Webdale
From Knowle road, we picked up a footpath (which
seems to follow the route of the old line)
went through a new housing estate & came out here on Parker lane.
On the left are the remnants of parker lane bridge over the line, now a
garden wall. |
/14%20dunbottle%20north_small.jpg) Dunbottle
Lane Facing North (14-07-02) : David Webdale Dunbottle
Lane Facing North (14-07-02) : David Webdale
Not much evidence between Parker lane & here. The
whole area has been re-developed.
Across the middle of the photo is Dunbottle lane bridge, the railway ran through here.
It seems common practise to land fill & bulldoze earth under bridges to avoid
maintaining them. Building had started here in 2004. |
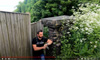
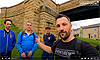
/16%20dunbottle%20east_small.jpg) Dunbottle
Lane Facing East (14-07-02) : David Webdale Dunbottle
Lane Facing East (14-07-02) : David Webdale
Bit of a rubbish photo really, apart from the yummy
mummy, this is the view from Dunnbottle lane.
The bridge wall can be
seen on the right hand side.
The line carries on towards Northorpe
station through the new housing estate on the left. |

%20%20(24%2008-06-03)/24%20spen%20valley%20junction.jpg)
%20%20(24%2008-06-03)/23%20heaton%20lodge%20foot%20bridge%20east.jpg)
/1%20heaton%20lodge%20north.jpg)

/18%20battyeford%20girder%20bridge%20s%20west.jpg)
/3%20heaton%20lodge%20east.jpg)
%20%20(24%2008-06-03)/17%20battyeford%20viaduct%20east%20close%20up.jpg)
%20%20(24%2008-06-03)/21%20battyeford%20viaduct%20next%20to%20east.jpg)
/4%20battyeford%20station%20west.jpg)

/6%20battyeford%20station%20east.jpg)
/7%20battyeford%20station%20east.jpg)
%20(8%20to%2016%2031-05-03)/19%20battyeford%20littlemoor%20rd%20houses.jpg)
/9%20oddfellows%20st%20west.jpg)
/13%20parker%20lane%20east.jpg)
/14%20dunbottle%20north.jpg)
/16%20dunbottle%20east.jpg)