The Leeds New Line route maps
See page 1 for explanation |
|
You are here: Map 6 Wortley
Gildersome Spur industrial estate - Farnley junction |
|
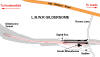
 Map 6 Wortley Map 6 Wortley
Gildersome spur industrial estate - Farnley flying junction
L.N.W.R Leeds New Line shown in red
See bottom of page for Farnley branch.
|
 Gildersome
tunnel vent SE252287 (26-02-05) : Rikj
website -
http://www.darkplaces.co.uk/
http://www.flickr.com/photos/rikj/ Gildersome
tunnel vent SE252287 (26-02-05) : Rikj
website -
http://www.darkplaces.co.uk/
http://www.flickr.com/photos/rikj/
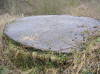
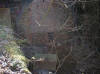
After some searching we found a well
capped airshaft. |
 Gildersome tunnel
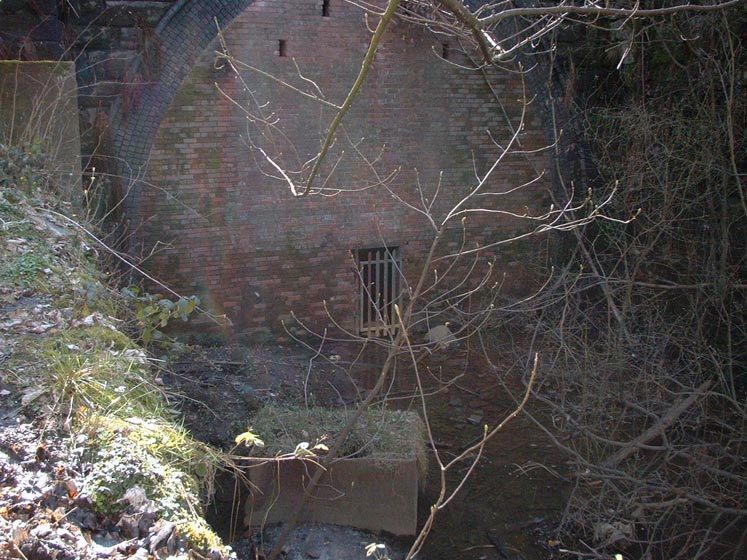
north portal SE257292 (26-02-05) : Rikj Gildersome tunnel
north portal SE257292 (26-02-05) : Rikj
Disused railway tunnel portal, entrance flooded, extends
1.5 miles to blockage! |
 Gildersome
tunnel north portal (04-06)
: Andrew Stopford Gildersome
tunnel north portal (04-06)
: Andrew Stopford
Leeds end of Gildersome Tunnel as it was in April 2006 |
Gildersome
tunnel north portal (22-04-07) :
Graeme Bickerdike
website - http://www.forgottenrelics.co.uk/
Unfortunately photographs don't give any real sense of
scale here. The portal is huge, clearly built to accommodate a larger
 loading
gauge. It's hidden in woodland at the end of a stone-lined cutting, most
of which has been infilled. Apparently, planning permission for many
infills prohibits tipping within 50 feet of a tunnel mouth - that's
certainly the case at Strines (Queensbury South), Clayton and looks that
way here. The first section appears to be cut-and-cover - beyond the
portal, the ground is artificially level for about 50 yards. I assume
the high portal effectively acts as a retaining wall for this
landscaping. loading
gauge. It's hidden in woodland at the end of a stone-lined cutting, most
of which has been infilled. Apparently, planning permission for many
infills prohibits tipping within 50 feet of a tunnel mouth - that's
certainly the case at Strines (Queensbury South), Clayton and looks that
way here. The first section appears to be cut-and-cover - beyond the
portal, the ground is artificially level for about 50 yards. I assume
the high portal effectively acts as a retaining wall for this
landscaping. |
 Gildersome
tunnel north portal (22-04-07) : Graeme Bickerdike Gildersome
tunnel north portal (22-04-07) : Graeme Bickerdike
It goes without saying that there are drainage
problems. A sizeable stream runs down the valley above the tunnel and
has then been diverted via a channel to flow away from the bore itself.
I suspect this is the reason for the cut-and-cover. |
 Gildersome
tunnel north portal (22-04-07) : Graeme Bickerdike Gildersome
tunnel north portal (22-04-07) : Graeme Bickerdike
On the south side, a pipe takes water down to
track level where a drain must then have carried it away.
It's well worth a visit here - there's plenty to see but come prepared
for the stench from the putrid water! |
 THE CONQUEST OF GILDERSOME
TUNNEL by the Leeds Historical Expedition Society ©
phill.d urbEX photography THE CONQUEST OF GILDERSOME
TUNNEL by the Leeds Historical Expedition Society ©
phill.d urbEX photography
website -
http://flickr.com/photos/phill_dvsn/sets/72157594397421428/
See the video on YouTube -
The L.H.E.S
go to hell & back (if you go down to the woods today) |
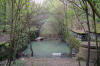
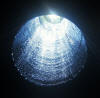
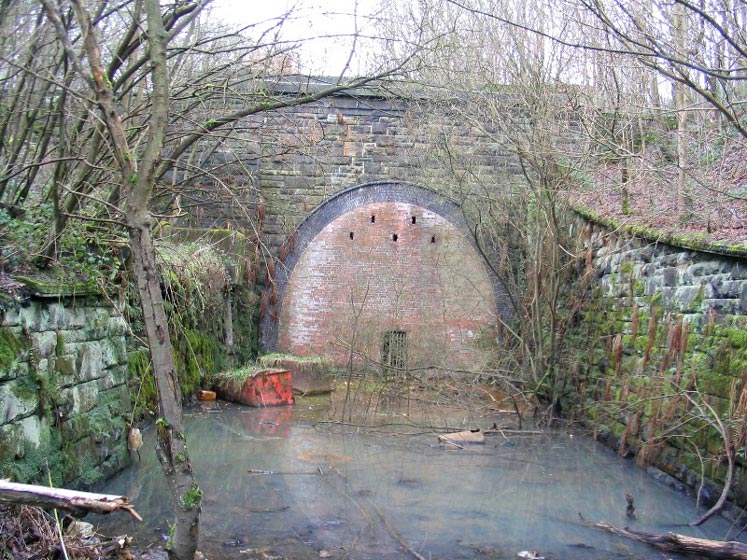
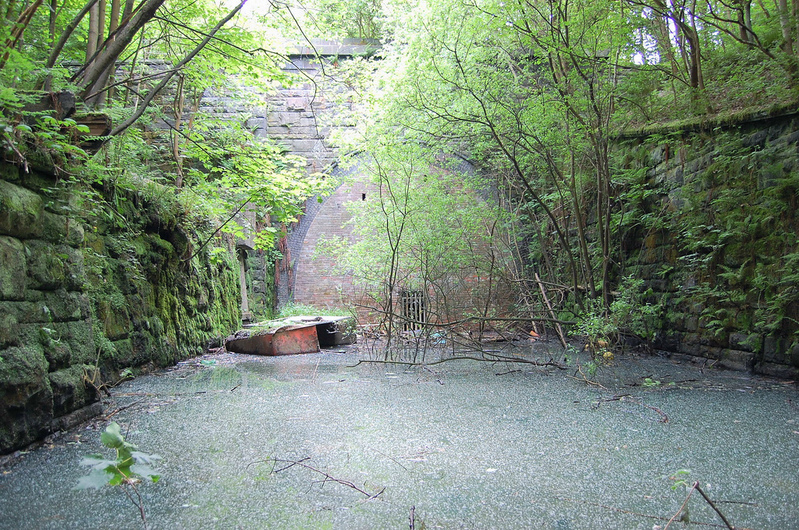
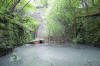 This
May 2007 shot shows just how deep the water level was guarding the
entrance to the forbidden portal of the underworld. Gildersome tunnel is
a bit of a monster at 1 mile 571yds (2.13km) it has remained unexplored
for many years. The gate was added sometime in the early 90's and this
seems to have been the last time anyone has been in. There are no
pictures or reports of this tunnel to be found anywhere on the net so
what lies beyond is anyone's guess. This is the only entrance as the
Western portal has been infilled when the M621 motorway was built near
to the Showcase cinema at Birstall. When i took this picture i never
thought i'd reach the other end 5 months later. The tunnel has been
badly affected by water ingress over the insuing years keeping it a well
& truely out of bounds place. This
May 2007 shot shows just how deep the water level was guarding the
entrance to the forbidden portal of the underworld. Gildersome tunnel is
a bit of a monster at 1 mile 571yds (2.13km) it has remained unexplored
for many years. The gate was added sometime in the early 90's and this
seems to have been the last time anyone has been in. There are no
pictures or reports of this tunnel to be found anywhere on the net so
what lies beyond is anyone's guess. This is the only entrance as the
Western portal has been infilled when the M621 motorway was built near
to the Showcase cinema at Birstall. When i took this picture i never
thought i'd reach the other end 5 months later. The tunnel has been
badly affected by water ingress over the insuing years keeping it a well
& truely out of bounds place. |
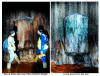
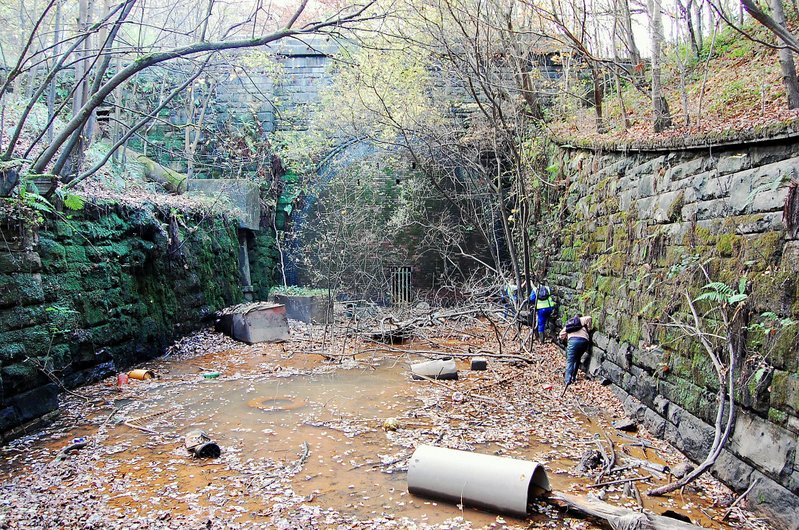
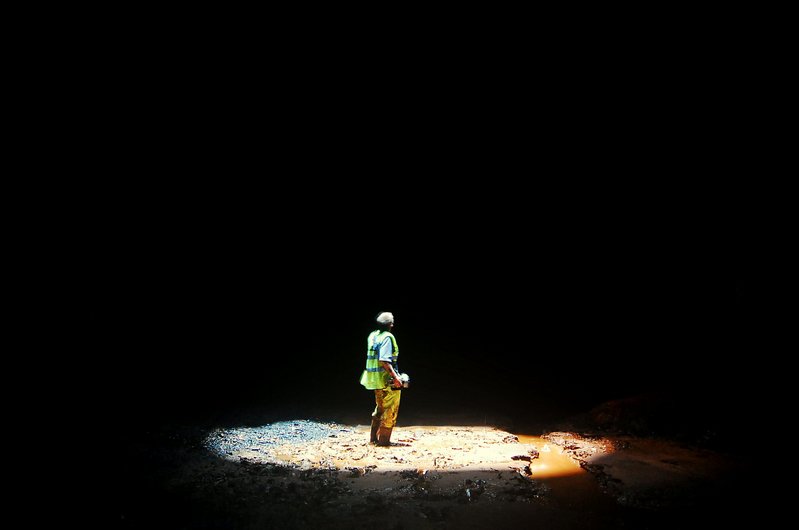
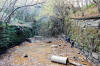 One
evening we decided to try a spot of light painting at the portal which
didn't really work out, However i was suprised to see the colour of the
water had changed from the blue/grey skank it's always been to a bright
toxic orange, The water level had dropped a good foot, still deep but it
did reveal thick mud in places. My co explorer Sam convinced himself he
could get across to the portal on the other side. Sam set off with
tripod for a walking pole and camera around his neck i couldn't believe
it when he got to the other side wet but non the less in one piece. Well
done Sam.. try a long exposure shot through the bars if you can mate i
shouted over. This he did & made his way carefully back. We set off home
to view the pictures full size. They weren't very good but we could see
the tunnel was flooded to a depth of 12-18'' for the first 150yds with
what appeared to be a raised drier spot further in, we could also see
the tunnel had a curve near to the entrance. Armed with this knowledge
we put it to the other members of the Leeds Historical Expedition
Society as a possible explore for the coming weekend. Never ones to
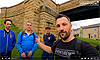
shirk a challenge we all agreed to have a dam good crack at it. Here we
see Sam, Dave & Ackers negotiating the treacherous bog not really
knowing what lay ahead for us. One
evening we decided to try a spot of light painting at the portal which
didn't really work out, However i was suprised to see the colour of the
water had changed from the blue/grey skank it's always been to a bright
toxic orange, The water level had dropped a good foot, still deep but it
did reveal thick mud in places. My co explorer Sam convinced himself he
could get across to the portal on the other side. Sam set off with
tripod for a walking pole and camera around his neck i couldn't believe
it when he got to the other side wet but non the less in one piece. Well
done Sam.. try a long exposure shot through the bars if you can mate i
shouted over. This he did & made his way carefully back. We set off home
to view the pictures full size. They weren't very good but we could see
the tunnel was flooded to a depth of 12-18'' for the first 150yds with
what appeared to be a raised drier spot further in, we could also see
the tunnel had a curve near to the entrance. Armed with this knowledge
we put it to the other members of the Leeds Historical Expedition
Society as a possible explore for the coming weekend. Never ones to
shirk a challenge we all agreed to have a dam good crack at it. Here we
see Sam, Dave & Ackers negotiating the treacherous bog not really
knowing what lay ahead for us. |
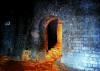
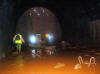 Once
inside we were able to switch the big lamps and peer into the impending
gloom. It was wall to wall standing water as far as the eye could see
and deep it was too. Things weren't looking good but we decided to try
navigate the first 100 yards to survey the situation further in. We were
very wary of the hidden danger of drains and rubble underfoot so we took
it in turns to lead the way with tripod prodding the ground testing
every inch of the way. You could feel solid ground under foot then
without warning you'd be up to your knees in the mud. As we rounded the
curve the little glow of daylight from the entrance disappeared we were
now in the tunnel good & proper. Here we found the flowing water had
created a narrow channel 18'' wide in which we could traverse along out
of the thick orange mud. It was at this point we realised the tunnel had
a gradient falling to the Leeds end with all the water flowing the way
we had come. The way forward couldn't possibly get any deeper. This
lifted our spirits a bit and slowly forward we went. Once
inside we were able to switch the big lamps and peer into the impending
gloom. It was wall to wall standing water as far as the eye could see
and deep it was too. Things weren't looking good but we decided to try
navigate the first 100 yards to survey the situation further in. We were
very wary of the hidden danger of drains and rubble underfoot so we took
it in turns to lead the way with tripod prodding the ground testing
every inch of the way. You could feel solid ground under foot then
without warning you'd be up to your knees in the mud. As we rounded the
curve the little glow of daylight from the entrance disappeared we were
now in the tunnel good & proper. Here we found the flowing water had
created a narrow channel 18'' wide in which we could traverse along out
of the thick orange mud. It was at this point we realised the tunnel had
a gradient falling to the Leeds end with all the water flowing the way
we had come. The way forward couldn't possibly get any deeper. This
lifted our spirits a bit and slowly forward we went. |
 The
tunnel had sprung a leak with a fair amount of water pouring in. We had
hoped this was the cause for all the flooding but it wasn't to be. You
can see the channel the flowing water had created although this kept
giving way and you were back wading knee deep in water again. The
tunnel had sprung a leak with a fair amount of water pouring in. We had
hoped this was the cause for all the flooding but it wasn't to be. You
can see the channel the flowing water had created although this kept
giving way and you were back wading knee deep in water again. |
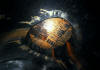
 Sam
& Dave view one of the colourful refuges in the tunnel Sam
& Dave view one of the colourful refuges in the tunnel |
  We
totally missed this side refuge on the way up the tunnel as we were too
busy making sure we were safe to move forward. We didn't take any
pictures untill we were on our way back. This side refuge 129 chains
into the tunnel appears to have been used as a plate layers hut for
storage and dinner time snap bothay for the track gangs.. Luxury indeed. We
totally missed this side refuge on the way up the tunnel as we were too
busy making sure we were safe to move forward. We didn't take any
pictures untill we were on our way back. This side refuge 129 chains
into the tunnel appears to have been used as a plate layers hut for
storage and dinner time snap bothay for the track gangs.. Luxury indeed. |
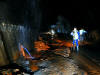
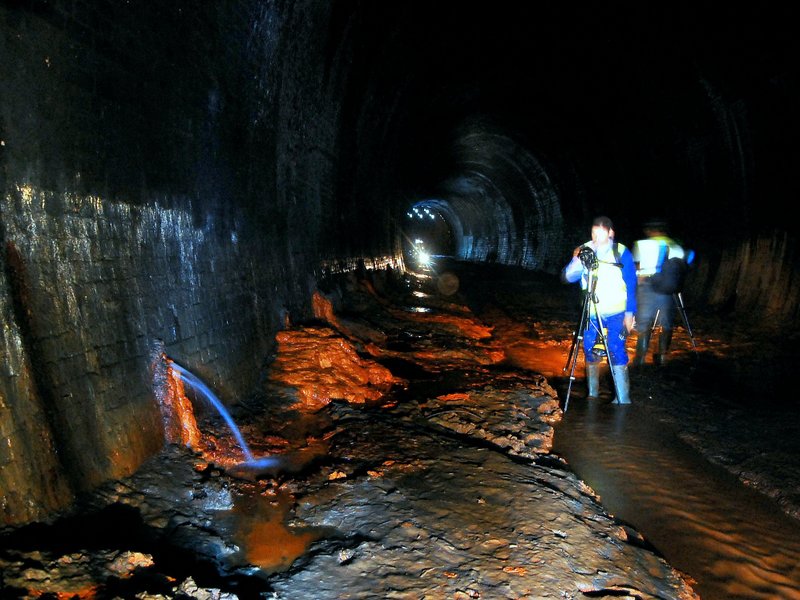
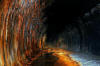 You
can see the narrow channel we used to navigate the tunnel. The water was
a foot deep in this section. Gildersome was extremely difficult to
photograph with the vivid orange mud burning bright red on long exposure
shots so we used a quick burst of halogen 5 mill candles and tried to
tone the colour down with a L.E.D lamp. You
can see the narrow channel we used to navigate the tunnel. The water was
a foot deep in this section. Gildersome was extremely difficult to
photograph with the vivid orange mud burning bright red on long exposure
shots so we used a quick burst of halogen 5 mill candles and tried to
tone the colour down with a L.E.D lamp.
There's a total of four air shafts in Gildersome causing problems for us
as the pile of debris from the demolished shafts were acting like a dam
with the water backing up behind to some considerable depth. It wasn't
until we got passed the second shaft that we came across our first solid
footing. At last we had the luxury of a few feet of raised ballast
higher than the water level. Some where at last to put our gear down &
sort ourselves out for the way forward. |
Beam me up Scotty!
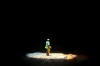 Feeling
pleased with ourselves getting this far we carried on untill suddenly we
could see something in the distant gloom. It was difficuilt to see
exactly what it was at first. Then the penny dropped we were approaching
the 3rd open air shaft situated 3 quarters of the way into the tunnel.
things were really looking good now as we thought for the first time
that we had a good chance of getting to the far end. Feeling
pleased with ourselves getting this far we carried on untill suddenly we
could see something in the distant gloom. It was difficuilt to see
exactly what it was at first. Then the penny dropped we were approaching
the 3rd open air shaft situated 3 quarters of the way into the tunnel.
things were really looking good now as we thought for the first time
that we had a good chance of getting to the far end. |
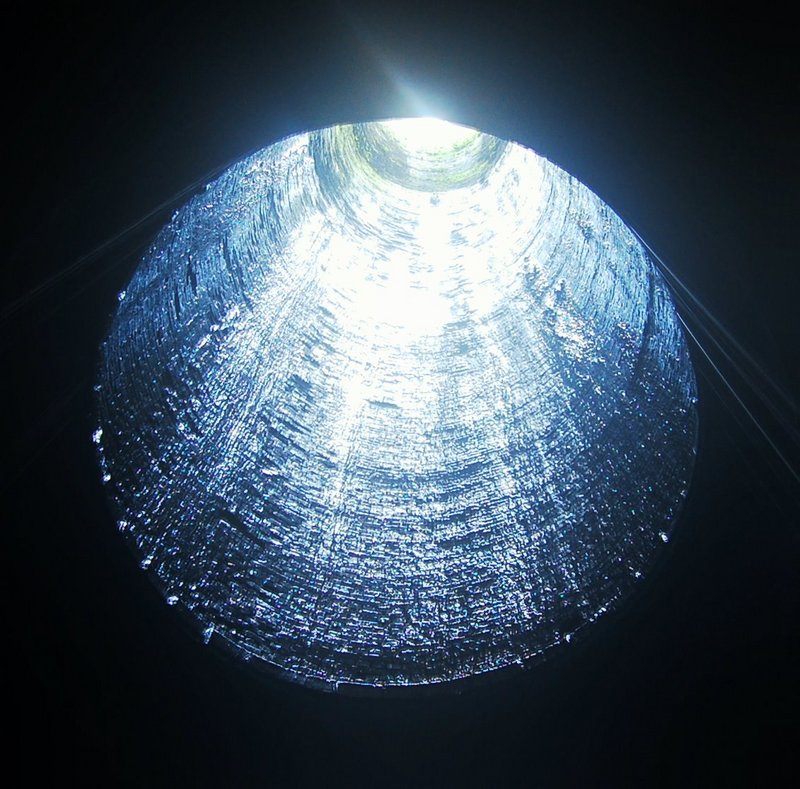
 We
were glad this shaft was open as there was a good flow of fresh air
coming down the tunnel reducing the risk of any nasty gas accumalation.
An open air shaft in a disused tunnel is a rarity indeed and it was
certainly the first time i had seen one. We
were glad this shaft was open as there was a good flow of fresh air
coming down the tunnel reducing the risk of any nasty gas accumalation.
An open air shaft in a disused tunnel is a rarity indeed and it was
certainly the first time i had seen one. |
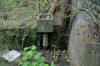
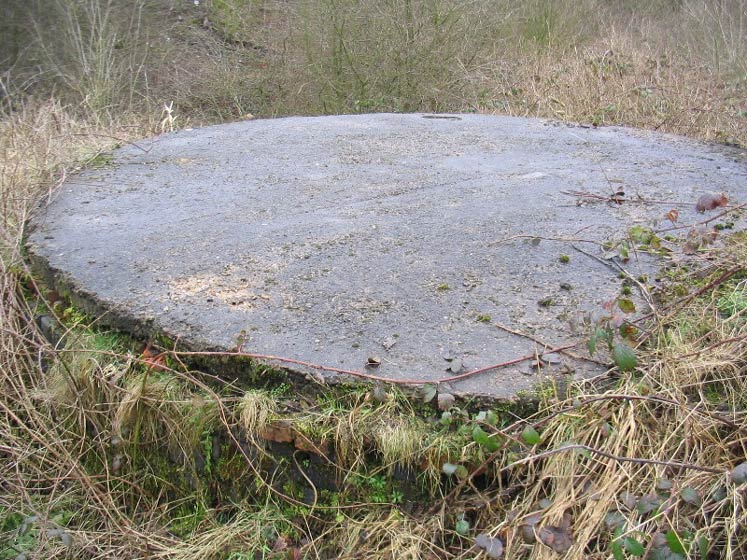
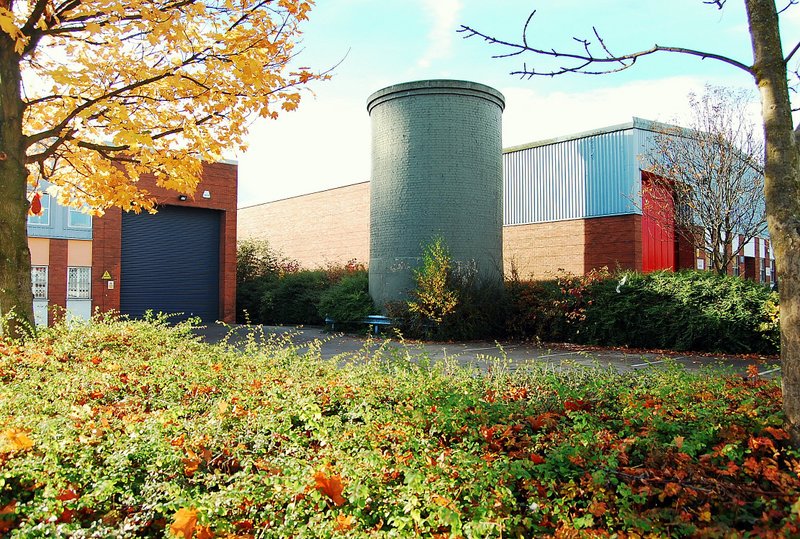
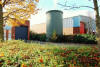 This
is what the shaft looks like from above, The good news for us was we
only had one more to go. This
is what the shaft looks like from above, The good news for us was we
only had one more to go.
The shaft looks rather out of place these days situated in a trading
estate in Gildersome spur. |
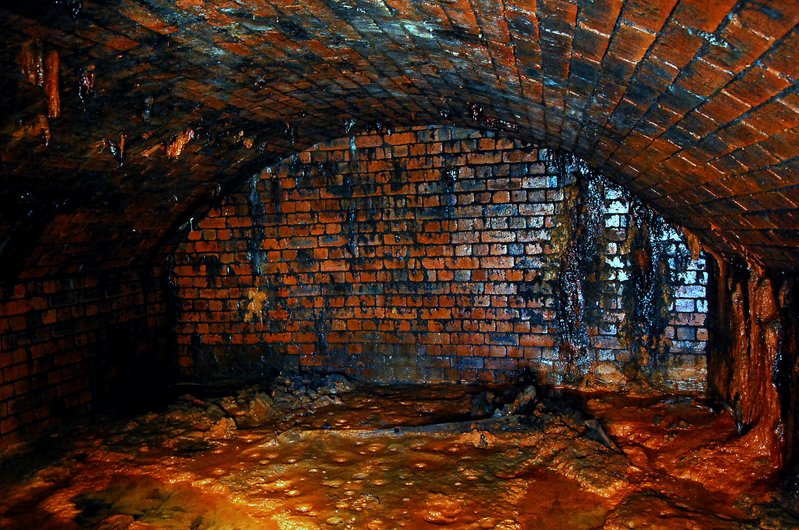
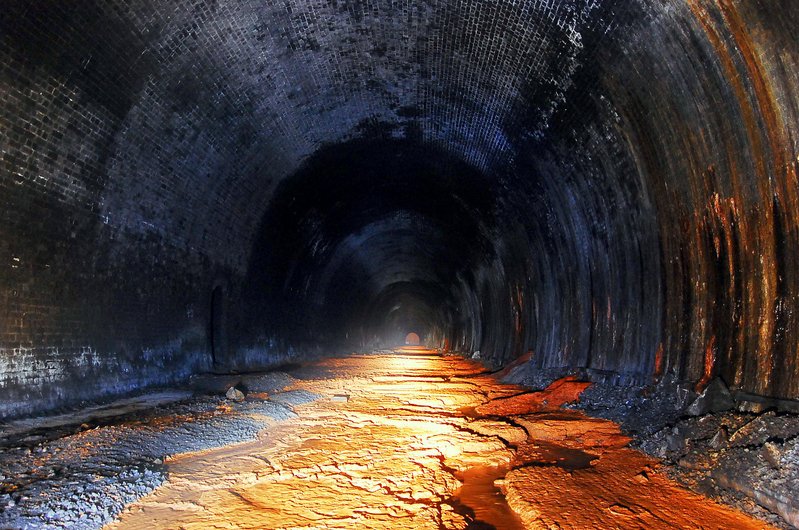
 Every
so often we'd switch the big lamp on to see what lay ahead. There it was
at last. The faint but unmistakable red brick retaining wall we had
heard about but never thought we'd see when we first got in the tunnel.
We were at the highest part in the tunnel now with the last 200yds
providing us with a much welcome piece of dry land. The mud was still
deep with the water flowing down the tunnel at a fair rate. Apart from
the leak we found near the entrance we couldn't see any visible sign of
where it was all coming from. To say the tunnel was in such a mess from
all the flooding the actual structure was in tip top shape with no
visible sign of roof collapse or major fault. It was just coated
everywhere in the dreaded orange Tango stuff. You needed to wear the
right gear for this one. Every
so often we'd switch the big lamp on to see what lay ahead. There it was
at last. The faint but unmistakable red brick retaining wall we had
heard about but never thought we'd see when we first got in the tunnel.
We were at the highest part in the tunnel now with the last 200yds
providing us with a much welcome piece of dry land. The mud was still
deep with the water flowing down the tunnel at a fair rate. Apart from
the leak we found near the entrance we couldn't see any visible sign of
where it was all coming from. To say the tunnel was in such a mess from
all the flooding the actual structure was in tip top shape with no
visible sign of roof collapse or major fault. It was just coated
everywhere in the dreaded orange Tango stuff. You needed to wear the
right gear for this one. |
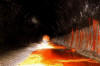 The
red hot looking lava water most suitable for a hellish place. The
retaining wall was built 24 chains into the tunnel meaning the first 600
yards had been buried by landfill as there were serious doubts the
tunnel could carry the weight of the M621 to be built above. The
red hot looking lava water most suitable for a hellish place. The
retaining wall was built 24 chains into the tunnel meaning the first 600
yards had been buried by landfill as there were serious doubts the
tunnel could carry the weight of the M621 to be built above. |
 The
last air/construction shaft situated just before the retaining wall The
last air/construction shaft situated just before the retaining wall |
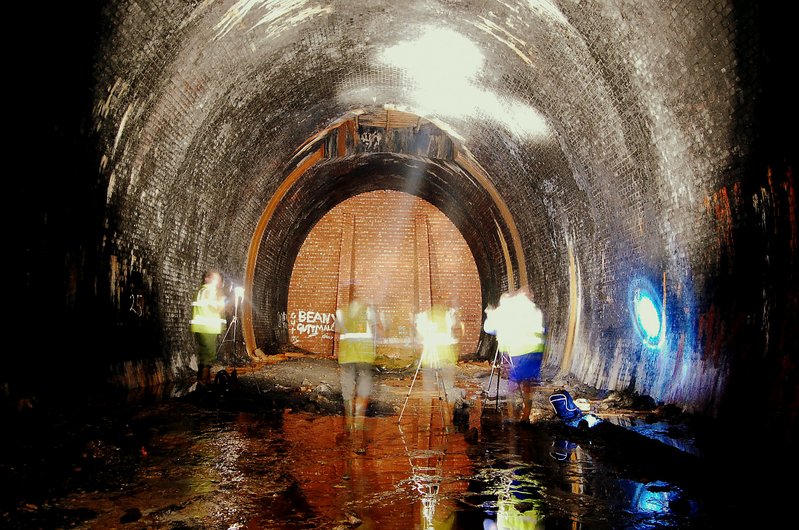
 I
tried a few shots of the retaining wall but at the end of the day it's
just a boring wall so i opted for these long exposure shots of the boys
doing there thing. I like the strange effects you can get with these
long open shutter captures. I
tried a few shots of the retaining wall but at the end of the day it's
just a boring wall so i opted for these long exposure shots of the boys
doing there thing. I like the strange effects you can get with these
long open shutter captures.
See Phills Blog -
http://blog.myspace.com/index.cfm?fuseaction=blog.view&friendID=265602590&blogID=326762127
© phill.d urbEX photography |
Gildersome
station
Opened
01-10-1900. Closed 11-07-1921.
 Gildersome station map 1908
:
David Webdale Gildersome station map 1908
:
David Webdale
Situated West side of Rooms lane off Gelderd road.
Buildings of timber construction, platforms were timber deck supported
on brick base.
Goods yard consisted of three sidings, warehouse & stables.
The stations middle of nowhere location lead to its early closure,
it was mainly used by workers from nearby St Bernards. |
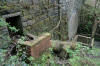
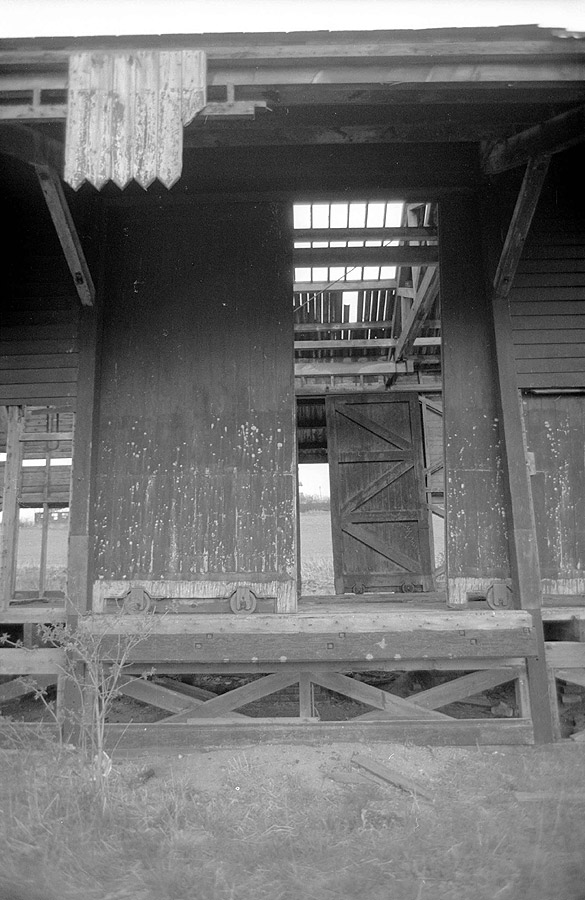
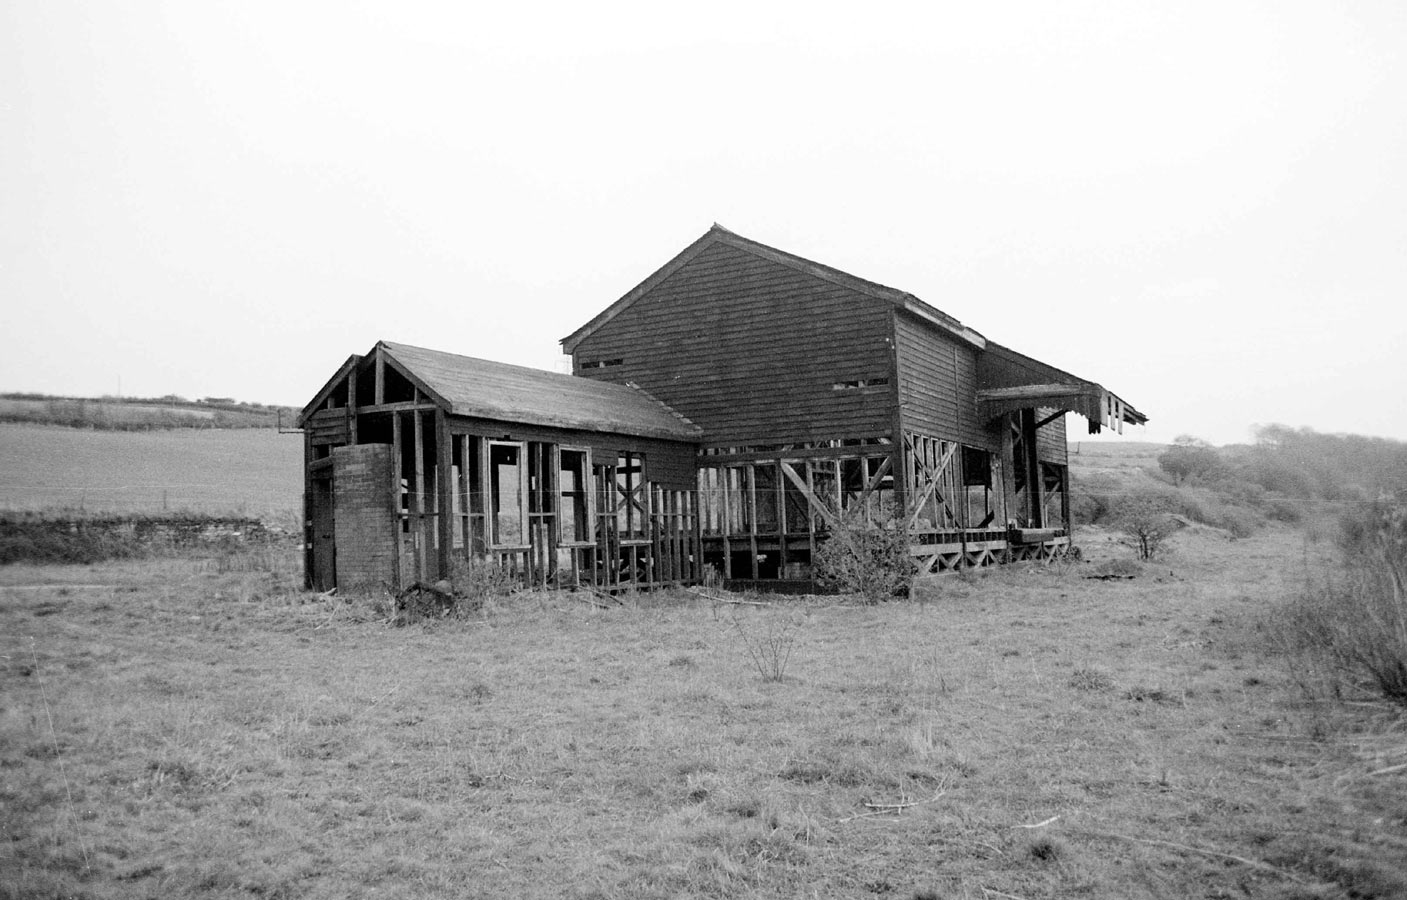
  Gildersome
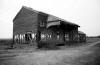
LNWR Goods shed 1970’s : Bob Cockcroft Gildersome
LNWR Goods shed 1970’s : Bob Cockcroft
Photos of the goods shed taken in the 1970’s.
They show the building
inside and out even though quite a bit of it is missing! |
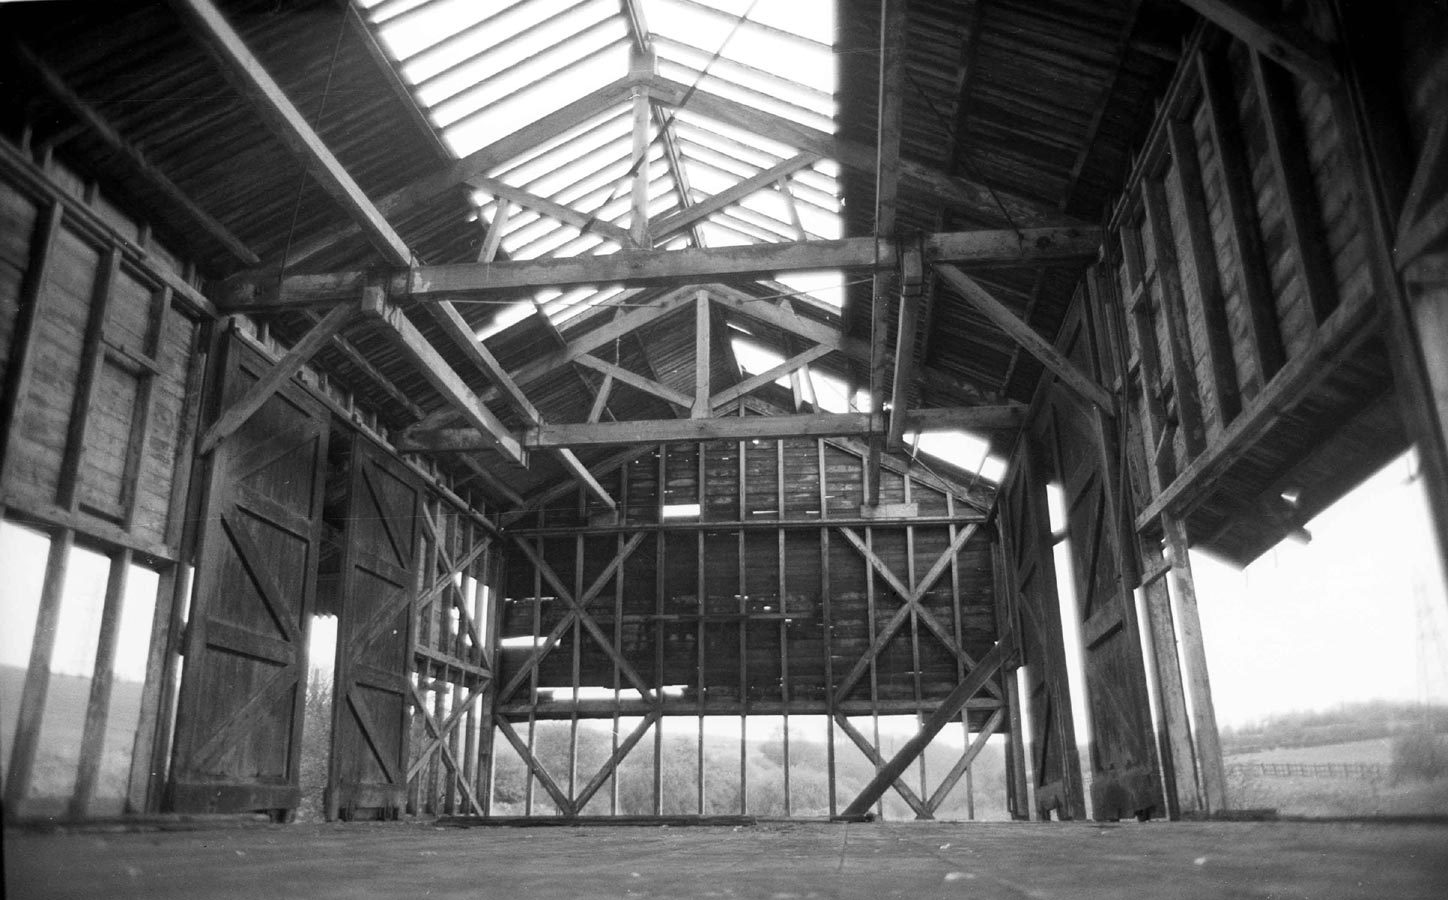
 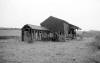 Gildersome
LNWR Goods shed 1970’s : Bob Cockcroft Gildersome
LNWR Goods shed 1970’s : Bob Cockcroft
It’s an attractive
building, simple like a Superquick model; then basically still there,
but only just.
It’s like many LNWR structures built at the turn of
the last century. |
GildersomeGildersome station entrance (13-08-06)
: Andrew Stopford
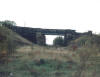
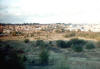
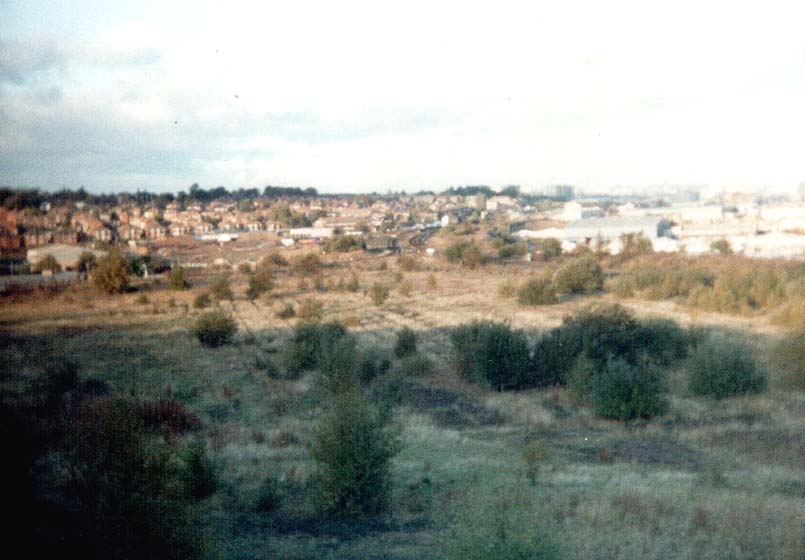
 Shot
of the Leeds New line from a 'filled in' overbridge looking at what was Gildersome Station. I have compared my shot with a picture in
'Railway Memories No. 13 - Huddersfield Dewsbury & Batley' taken from the
same spot in 1962 (page 47 & highly recommended if you don't have it), and
the change is staggering. I find it hard to believe that in only 40 years so
much of this line has disappeared without trace. Shot
of the Leeds New line from a 'filled in' overbridge looking at what was Gildersome Station. I have compared my shot with a picture in
'Railway Memories No. 13 - Huddersfield Dewsbury & Batley' taken from the
same spot in 1962 (page 47 & highly recommended if you don't have it), and
the change is staggering. I find it hard to believe that in only 40 years so
much of this line has disappeared without trace. |
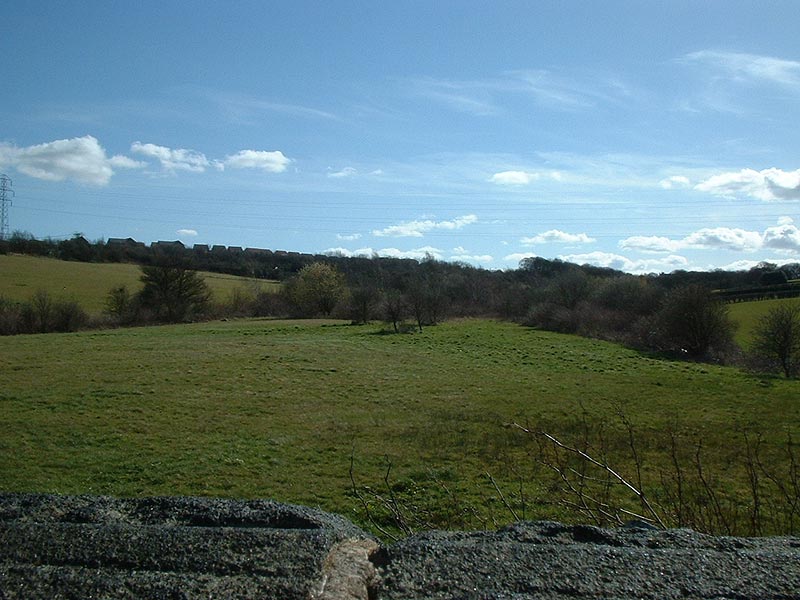
%20(8%20to%2016%2031-05-03)/5%20gildersome%20station%20bridge%20east_small.jpg) Gildersome station bridge facing East
(30-05-03) : David Webdale Gildersome station bridge facing East
(30-05-03) : David Webdale
Nothing much here either, the whole area is turned into farmland. The
station & goods yard were down to the right, with entrances to each
platform from this bridge. The sign in front says no through road, can
they do that? Anyway better go someone's pointing a shot gun at us. |
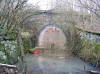
%20(8%20to%2016%2031-05-03)/6%20gelderd%20rd%20footpath%20south_small.jpg) Gelderd road footpath facing South
(30-05-03) : David Webdale Gelderd road footpath facing South
(30-05-03) : David Webdale
Back to the safety of 90 mph traffic on Gelderd road.
This bridge provides a footpath access under the line. It looks like
some of the bridges I've seen around Heckmondwike, stone with a brick
arch. This & the embankment visible from the M621. |
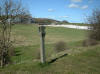 Gradient marker
(04-06)
: Andrew Stopford Gradient marker
(04-06)
: Andrew Stopford
gradient marker on the Leeds New between the Jewish cemetry and the
M621(April 06) |
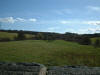
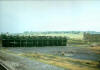
%20(8%20to%2016%2031-05-03)/7%20gelderd%20rd%20embankment_small.jpg) Gelderd Road embankment West (30-05-03)
: David Webdale Gelderd Road embankment West (30-05-03)
: David Webdale
Taken from the brow of the hill next to Gelderd road (on the right of
photo). Looking back towards Gildersome, the railway embankment is
clearly visible, cutting across the middle of the photo. Down in the
bottom there is the Jewish cemetery. The bridge in the previous photo is
just visible, behind the cemetery. |
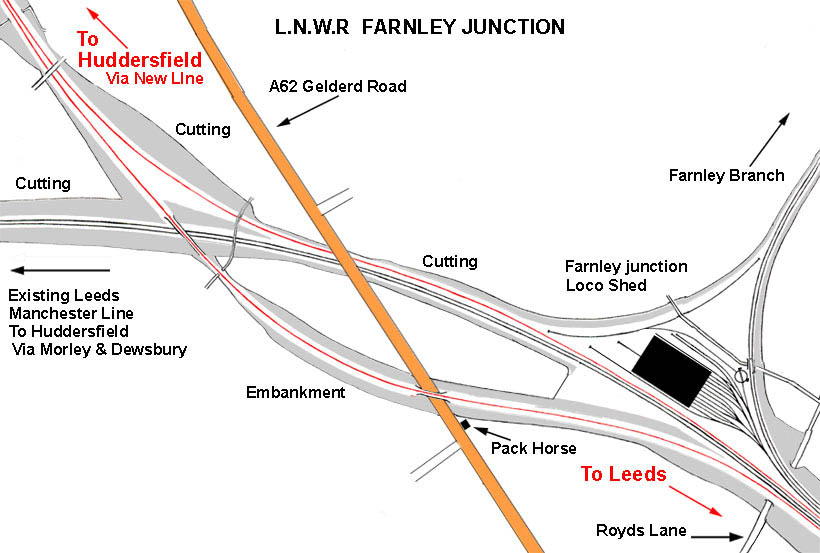
Farnley Flying Junction
Farnley junction
map 1908 : David Webdale
 Here the line split in two. The single track line from Huddersfield to Leeds,
(the down line), dropped down underneath Gelderd road Before joining the
existing Leeds - Huddersfield line. Here the line split in two. The single track line from Huddersfield to Leeds,
(the down line), dropped down underneath Gelderd road Before joining the
existing Leeds - Huddersfield line.
The single track line from Leeds to Huddersfield,
(the up line), was carried on an embankment, where it crossed over the
existing Leeds-Huddersfield line & over Gelderd road (see
photos below)
before
joining the existing Leeds - Huddersfield line.
The total length of the Leeds New Line was approximately 13 7/16
miles.
The down line from Huddersfield to Leeds is about 3/4 of a mile shorter
than the up line to Huddersfield.
From Gildersome the line descends at 1 in 70, with about 200 yards at
1in 52.
The line from Leeds to Huddersfield had a gradient of
1 in 80, due to
its extra length.
Looks like a busy place in its day.
Seven tracks crossing Royds lane on
the approach to Leeds. Routes going off in four directions & a loco
shed. |
/034%20Engine%20Shed%20Farnley%20Branch_small.jpg) Farnley
branch & loco sheds map (1890) : Malcolm Mallison Farnley
branch & loco sheds map (1890) : Malcolm Mallison
6 inch maps from the 1890 survey. |
%20(8%20to%2016%2031-05-03)/8%20gelderd%20rd%20fly%20over%20south_small.jpg) Gelderd
Road flyover facing South (31-05-03) : David Webdale Gelderd
Road flyover facing South (31-05-03) : David Webdale
This is all that's left of the bridge which carried the single up line
to Huddersfield over Gelderd road.
The Pack Horse Inn is behind us. (see
main map & Farnley junction map). |
%20(8%20to%2016%2031-05-03)/9%20gelderd%20rd%20bridge_small.jpg) Gelderd road bridge facing South (31-05-03)
: David Webdale Gelderd road bridge facing South (31-05-03)
: David Webdale
Taken from the track bed on the down line to Leeds, facing in
Huddersfield direction.
The line from Leeds to Huddersfield via Dewsbury
is on the left.
Part of a grey steel girder bridge where the line came
under Gelderd road is just visible behind the trees. |
%20(8%20to%2016%2031-05-03)/11%20farnley%20branch%20footbridge_small.jpg) Farnley
sidings. access road bridge facing North (31-05-03) : David
Webdale Farnley
sidings. access road bridge facing North (31-05-03) : David
Webdale
This bridge carried an access road over a long curved siding on the top
side of the loco shed (see Farnley flying junction map).
The loco shed was to the right of this bridge. |
 The
Leeds New Line part 9: Darren Hosker c/o Paul Holroyd The
Leeds New Line part 9: Darren Hosker c/o Paul Holroyd
Youtube from Darren Hosker
https://www.youtube.com/watch?v=Gts6-AVhCRE |
 Farnley sidings. access road bridge
facing North (1979) : Dave Walbank Farnley sidings. access road bridge
facing North (1979) : Dave Walbank
Same
bridge in 1979, I remember standing on that as a kid. |
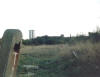 Farnley Junction Entrance (1979)
: Dave Walbank Farnley Junction Entrance (1979)
: Dave Walbank
This gate led onto the path over the bridge in previous photo. Path
provided access to the sheds. |
%20(8%20to%2016%2031-05-03)/13%20farnley%20junction%20south_small.jpg) Farnley junction facing South
SE272314 (31-05-03)
: David Webdale Farnley junction facing South
SE272314 (31-05-03)
: David Webdale
Taken from above Royds lane, facing back towards Huddersfield, next to
the existing Leeds Huddersfield line via Dewsbury.
The Farnley branch
track bed is clearly visible on the right.
The junction of the single
track up line to Huddersfield was across the other side I could find no
evidence. |
 Farnley
Loco sheds Farnley
Loco sheds
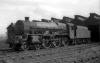
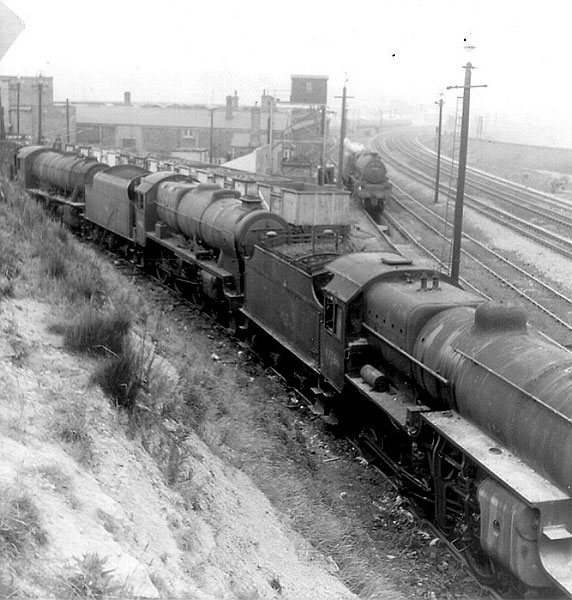
Farnley Loco sheds (n.d) : Dave Walbank |
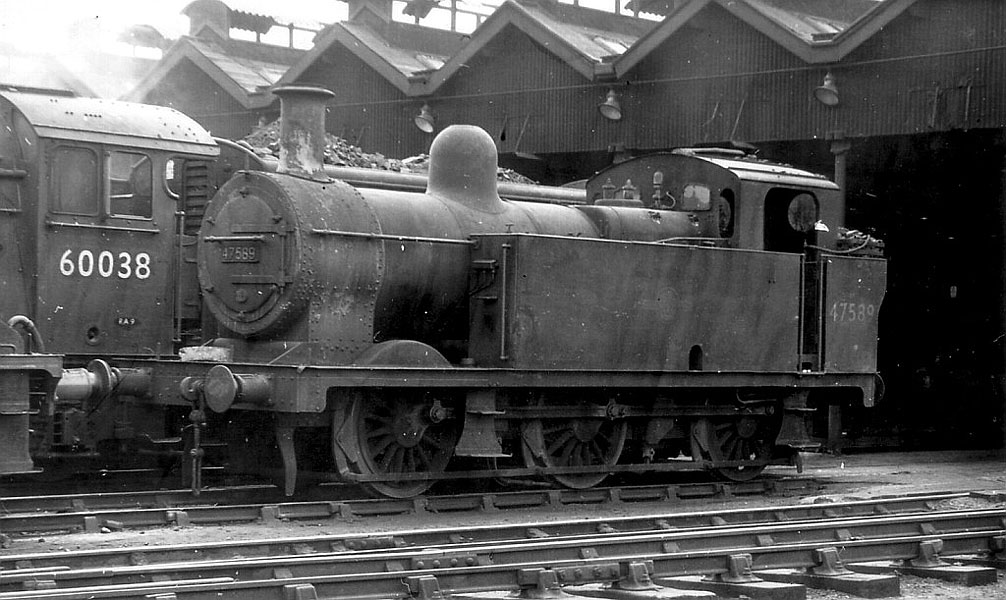
 Farnley
Loco sheds (n.d) : Dave Walbank Farnley
Loco sheds (n.d) : Dave Walbank
47589 at Farnley. |
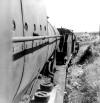
 Farnley
Loco sheds (n.d) : Dave Walbank Farnley
Loco sheds (n.d) : Dave Walbank
Engines in storage at Farnley. |
 Farnley
Loco sheds (n.d) : Dave Walbank Farnley
Loco sheds (n.d) : Dave Walbank
Engines in storage at Farnley. |
 Farnley
Loco sheds Facing East : Dave Walbank Farnley
Loco sheds Facing East : Dave Walbank
Taken from behind the shed in 1979. The track
beds leading into the shed are clearly visible.
The existing Leeds to
Huddersfield via Dewsbury line is on the right.
The Farnley branch
curves around to the left of photo. |
 Farnley
Loco sheds Facing west : Dave Walbank Farnley
Loco sheds Facing west : Dave Walbank
Taken from a moving train on the Leeds Huddersfield via Dewsbury line,
shortly before the sheds were demolished.
Tracks are gone & the building on the right is the railway house where
engine crews used to stay over night.
I used to see it full of steam engines you could see it a good half mile
away from the road as we walked up from Leeds. |
%20(8%20to%2016%2031-05-03)/15%20royds%20lane%20west%20side_small.jpg) Royds lane West side (31-05-03)
: David Webdale Royds lane West side (31-05-03)
: David Webdale
Although this bridge over Royds lane is still in use, I thought I'd take
a picture anyway.
Up on top there were the Leeds new line & the Farnley
branch junctions, with the existing Leeds-Huddersfield line.
Although this
bridge is still in use it looks more knackered than the disused ones. |
%20(8%20to%2016%2031-05-03)/16%20royds%20lane%20east%20side_small.jpg) Royds lane East side (31-05-03)
: David Webdale Royds lane East side (31-05-03)
: David Webdale
Out of the other side of the bridge, this road takes us
behind the Pack Horse Inn & towards Gelderd road.
I could not find any
evidence of the up line flyover. All this area has been re-developed
into industrial estates. |
L.N.W.R Farnley
Branch |
%20(8%20to%2016%2031-05-03)/14%20farnley%20branch%20from%20leeds%20bridge%20south_small.jpg) Farnley branch facing South (31-05-03)
: David Webdale Farnley branch facing South (31-05-03)
: David Webdale
Following the access road down past the loco shed towards where it joins
Royds lane,
we came across the remnants of a bridge which once carried
the Farnley branch line.
A turn table was just to the left, on the other
side of the bridge.
See Farnley junction map |
 Farnley
Branch embankment (29-06-05) : Rikj
website -
http://www.darkplaces.co.uk/
http://www.flickr.com/photos/rikj/ Farnley
Branch embankment (29-06-05) : Rikj
website -
http://www.darkplaces.co.uk/
http://www.flickr.com/photos/rikj/
The branch line runs from SE272314 (Farnley Junction)
to the D&R steel stockholding works on
Whitehall Road. |
 Farnley
Branch Dunlop & Ranken sidings (17-06-83) : Paul Corrie Farnley
Branch Dunlop & Ranken sidings (17-06-83) : Paul Corrie
31162 on the trip from Stourton Goods backing RSJ"s into
the unloading bay at Dunlop"s. |


%20(8%20to%2016%2031-05-03)/5%20gildersome%20station%20bridge%20east.jpg)
%20(8%20to%2016%2031-05-03)/6%20gelderd%20rd%20footpath%20south.jpg)

%20(8%20to%2016%2031-05-03)/7%20gelderd%20rd%20embankment.jpg)
/034%20Engine%20Shed%20Farnley%20Branch.jpg)
%20(8%20to%2016%2031-05-03)/8%20gelderd%20rd%20fly%20over%20south.jpg)
%20(8%20to%2016%2031-05-03)/9%20gelderd%20rd%20bridge.jpg)
%20(8%20to%2016%2031-05-03)/11%20farnley%20branch%20footbridge.jpg)


%20(8%20to%2016%2031-05-03)/13%20farnley%20junction%20south.jpg)


%20(8%20to%2016%2031-05-03)/15%20royds%20lane%20west%20side.jpg)
%20(8%20to%2016%2031-05-03)/16%20royds%20lane%20east%20side.jpg)
%20(8%20to%2016%2031-05-03)/14%20farnley%20branch%20from%20leeds%20bridge%20south.jpg)

